Initial setup
Set up and use the Bambuser player
Let's start with adding the player to your website.
To do that, you will need to have a code snippet added to your landing page. That code snippet is available to you inside the dashboard on the show setup page.
With that snippet, we load the Bambuser Live Shopping player embed script and register a click event listener for the specified Call To Action (CTA) element. The trigger element will then start an overlay iframe of the player.
Embed the player
1. Set up your show
Log in to the dashboard
Use your credentials to log in to the Bambuser dashboard.
If your account is within EU servers, log in through Bambuser EU dashboard.
Create a show / Open an existing show
To create a new show, click the "Create test show" or "Create show" button on the top right corner.
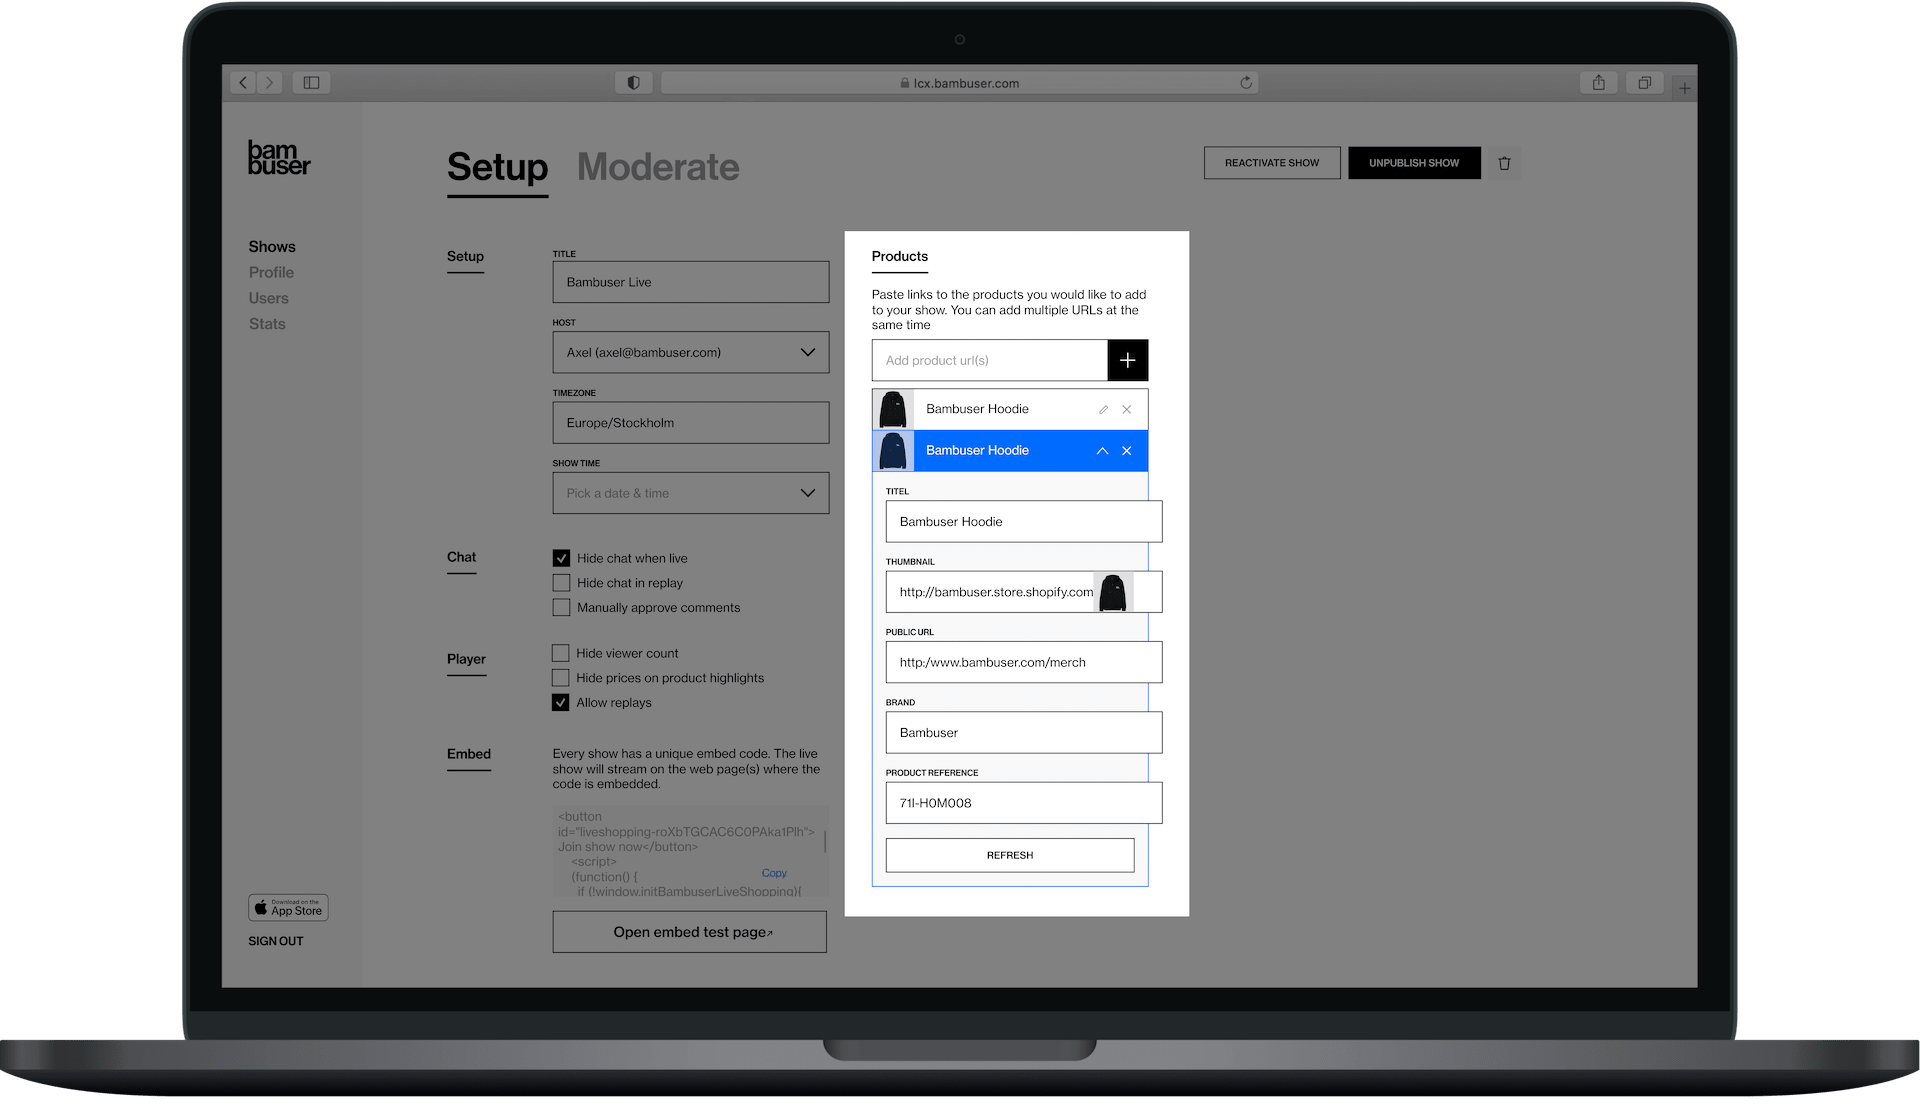
Add products (optional)
To add products to your show, navigate to your show on the Live Shopping dashboard. On the right side, you can see the show's product section. Add your products by entering the URL(s) to your PDP (Product Display Page). You can add multiple products by entering space-separated or comma-separated URLs.
When you add a product to a show in the Bambuser Dashboard, some basic product details are loaded from the given product's PDP. These can only be populated correctly when your PDP structured data is in the format our scraper expects.
- A thumbnail image URL
- A product name or title
- A brand name
- A reference value (often the SKU, or if it does not exist, the product URL)
Product data is collected using the following standards:
- Schema.org/Product
- og: meta tags
If none of the above is present on your product pages, you may can still manually update product info.
Learn more about scraping here: Bambuser Live Shopping Product Data Scraping
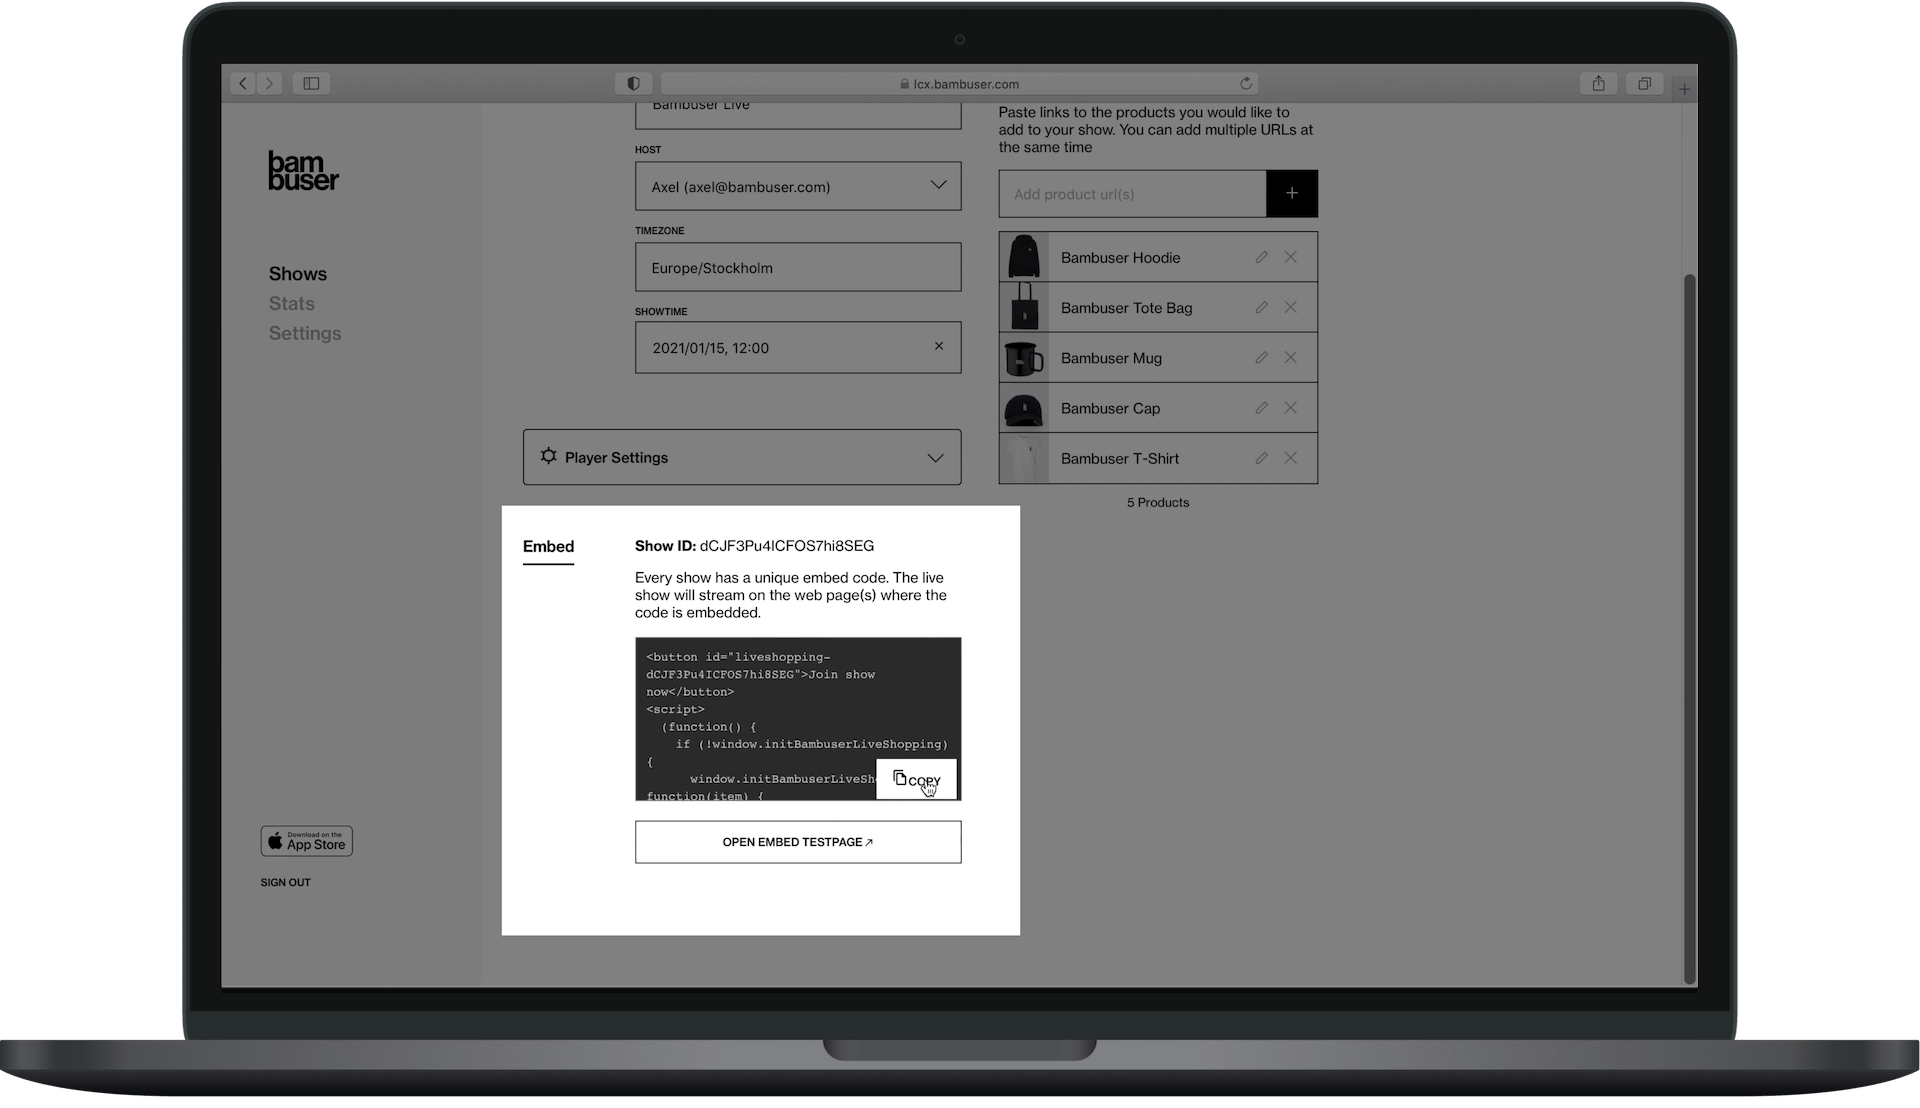
2. Embed the code snippet
Copy the embed code snippet
On your show page, press the Copy button in the Embed part of the show's Setup page. This copies the embed code, which can then be inserted on any page where you want to show the player.
Add the code snippet to your landing page
Add a code snippet to your landing page. This can be done by adding it to your page through the source code, CMS editor, or tag managers such as GTM.
Example: Default embed code
<button id="YOUR_ELEMENT_ID_HERE">Join show now</button>
<script>
  (function() {
    if (!window.initBambuserLiveShopping) {

      window.initBambuserLiveShopping = function(item) { window.initBambuserLiveShopping.queue.push(item) };

      window.initBambuserLiveShopping.queue = [];
      var scriptNode = document.createElement('script');
      scriptNode['src'] = 'https://lcx-embed.bambuser.com/your-brand/embed.js';
      document.body.appendChild(scriptNode);
    }

    window.initBambuserLiveShopping({
      showId: 'SHOW_ID_HERE',
      node: document.getElementById('YOUR_ELEMENT_ID_HERE'),
      type: 'overlay',
    });
  })();
</script>
THAT'S IT! YOU'RE READY TO BROADCAST YOUR FIRST SHOW! 🥳🥳🥳
When a user visits your site he/she will now see a button saying Join show now. Pressing the button will open the player and start the show! Simple as that.
Do you want something a little more exciting than a simple button? You can have any custom HTML element as the CTA (call to action) to trigger the player. Read on how to customize your trigger element below.
Find the correct embed code for your brand on the "Show setup" page on the dashboard.
3. Customize the trigger element
The embed code includes a simple button that starts the player when clicked. But very often you may like to have a custom element instead in order to triggers the player.
In the embed snippet, you will find a function call as below:
window.initBambuserLiveShopping({
  showId: 'BAMBUSER_LIVESHOPPING_SHOW_ID_HERE',
  node: document.getElementById('YOUR_ELEMENT_ID_HERE'),
  type: 'overlay',
});
By simply changing value of the node property in the passed argument, you can target your own custom element to start the player.
Customizable properties:
| Property | Description | Type |
|---|---|---|
| showId | Each show has a unique ID that is included in the code snippet on your show page in Bambuser Dashboard. In some cases, you may want to assign this property dynamically. | String |
| node | An element that opens the player on click event. Note: Removing node property will trigger the player on page load. | DOM Element |
| playerContainerNode | (Optional) Specifies the container of the Bambuser live shopping player. If not specified it will be placed in <body>. | DOM Element |
Example: Customized trigger element
// Your very cool interactive element here provided with a id attribute
<div id="myCoolClickableThing">Click me!</div>

// The bambuser embed script stripped of the "button" element
// and with a node pointing at your element "myCoolClickableThing"
<script>
  (function() {
    if (!window.initBambuserLiveShopping) {

      window.initBambuserLiveShopping = function(item) { window.initBambuserLiveShopping.queue.push(item) };

      window.initBambuserLiveShopping.queue = [];
      var scriptNode = document.createElement('script');
      scriptNode['src'] = 'https://lcx-embed.bambuser.com/your-brand/embed.js';
      document.body.appendChild(scriptNode);
    }

    window.initBambuserLiveShopping({
      showId: 'BAMBUSER-LIVESHOPPING-SHOW-ID-HERE',
      node: document.getElementById('myCoolClickableThing'),
      type: 'overlay',
    });
  })();
</script>
Extra customizations
Embedding multiple shows on one page
Use the following syntax if you want to have more than one show embedded on your landing page.
// Your very cool interactive element here provided with a id attribute
<div id="myCoolClickableThing-1">Click me!</div>

<div id="myCoolClickableThing-2">Click me!</div>

// The bambuser embed script stripped of the "button" element
// and with a node pointing at your element "myCoolClickableThing"
<script>
  (function() {
    if (!window.initBambuserLiveShopping) {
      window.initBambuserLiveShopping = function(item) { window.initBambuserLiveShopping.queue.push(item) };
      window.initBambuserLiveShopping.queue = [];
      var scriptNode = document.createElement('script');
      scriptNode['src'] = 'https://lcx-embed.bambuser.com/embed.js';
      document.body.appendChild(scriptNode);
    }

    // We can embed multiple shows in a single page as below
    // node: The trigger element for opening the reletive show
    window.initBambuserLiveShopping({
    showId: 'BAMBUSER-LIVESHOPPING-SHOW-ID-HERE',
      node: document.getElementById('myCoolClickableThing-1'),
      type: 'overlay',
    });

    window.initBambuserLiveShopping({
      showId: 'BAMBUSER-LIVESHOPPING-SHOW-ID-HERE',
      node: document.getElementById('myCoolClickableThing-2'),
      type: 'overlay',
    });
  })();
</script>
Autoplay
Instead of the customer manually starting the show, the player can be configured to automatically start when they land on your page. This can be configured in two ways.
1. Query parameter
Append the query parameter to the URL where you have your player embedded. If that show is already embedded on your page, the player will automatically be triggered on page load.
?autoplayLiveShopping=SHOWID
2. Custom initialization
Omitting the node property from the object passed to the initBambuserLiveShopping method will trigger the initialized show immediately.
<script>
  (function() {
    if (!window.initBambuserLiveShopping) {

      window.initBambuserLiveShopping = function(item) { window.initBambuserLiveShopping.queue.push(item) };

      window.initBambuserLiveShopping.queue = [];
      var scriptNode = document.createElement('script');
      scriptNode['src'] = 'https://lcx-embed.bambuser.com/your-brand/embed.js';
      document.body.appendChild(scriptNode);
    }

    window.initBambuserLiveShopping({
      showId: 'BAMBUSER-LIVESHOPPING-SHOW-ID-HERE',
      /* n̶o̶d̶e̶:̶ ̶d̶o̶c̶u̶m̶e̶n̶t̶.̶g̶e̶t̶E̶l̶e̶m̶e̶n̶t̶B̶y̶I̶d̶ '̶m̶y̶C̶o̶o̶l̶C̶l̶i̶c̶k̶a̶b̶l̶e̶T̶h̶i̶n̶g̶'̶)̶,̶ */
      type: 'overlay',
    });
  })();
</script>
Player JavaScript API
Apart from embedding the player and your shows, in most cases, you also need to configure the player, or/and handle different player events.
When triggering the player for the first time in a browser session, it look for the window.onBambuserLiveShoppingReady method. That is used for initializing custom behavior that is implemented using the player JavaScript API. The player that is passed as the argument and includes several constants and methods to control the player behavior.
It is a good practice implement the window.onBambuserLiveShoppingReady method before the embed code.
Example:
<button id="YOUR_ELEMENT_ID_HERE">Join show now</button>
<script>
  window.onBambuserLiveShoppingReady = function (player){
    // Use 'player' JavaScript API methods here
  };

  (function() {
    if (!window.initBambuserLiveShopping) {

      window.initBambuserLiveShopping = function(item) { window.initBambuserLiveShopping.queue.push(item) };

      window.initBambuserLiveShopping.queue = [];
      var scriptNode = document.createElement('script');
      scriptNode['src'] = 'https://lcx-embed.bambuser.com/your-brand/embed.js';
      document.body.appendChild(scriptNode);
    }

    window.initBambuserLiveShopping({
      showId: 'SHOW_ID_HERE',
      node: document.getElementById('YOUR_ELEMENT_ID_HERE'),
      type: 'overlay',
    });
  })();
</script>
To learn more about Player JavaScript API methods and configuration options, see the Player API reference doc.
Appearance
If you wish to customize the appearance of your player (colors, fonts, icons, etc.), reach out to your contact person at Bambuser or support@bambuser.com.
Initial setup FAQ
You can have as many shows on your website as you would like. Each show will have its own ID (found in the dashboard) and you can link it to its own CTA. How to do that, you can find it here.
You can inject a JavaScript code including the embed code via any tag management solutions such as Google Tag Manager (GTM), Adobe Analytics, Tealium, etc.