⚠️ Sunset Notice: This service will be discontinued as of September 30th, 2023. Learn more »
Did you come here for Live Video Shopping?
This is documentation for Bambuser Live Streaming SDK.
If you're looking for documentation regarding Live Video Shopping (opens new window) , see these pages (opens new window)
How to live-stream from a DJI Phantom, Mavic or Inspire drone
Please note
Not all countries and regions regulate drones in the same manner. Always educate yourself on the current laws and regulations of the country, state province or municipality you are flying in.
Always fly safely!
Aerial Photography challenges
Remote-controlled aerial photography poses quite a few challenges. With regards to technical capabilities, you will need following:
A stable and reliable aerial platform capable of carrying the weight of the camera.
A good camera system. For cinematic shots, it should have decent optics and be individually stabilized with a motorized 3-axis gimbal.
A robust radio link to the operator on the ground. Preferably also a video link for real-time monitoring.
An efficient motor/propeller combination which should result in longer flight time.
Preferably some autonomy, such as return-to-home function, in case the radio link is interrupted. More creative aspects such as Follow me and Virtual dolly have been popular for a while. Lately, Visual obstacle avoidance is also being introduced.
When you have a platform that fulfills all or at least some of these criteria, the most common workflow is to record HD video and photos to an onboard SD card for later use.
Adding live streaming
To add live streaming, you could consider mounting a 4G/LTE device directly to the aircraft and broadcast directly to any nearby cell tower.
If there were fully autonomous drones that were legal to operate without a human on the ground, it would perhaps be the way to go for ultimate reach.
However, in most practical scenarios we have an operator on the ground within line of sight of the drone. To be able to compose stunning shots, a video link to the ground is often desired and nowadays several of the available options are digital and of fairly high definition. This makes the spot of the ground operator a good place to pick up a video signal for broadcasting.
Case study: DJI Phantom
DJI is a market leader in off-the-shelf multi rotors, who tends to consistently get good marks on all of the points above and is an option to consider when you need something that works out-of-the-box.
DJI is probably not the only brand supporting live streaming to Bambuser, but the key to simple live streaming from drones is to look for built-in RTMP forwarding capability, which DJI offers.
This guide will focus on how to broadcast using the RTMP protocol from a DJI Phantom 3 Professional and should also be applicable to later Phantoms as well as DJI Mavic and the DJI Inspire series.
DJI’s handheld remote control includes an HD video receiver.
HDMI output exists as an optional extra, this is a viable way to live stream if you involve additional pro gear, which is not always desirable in the field. However most of the time the operator also attaches their phone or tablet to the remote control via a USB cable, to act as a display for the live feed and telemetry via the DJI GO app.
Conveniently, this app also has support for forwarding to various online services, including Bambuser.
Info
Some of the earlier generation drones required Wi-Fi to transmit video to the phone/tablet and might have had trouble supporting this workflow. However thanks to the fact that current products tend to use USB tethering, the normal Wi-Fi/4G network stack in the phone/tablet is unoccupied and can be used for internet connectivity.
Configuring live streaming in DJI GO
- Start up the drone and the controller
Keep the propellers off for safety, unless you are in the field and intend to fly!
Attach your iOS or Android device via USB to the controller and launch the DJI GO app
Enter into the Camera mode
Open Settings (marked ...) and in General settings, scroll down to Select Live Broadcast Platform
Choose RTMP: Custom
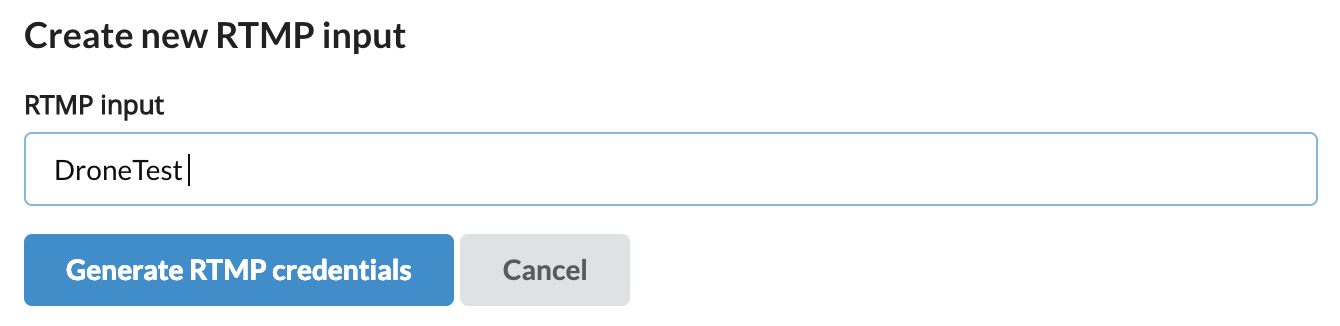
In the Create Custom Live Broadcast dialog, enter as RTMP URL, an RTMP Input created in the Bambuser Content Manager (opens new window)

- In the DJI GO app, concatenate
urlandkeyvalues, separated by a forward slash/.
Example
The following example values from the Bambuser Dashboard:
URL: rtmp://3fc7ccef.fme.bambuser.com/b-fme
key: f11a03d04dce3233f91b3742a0112f03195e937a
produces this value for the DJI GO app:
rtmp://3fc7ccef.fme.bambuser.com/b-fme/f11a03d04dce3233f91b3742a0112f03195e937a
- Tap next followed by start
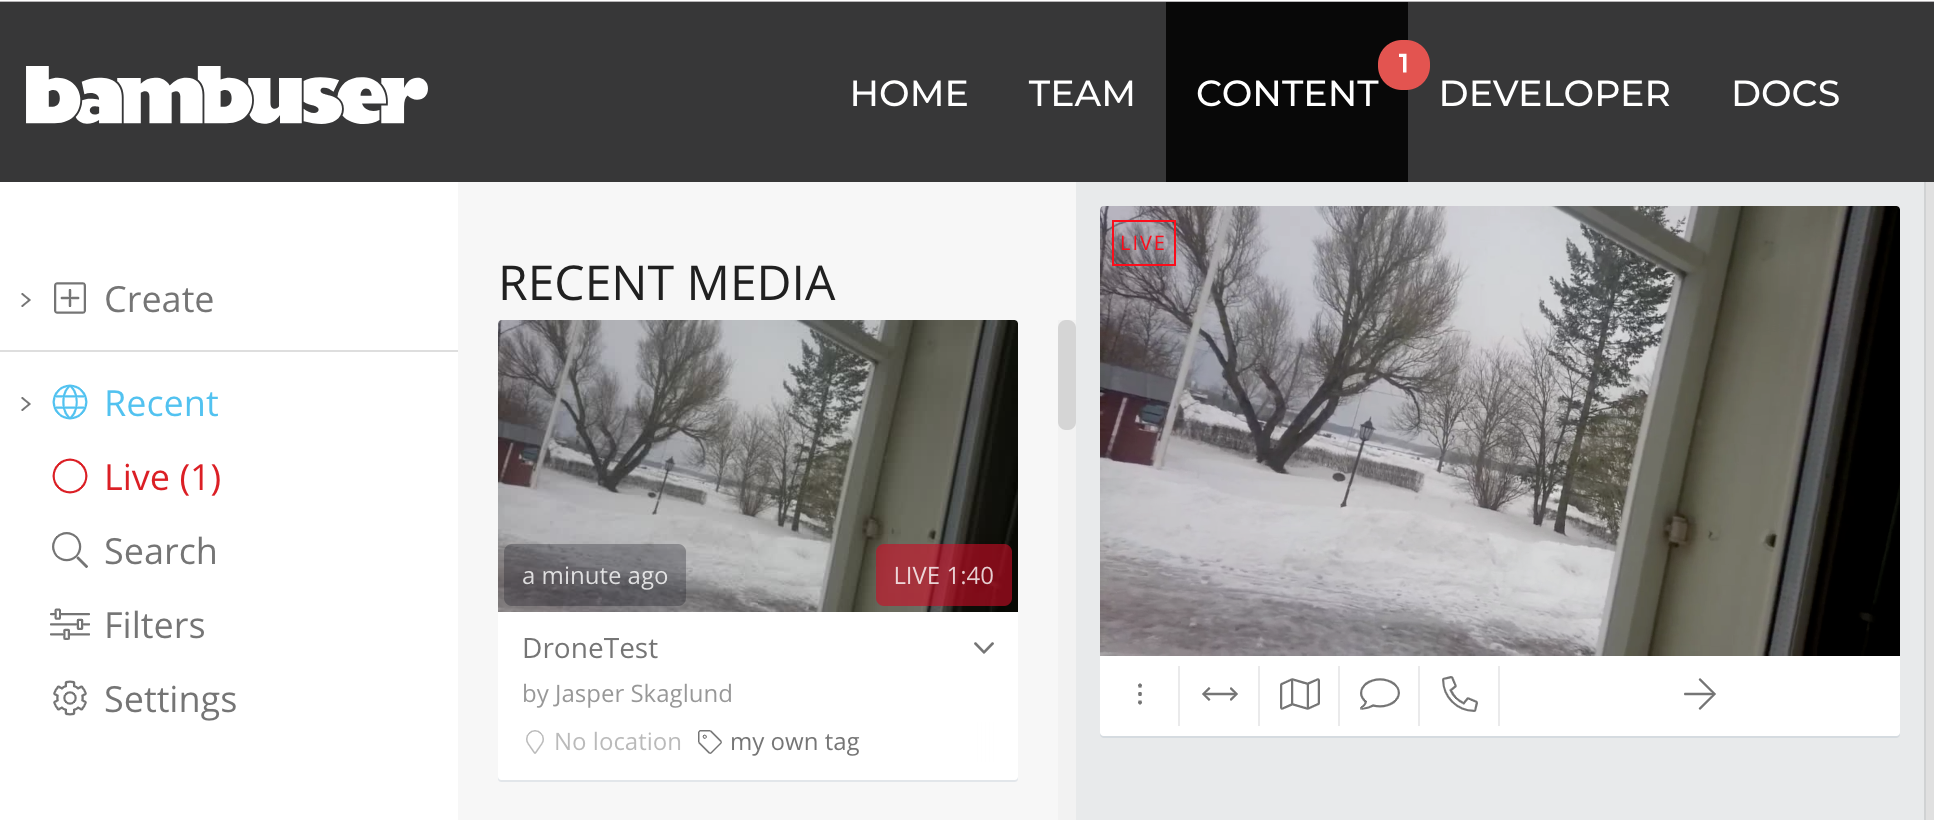
The app counts down from 3 and the live stream starts. A live streaming indicator appears in the top left corner and allows you to start and stop live streaming independently of other Drone operations (such as the photo controls on the right hand side, which affects the recording to the onboard SD card).
Your live stream now appears in your Bambuser Content Manager (opens new window) and can be incorporated in your real time video workflows just like other content you ingest to Bambuser.
You can now ensure the RTH point has been set, take off and have your flight live streamed to the world. Once set up, the live streaming can be started and stopped while in the air, should you desire not to include the takeoff and landing in the broadcast.
After landing the aircraft and moving the onboard SD card to your computer, you could upload any full 4K quality recordings and photos you produced during the flight to Bambuser, should you so desire. Look for the upload form in Bambuser.