
How to use the Bambuser Content Manager?
The Content Manager is the online platform where you manage, preview and publish your team’s video and image content.
Manage
Create
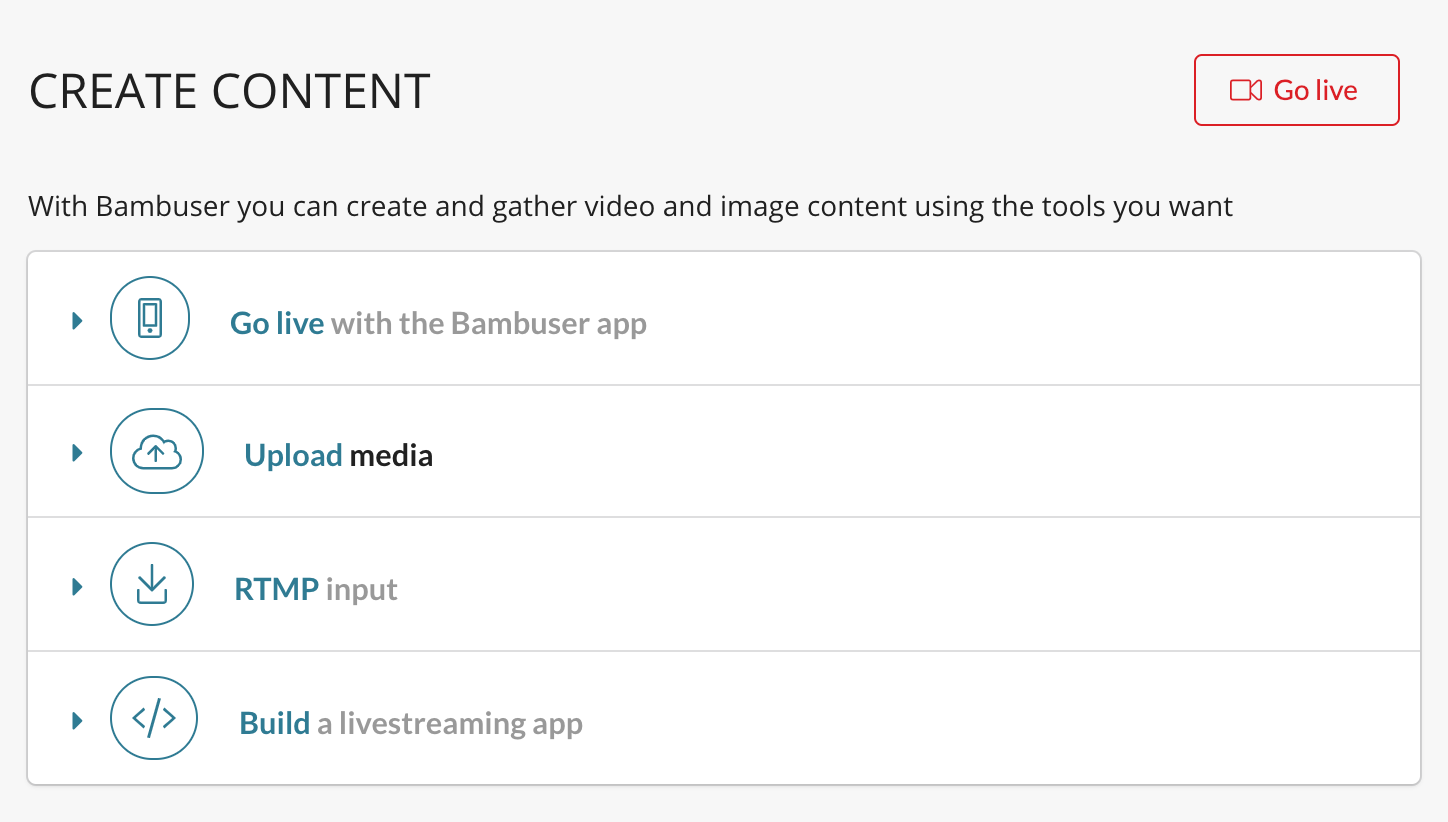
We want you to be creative and able to gather all content in one place, hence we provide several ways to produce videos and images. Go live in an instant with our web broadcaster or Bambuser app. Upload previously recorded videos and images simply by dragging and dropping. Use your favourite RTMP application or product to ingest videos using RTMP. Or why not from you own broadcasting app which you can build using our SDK?
Bambuser Broadcaster app
You can download the Bambuser Broadcaster app for iOS and Android and start streaming right away.
Webcam
Open the web broadcaster by clicking the “Go live” button in the “Create Content” section or the “Webcam” option in the “Create” dropdown menu. Click the red button in the broadcaster and you are live!
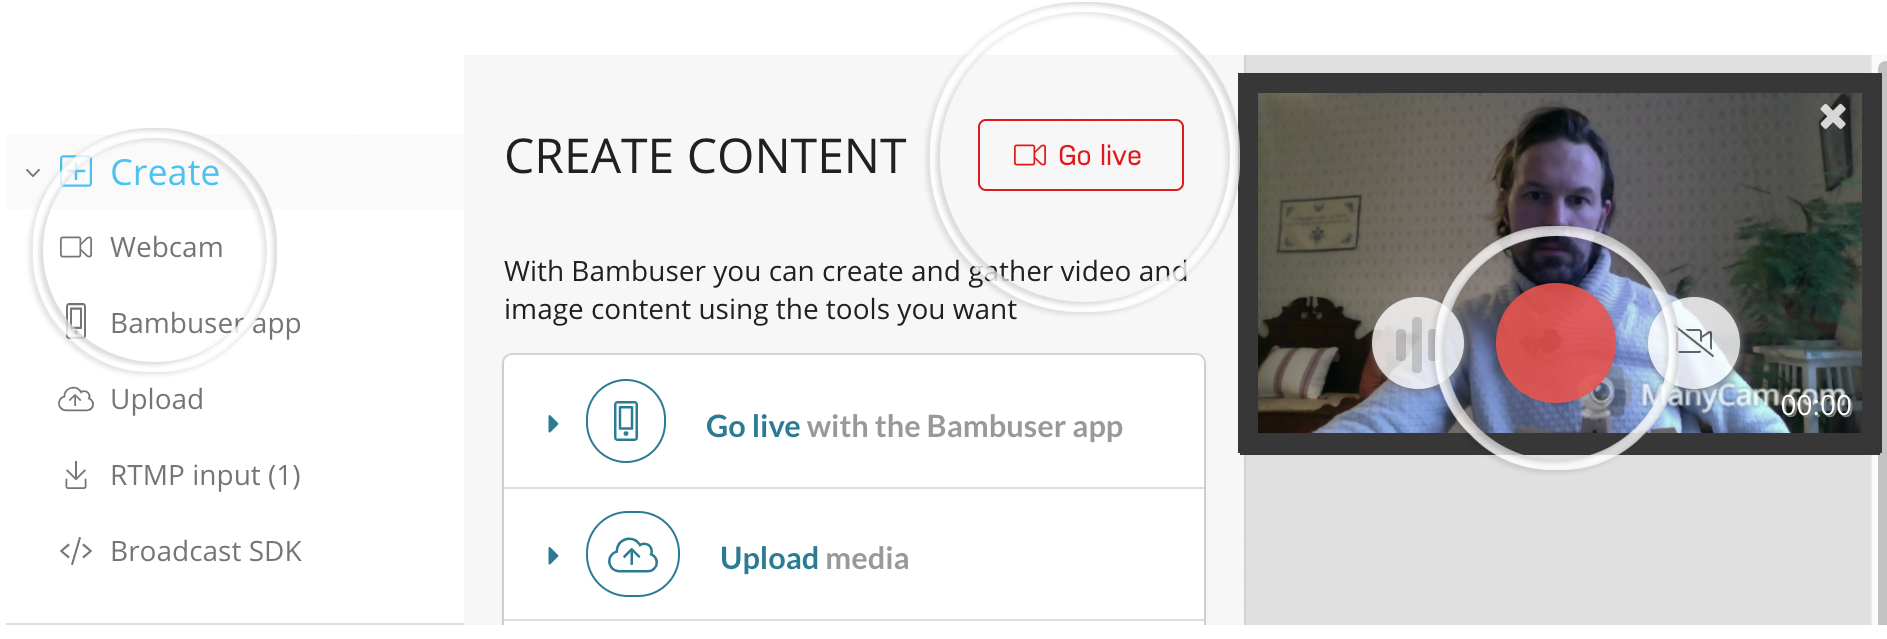
Shows the key points to start a webcam broadcast.
Upload
To upload your pre-recorded videos and images you may drag and drop them to the upload area in the “Create Content” section. It is also possible to select your files using a file dialogue opened by clicking “Browse” in the upload area or “Upload” in the “Create” dropdown menu.
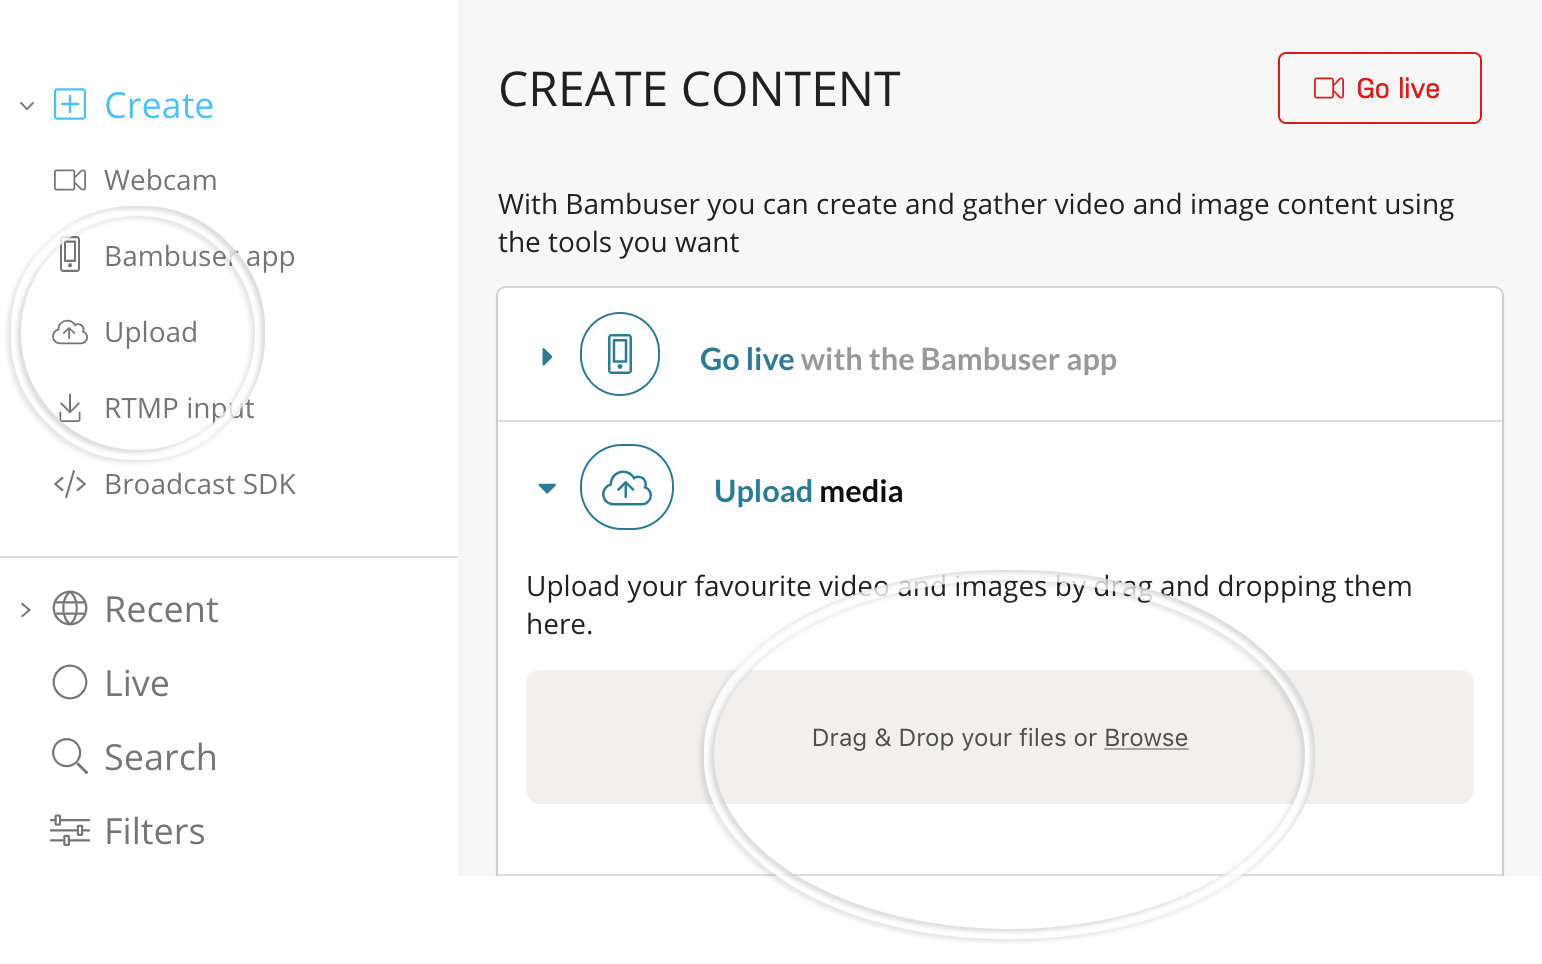
Shows key points for file uploads
RTMP input
By using RTMP input you may easily gather video from your favourite third party software or device. RTMP input configuration has moved from the Content page to the Developer page. See how to create a Bambuser RTMP application id and use it to configure a stream output in your RTMP software or device.
Your own app
Content produced with apps built using the Broadcaster SDK end up in the Content Manager. Download the SDK and start building!
Settings
You may set some personal Content Manager settings by clicking “Settings” placed as the last option in the left column. The settings are saved to your local browser so the they will not follow with you when switching browser.
Previews
Live thumbnails – Shows a moving picture (MJPEG) for incoming live videos for quicker monitoring. The feature has limited browser support.
Mute preview players – Mute opened preview players by default. Reduces noice levels in workflows where previewing multiple videos simultaneously is a must.
Notifications
A good way making sure not to miss any incoming important material in the Content Manager is to enable notification services.
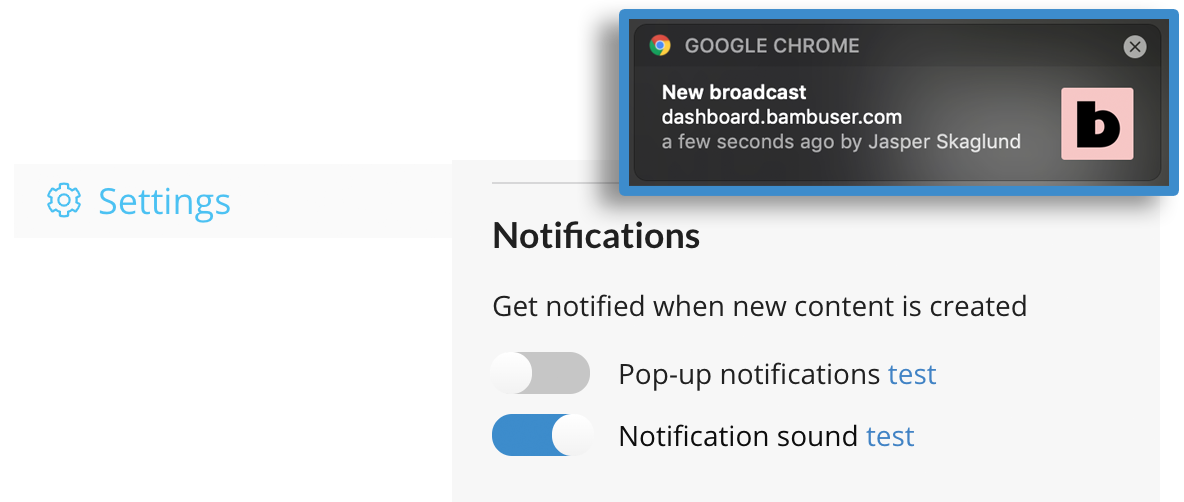
Pop-up notification – Shows a notification when a new live broadcast is reported.
Notification sound – Plays a bell sound when a new live broadcast is reported.
Preview
When clicking on a video thumbnail, the video will start playing in the “Preview” pane and photos will be displayed in a modal. While the video is live the operator of the Content Manager will be able to interact with the contributor via audio talkback or text messages.
Videos
When clicking on a video thumbnail, it will start playing in the middle Preview pane. It is possible to place multiple videos for previewing at the same time. Underneath the player is an action bar which allows you to do the following:
- The “three dots“ icon opens a menu where you can tag, download, delete, trim and access broadcast details. The three dots icon is accessible both in the left pane and the middle preview pane.
- Add tag to the video making it easier to sort and find in your archive
- Broadcast details shows some video meta data. The information displayed could be useful for verification purpose; title, author, location, length of the video, resolution, date/time and broadcast device & name.
- Copy link to external player saves a shareable link to your clipboard
- Edit segments, opens a modal with a video editor enabling you to time tag certain parts of a video and even downloading the produced segments
- Download content in original format or MP4
- Delete broadcast permanently removes it from the servers
- The “two way arrow” opens a Quick save version of the Edit segments tool allowing you to add new segments
- The “map” icon toggles a map displaying where the video was recorded
- The “chat” icon toggles the chat
- The ‘phone” icon toggles the talkback component
- The “arrow” icon lets you place a video in any chosen publishing output.
Segment tool
The segment tool allows you to mark out highlights, or segments, from live or archived broadcasts. The segments are saved as time tags which are displayed on the timeline in the player. The segments may be extracted and saved as new video clips at any time. The complete segment tool can be found by clicking the “three dot” icon displayed while hovering a video thumbnail, and in the action bar underneath the preview player. To access a Quick save version click the “two way arrow” icon in the preview player action bar or the “New segment” button visible when previewing a video in fullscreen.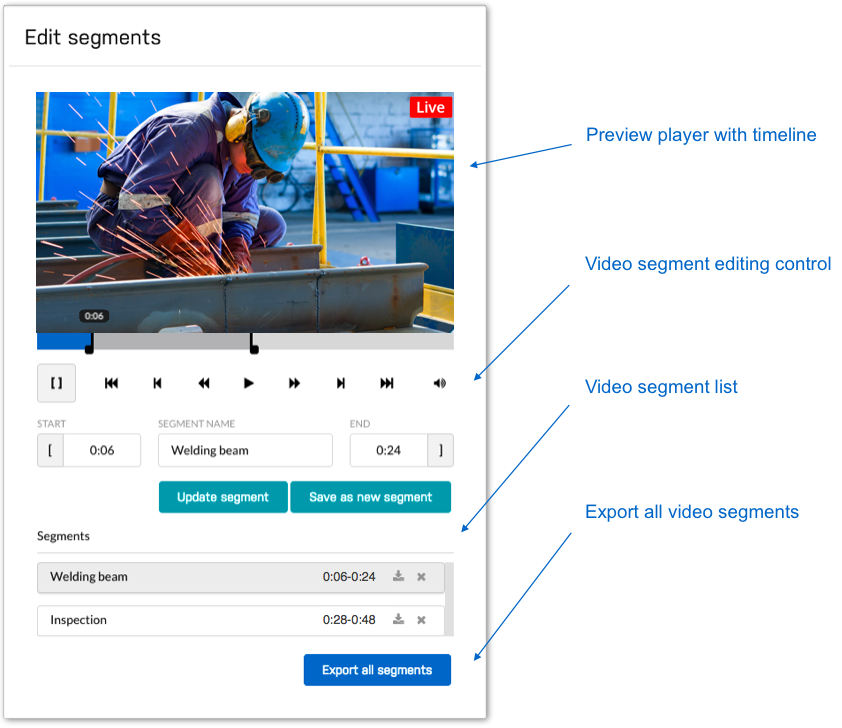
Preview player
Plays the video and displays a timeline with additional start and end markers for the currently selected time range.
Video segment editing control
This section provides play, rewind and forward controls for the video. The rewind and forward buttons allows you to either jump to the start or end of the video, jump to the start or end of the highlighted segment or jump 15 second forward or backward. Or just click somewhere on the timeline to mark your required position.
To create a new segment, choose a specific time range, type the name of the segment and click “Save segment” and it will be placed at the bottom in the “Segment list”.
To edit the start and end points and/or name of segments from the segment list, firstly highlight the segment followed by the Start/End buttons next to the fields that display the time when you are at the right position in the video. Or manually type time positions in the time fields.
Video segment list
This section lists all the segments that have been created from the video with respective titles as well as start and end points. Click on a segment either to edit or create a new one from it. When you have finished editing the segment, you can choose to download the selected one, or just click “Export all segments” to download all clips in the list.
Export video segments
The exported segments will be saved as individual files in .mp4 format with descriptive file names.
Note that the start and end points for the segments are not precise. To ensure you have included everything you need in a segment, you might want to add a 2-3 second margin at the start and end positions.
Interact
You can interact with the user streaming live with the Bambuser app. It is possible to send text messages via a chat and make voice calls using talkback.
Chat
Open the chat by clicking the “chat” icon. Type in the field where it says “Type a message” and hit enter, or press send. The app user will receive the message in the Bambuser broadcast app interface.
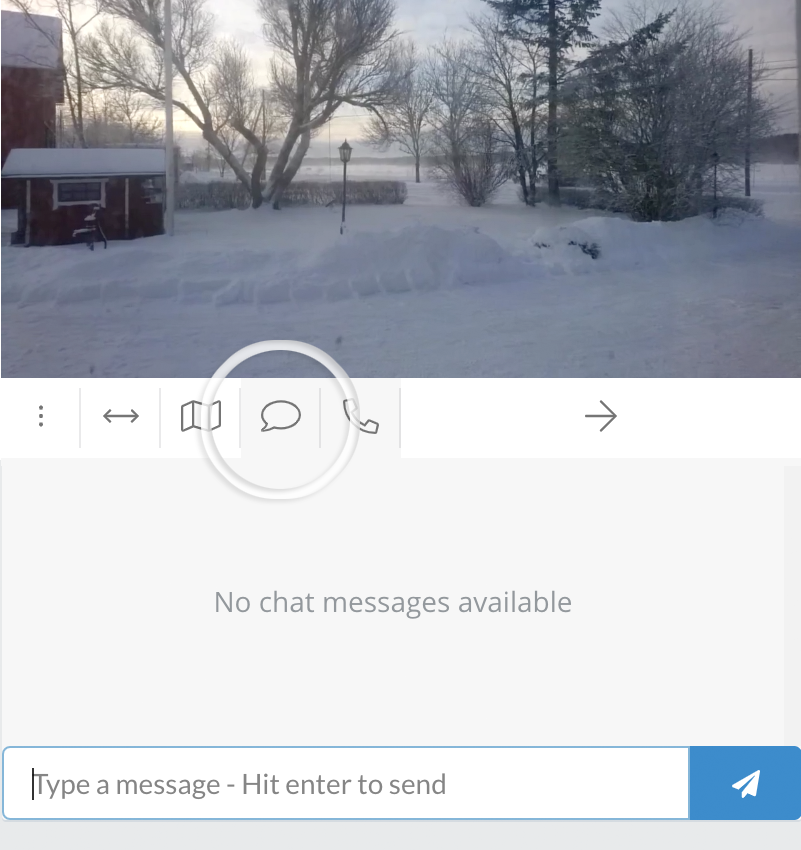
Note that the message function is a one-way communication and read-only for the app user.
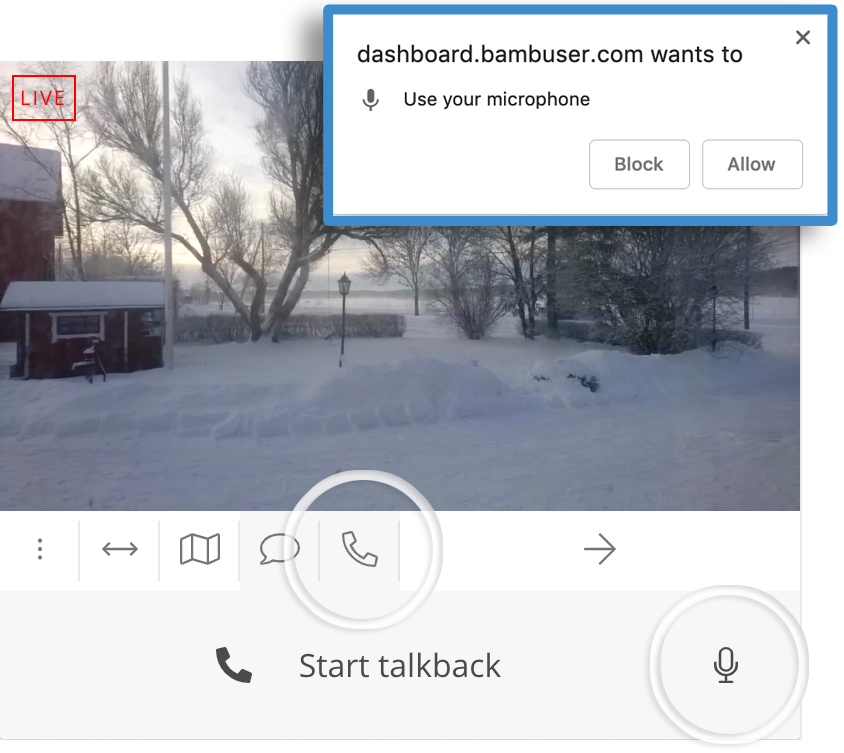
Audio talkback
While a broadcast is live you can try to call the user on the other end. Click on the “phone” icon in the action bar underneath the preview player to launch an audio only WebRTC broadcaster. Press “Start talkback” to send a talkback request to the broadcasting user, who can accept or decline your talkback attempt. If accepted the app user will hear you. Make sure to have the preview player unmuted during a talkback session if you desire to be able to have a two way communication.
The browser may ask for permission to use the microphone, please allow this (and preferably tick the box for “Always allow”).
It’s possible to initiate talkback sessions on multiple previews at the same time. To avoid confusion you can mute individual channels by toggling the “mic” button.
We strongly recommend the use of a headset during a talkback session in order to avoid acoustic feedback.
Photos
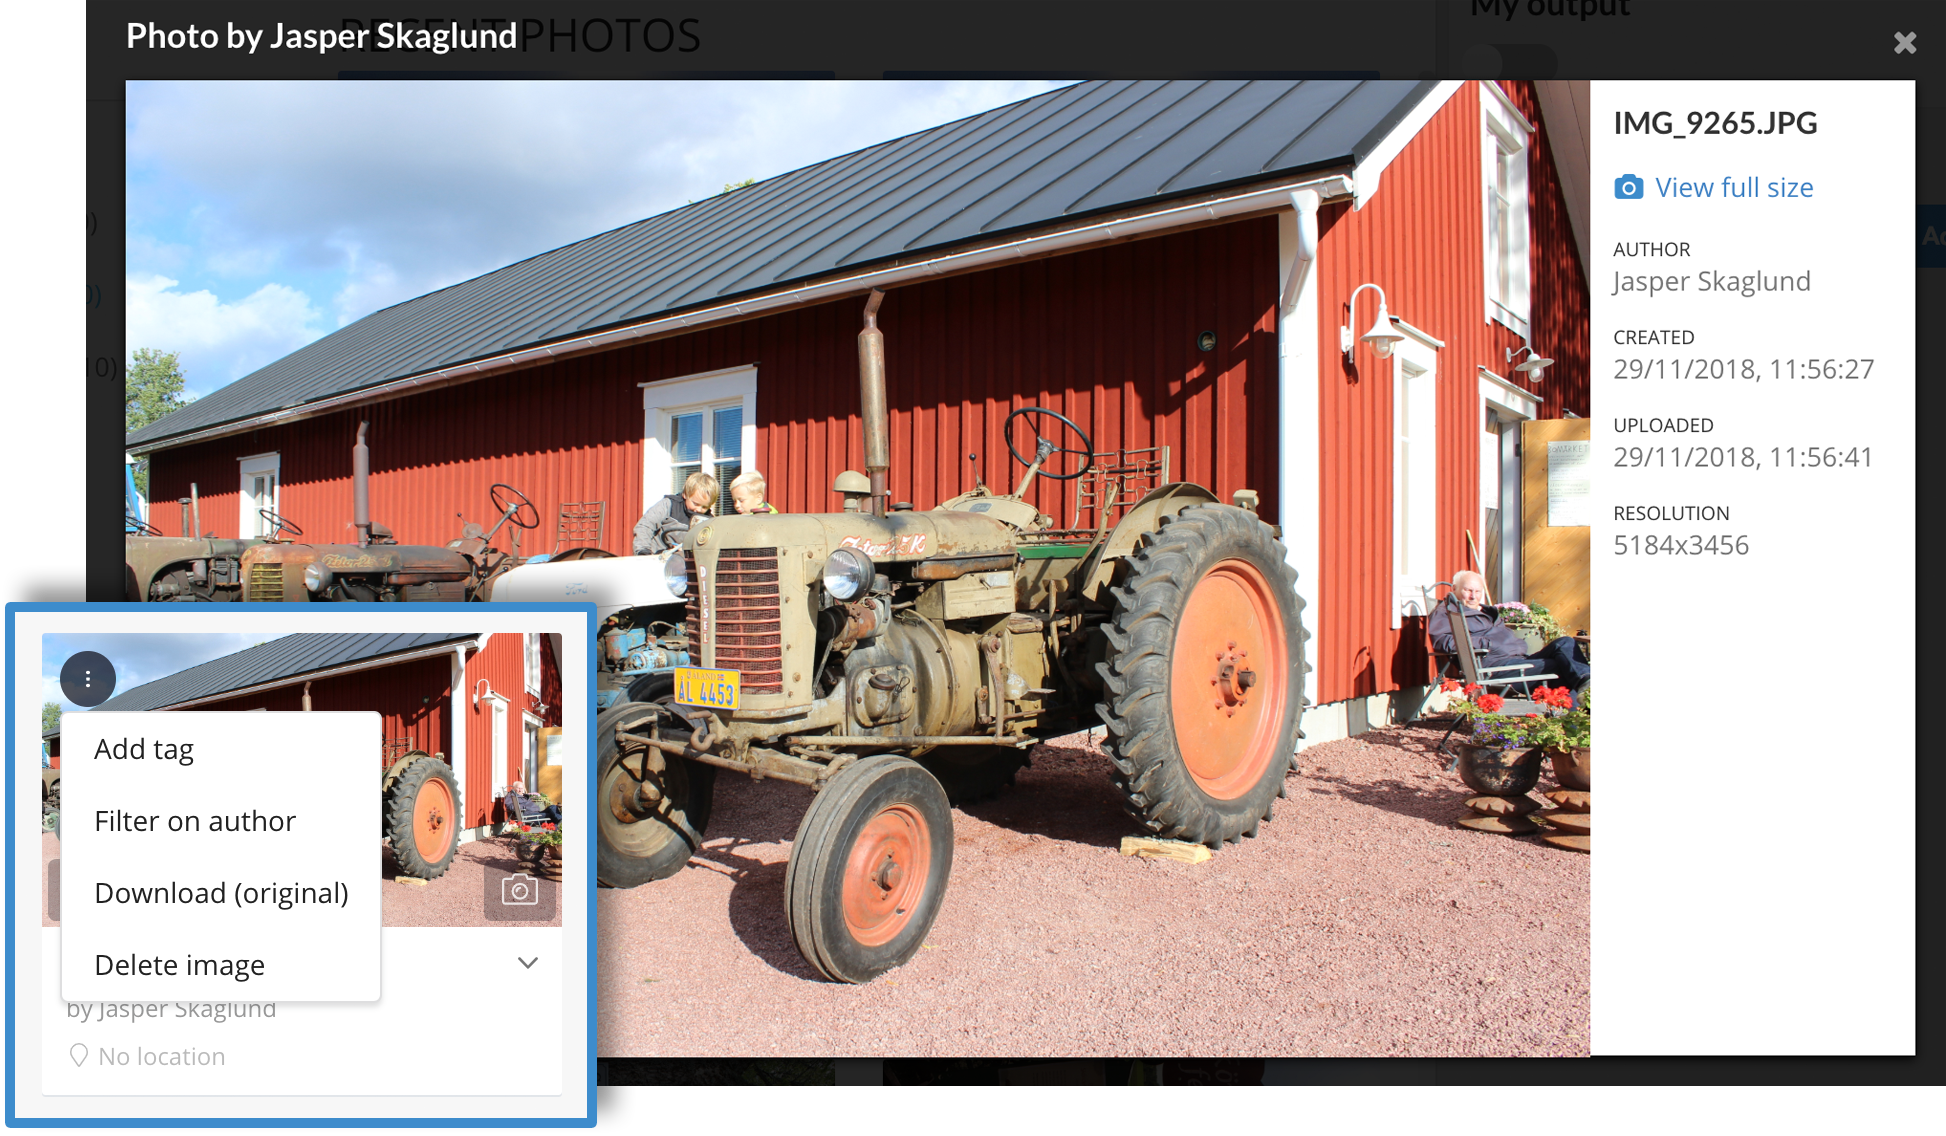
To view and see details about an incoming photo, simply click on the thumbnail located in the left pane. Click on the “three dots” icon, displayed when hovering the thumbnail, to open a dropdown with the following options:
- Add tag to the photo making it easier to sort and find in your archive
- Download the original photo to your computer
- Delete image, permanently removes it from the servers
Publish
When a video is ready for publishing click on the “arrow” icon and select the desired Outbox. Videos can be published to a SDI and/or RTMP/TCP Outbox. The Outbox is like a playlist and will play videos in the order they appear in the list.
SDI
Firewalls and ports
Please ensure that following ports are open for outgoing traffic:
- 80
- 443
- 1935
The streams are primarily served via cloud providers where IP ranges and hostnames are not known in advance.
Requirements
- Windows PC (64-bit OS) or macOS 10.9
- SDI-card (we recommend Blackmagic Decklink)
- SDI-application, provided by Bambuser
- SDI-application credentials provided by Bambuser
Bandwidth requirements:
[2-4 Mbps per stream (depending on resolution etc of the stream)] x [number of active SDI outputs ] x 2
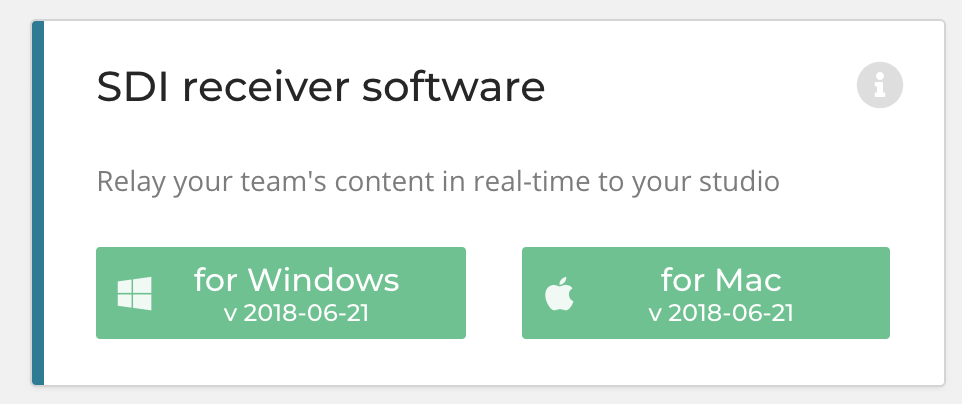
Configuration
- Download the SDI application from the Bambuser Dashboard (If you cannot access the Developer page or the SDI receiver software please ask the administrator of your team to give you permission)
- Install it on the supported platform of choice
- Send a request to Bambuser to set you up with a SDI Outbox
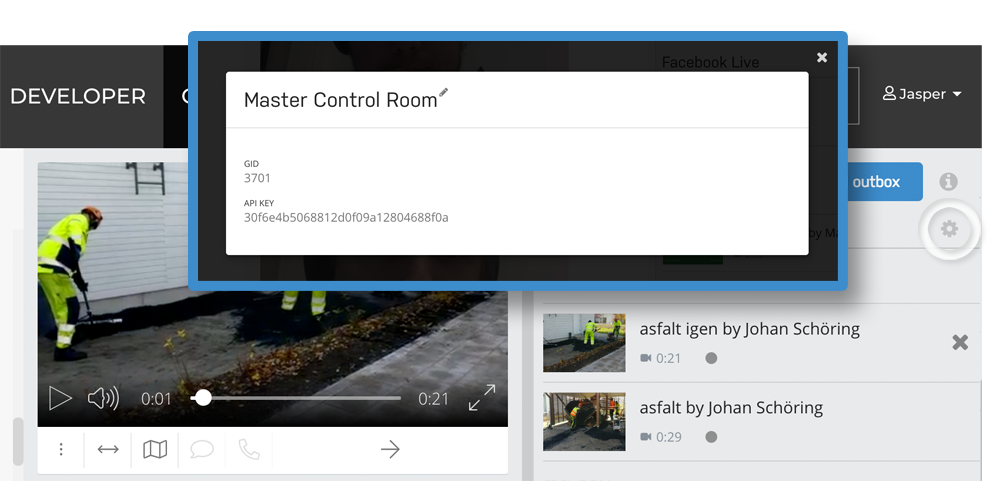
- The SDI application requires a GID (group id) and a API KEY. To access the credentials go to the Content Manager. In the column to the right you will find your outboxes. (SDI outboxes are labeled with “SDI”). Click on the “cog wheel” icon of the SDI Outbox of choice and they are displayed in a modal.
How it works
Videos placed in a SDI Outbox in the Content Manager are ready to be streamed on the SDI machine. The playlist in the SDI Outbox will loop in the order they appear in the list. The order may be altered by dragging and dropping the thumbnails. However if an unplayed video is placed before any played clips while streaming, playback is aborted and the newly replaced video will start playing . You can remove videos (live or archived) from a playlist by hovering with your mouse over the thumbnail and clicking the x-symbol.
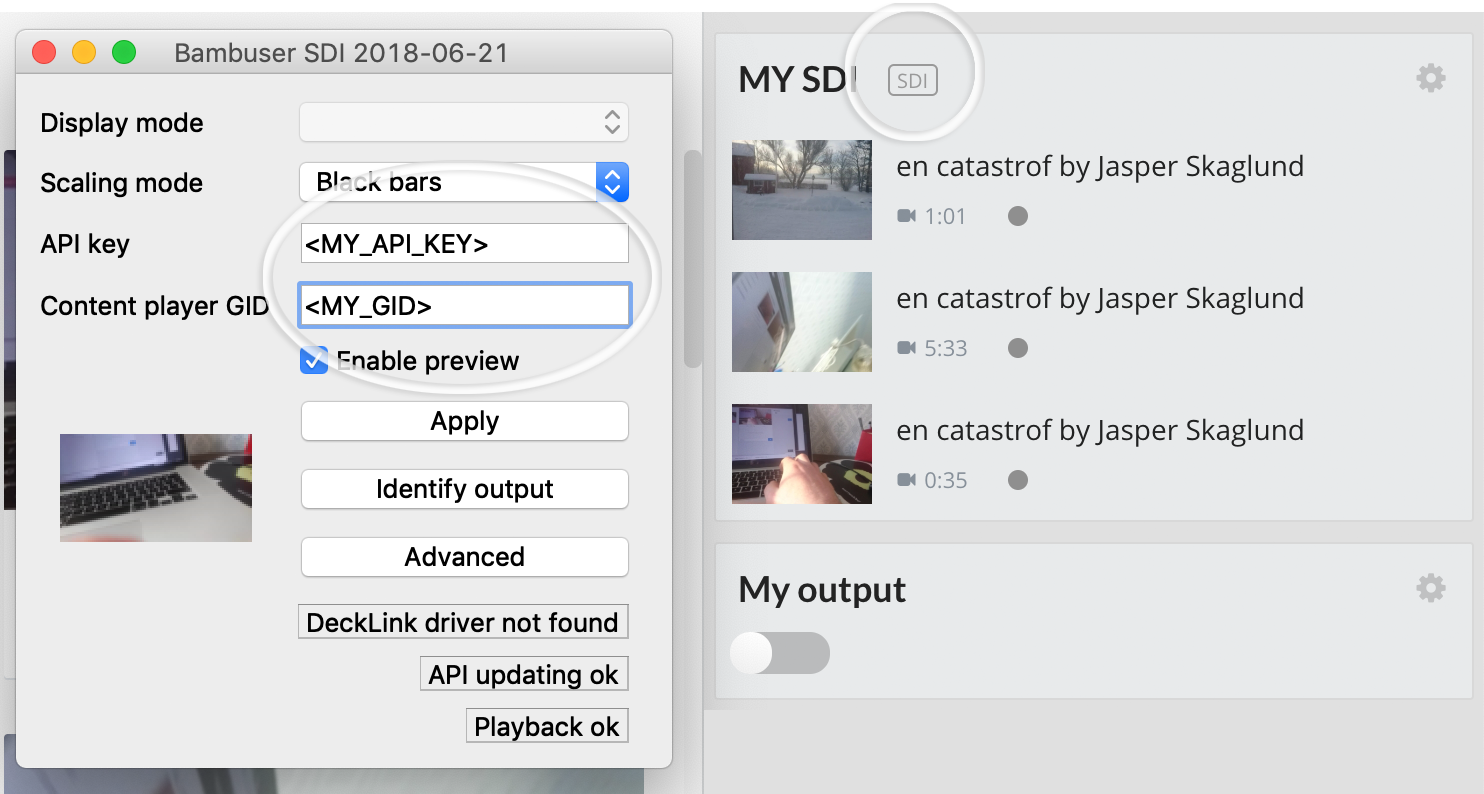
- Display mode – Select the preferred display mode supported by the used SDI card (NTSC, 720p50, 1080p30 etc)
- Scaling mode – Set how a videos with different resolutions should scale. Possible values are stretch, crop or added black bars (keeps original aspect ratio)
- API key – Enter the API key for the SDI Outbox of choice found in the Content Manager
- Content player GID – Type in the GID for the SDI Outbox of choice found in the Content Manager
- Enable preview – Shows a small player in the application playing the videos in your SDI Outbox playlist
- Apply – Confirms your API key and GID
- Identify output – Injects a short sound and a test image to the stream which may help to identify which SDI port is connected to which output
- Advanced – Opens advanced settings for the SDI output
The SDI application adjusts its GUI according to the SDI-card you have. The interface is duplicated for each number of ports it supports. To activate an output among many you simply check the checkbox for the specific output. Unchecked outputs will stay idle.
Advanced
The SDI application is meant to work without manual tuning in most cases, but if the network is too bursty and you are experiencing stuttering/freezing in the video, you can press the “Advanced” button.
By checking the “Override buffering”, you are free to configure the buffer parameters. By increasing the “Target buffer size” parameter, you are adding latency to the playback, but also increase tolerance for occasional network variance.
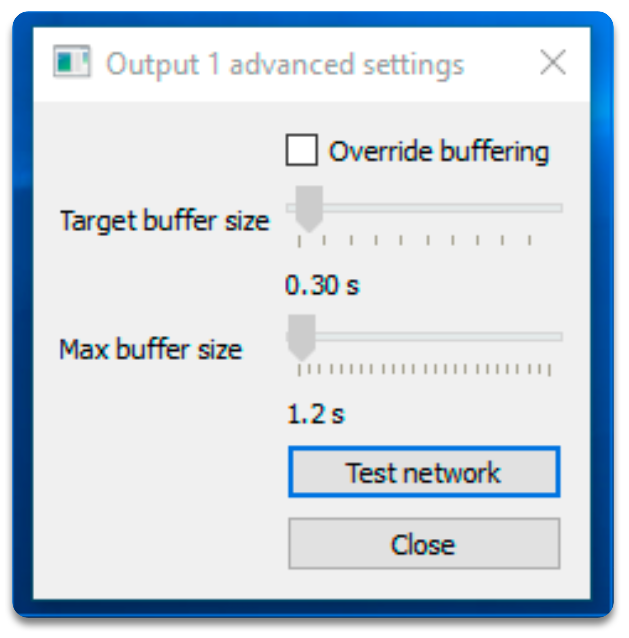
The “Max buffer size” parameter needs to be set accordingly (the application automatically forces this parameter to be at least 0.5 seconds more than the target buffer size); if more data than this happens to be buffered, it tries to skip forward to catch up with real time.
In case playback doesn’t seem to work smoothly, there’s a built in test tool as well. Make sure to add an archived (non-live) broadcast for testing to the configured outbox (ideally a real world video with real content, ideally a couple minutes long).
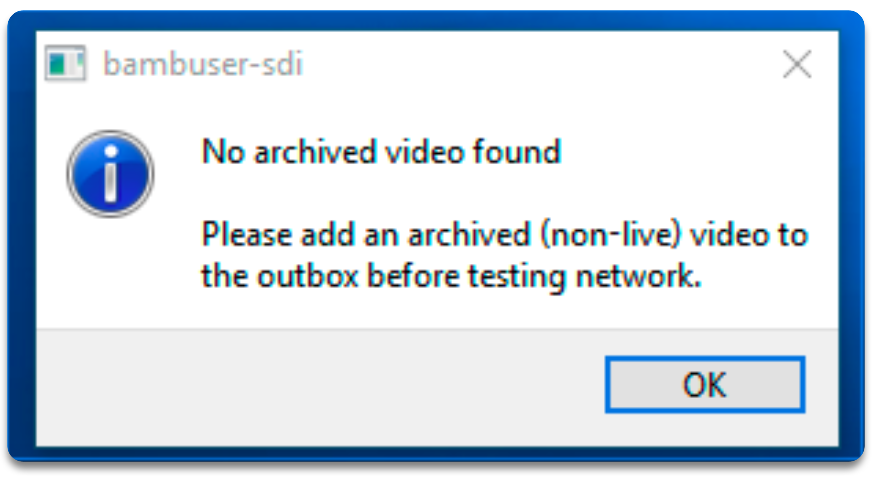
Then press the “Test network” button. After running the tests, the application will report the findings, including the roundtrip time to the server hosting the video, the measured download speed, and the required average speed for that particular video.

RTMP/TCP to a 3rd party CDN
Firewalls and ports
Please ensure that following ports are open for outgoing traffic:
- 80
- 443
- 1935
Additionally, depending on the security setup of your internal network, it may be necessary to whitelist all subdomains of bambuser.com.
Requirements
- An account with a 3rd party CDN/OVP that will accept live streaming ingestion over RTMP/TCP.
- RTMP/TCP credentials, provided by the CDN/OVP
- An RTMP/TCP enabled Outbox in the Content Manager
Configuration
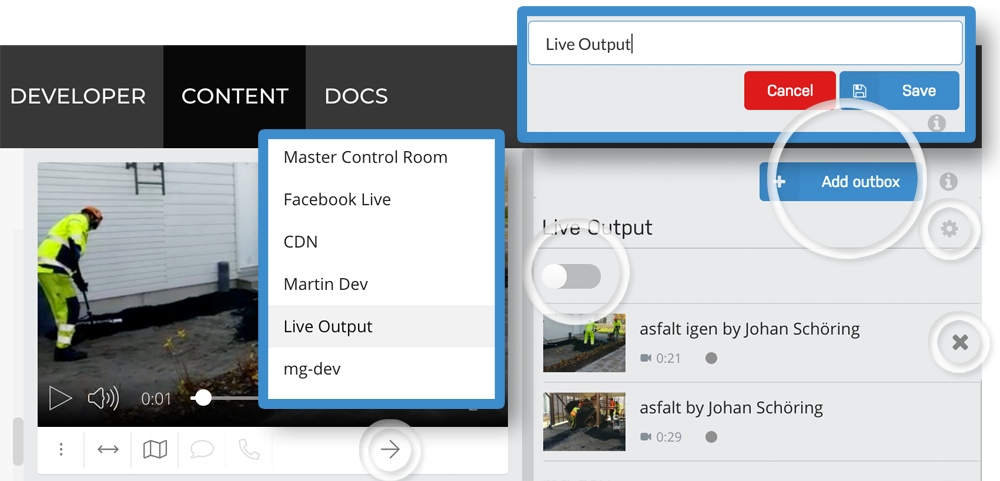
- Click “Add outbox” in the upper right corner in the Content Manager. Type a name and click “Save”.
- Click on the cogwheel symbol next to the newly created outbox.
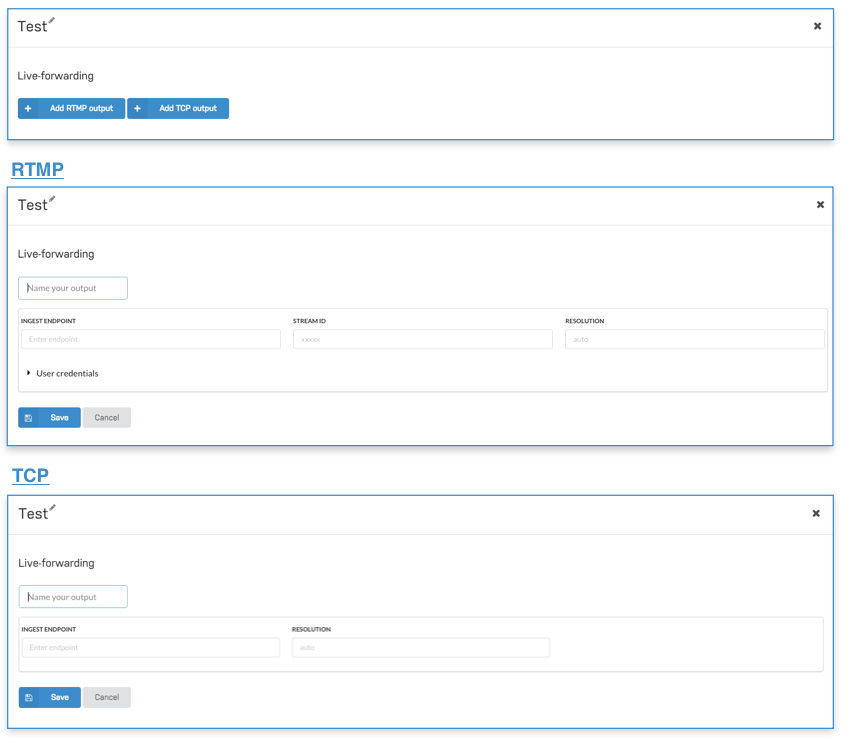
- Click the “Add RTMP output” or “Add TCP/UDP output” button
- Insert your RTMP or TCP/UDP credentials provided by the receiving party. Username and password might not be necessary.
- Click ”Save” and close the box
How it works
The Outbox behaves like a looping playlist and will play videos in the order they appear in the list. To add a video to your playlist you press the “arrow” icon underneath the preview player and select the Outbox from the menu. You may set the order of the playlist by dragging and dropping the thumbnails. Start streaming by clicking the toggle button above the playlist. Dropping a video at the top of the list while streaming will stop playback and the playlist will start from the top.
You can remove videos (live or archived) from a playlist by hovering with your mouse over the thumbnail and clicking the x-symbol.
Automatically adding content to an outbox
You can have a broadcast automatically added to an outbox by setting the outboxes group-ID, or gid, to the title of your broadcast. First, find the gid of your outbox.

Secondly, add that gid to the title of your broadcast in a hashtag in the following manner #group-12345.

Automatically starting RTMP forwarding when content is added to an outbox
RTMP outputs can be configured to automatically start and stop when content is added to the outbox. Using the technique above to automatically add a broadcast to an outbox can give you a hands off approach for your broadcasting needs. When adding a new RTMP output you will be presented with two toggles to enable automatic starting and stopping of your outbox.
