Extend Bambuser Chat
Autotrigger Chat on Page Load
To automatically display the On-site Chat window upon page load, you can add the following search query parameter to the URL. This feature is only applicable when Bambuser Chat is present on the page:
?bambuserAction=chat:open
Example: https://www.example.com/?bambuserAction=chat:open
Once the On-site Chat window is triggered and opened, the search query parameter (bambuserAction=chat:open) will be automatically removed from the URL.
Interaction Event Listeners
An Interaction Event is an event that allows you to understand what Bambuser Chat is doing, so that you can react accordingly. You can write listeners to create custom journeys based on what Bambuser Chat is doing.
Bambuser Chat is Ready
Bambuser Chat is visible to the shopper:
<script>
  hero("onReady", function (event) {});
</script>
Bambuser Chat is in Use
The shopper has a conversation in-progress:
<script>
  hero("onReady", function (event) {
    if (event.messengerInUse) {
    }
  });
</script>
Bambuser Chat is Not Visible
Bambuser Chat is not visible to the shopper:
<script>
  hero("onShutdown", function () {});
</script>
Bambuser Chat is Shown
The Bambuser Chat view has been shown:
<script>
  hero("onShow", function () {});
</script>
Bambuser Chat has been Hidden
The Bambuser Chat view has been hidden:
<script>
  hero("onHide", function () {});
</script>
Example:
<script>
  const scrollToTopButton = document.querySelector("button.scroll-to-top");
  hero("onReady", function () {
    scrollToTopButton.style.display = "none";
  });
  hero("onShutdown", function () {
    scrollToTopButton.style.display = "block";
  });
</script>
Bambuser Chat Conversation has Ended
To understand when a conversation has been finished by an associate, you can use the onConversationStatusUpdate event:
<script>
  hero("onConversationStatusUpdate", function (event) {
    if (event.conversationStatus === "ended") {
      console.log(event.conversationId);
      console.log(event.associateId);
      console.log(event.associateEmployeeId);
      console.log(event.now);
    }
  });
</script>
Please note the following:
| Name | Type | Description |
|---|---|---|
| event.conversationId | string | A unique ID to be able to reference the specific conversation. |
| event.associateId | string | The Bambuser Chat ID of the associate in the conversation. Only populates when the shopper is using the Bambuser Chat chat and the conversation ends. |
| event.associateEmployeeId | string | The Employee ID of the associate in the conversation. Only displays if this feature ha been enabled as part of the Product Expert sign-up process. Only populated when the shopper is using the On-site chat and the conversation ends. |
| event.now | boolean | 'True' indicates that the event happened now, in real time. 'False' indicates the event happened in the past. Only populates when the shopper is using the Bambuser Chat chat and the conversation ends. |
As an example, to listen for a conversation which has ended whilst the shopper is still on the active page, the following can be used:
<script>
  (event.conversationStatus === "ended" && event.now) { … }
</script>
When the shopper has been down the Get Notified route there are two caveats to be aware of in relation to the Conversation Ended event:
- If the page is closed when the chat is finished then the end of chat event will fire the next time the Bambuser Chat plugin is loaded; however the event will not include the associate details.
- If the shopper is following the Get Notified link on a device different to the one where they started the original conversation then the end of chat event won't fire at all. For example, if the shopper starts a chat on desktop, leaves a get notified message, receives a Get Notified SMS and follows the link on their mobile device; then the end of chat event won't fire.
Conversation Rated by Shopper
The following event can be used to read the rating value and feedback contents from the rating submission by the shopper at the end of a chat. This can be used to populate in Google Analytics, for example:
<script>
  hero("onConversationRatingSubmit", function (event) {
    console.log(event.conversationId);
    console.log(event.conversationStatus);
    console.log(event.associateId);
    console.log(event.associateEmployeeId);
    console.log(event.ratingValue);
    console.log(event.ratingFeedbackValue);
  });
</script>
Department selected by Shopper
A shopper selects from the list of departments; note that this happens before the shopper sends their initial message to start a conversation. The event payload contains the department's name and unique ID.
<script>
  hero("onDepartmentSelect", function (event) {
    console.log(event.departmentName);
    console.log(event.departmentId);
  });
</script>
| Name | Type | Description |
|---|---|---|
| event.departmentName | string | The full name of the department. |
| event.departmentId | string | This is the same ID used in Department Filtering. |
Need selected by Shopper
A shopper selects from the list of needs (these are not enabled by default, please consult your Customer Success Manager for details).
<script>
  hero("onNeedSelect", function (event) {
    console.log(event.needName);
  });
</script>
Leave a message form is displayed
The Hero "Get Notified" form is shown to a shopper. This happens when Product Experts are not currently available and the shopper leaves a message. Note that the shopper must successfully enter a valid email or phone number for this event to be triggered.
<script>
  hero("onGetNotifiedInit", function () {});
</script>
Leave a message form is submitted
A shopper leaves a message via the "Get Notified" form.
<script>
  hero("onGetNotifiedSubmit", function () {});
</script>
Shopper searches for a nearby store
A shopper submits their postcode in order to find their nearest store. This feature is not enabled by default, please consult your Customer Success Manager for details. Note that the shopper must successfully enter a valid postcode for this event to be triggered.
<script>
  hero("onPostcodeSubmit", function () {});
</script>
Shopper selects a store
A shopper selects a store from the location search results. This feature is not enabled by default, please consult your Customer Success Manager for details.
<script>
  hero("onStoreSelect", function (event) {
    console.log(event.storeName);
  });
</script>
Interaction Event Methods
The Bambuser Chat Client API exposes a number of methods i.e. show and hide to allow you to interact with the On-site Chat plugin.
Showing On-site Chat
This method will show the On-site Chat window. This can only be used if Bambuser Chat is available on the page.
<script>
  hero("show");
</script>
In this example, we show the On-site Chat when a button is clicked:
<script>
  const openHeroButton = document.querySelector("button.open-hero");
  openHeroButton.onclick = function () {
    hero("show");
  };
</script>
Hiding On-site Chat
This method will hide the On-site Chat window. This will only close the chat window, if Bambuser Chat is open on the page.
<script>
  hero("hide");
</script>
In this example, we can hide On-site Chat when a button is clicked:
<script>
  const closeHeroButton = document.querySelector("button.close-hero");
  closeHeroButton.onclick = function () {
    hero("hide");
  };
</script>
Adjust On-site Chat position
Here we'll walk you through how to set precisely where you want to display Bambuser Chat on the webpage. On the pages where On-Site chat can be opened, there is a Bambuser Chat icon - a button that shoppers can click to open a chat. You can adjust its position by adding the code below to those pages.
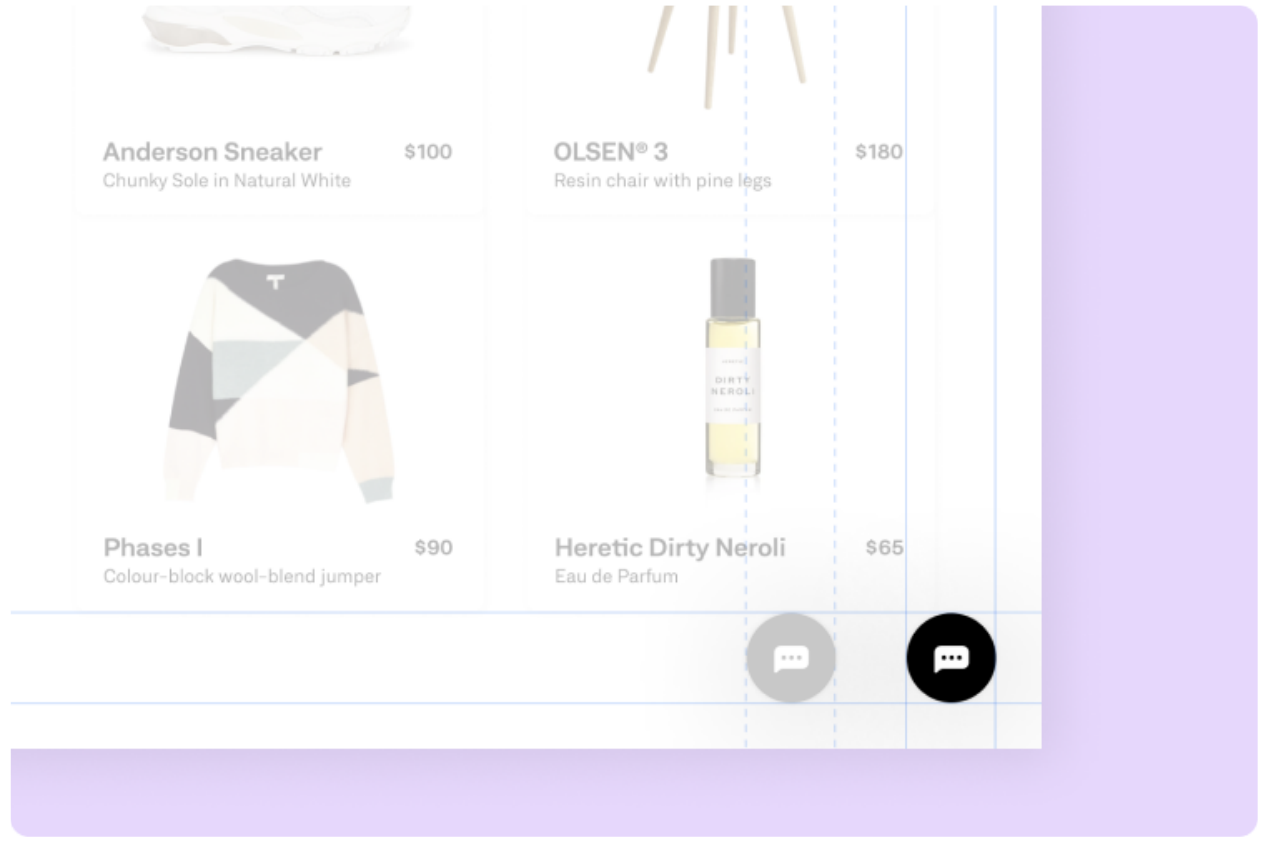
Within the On-site Chat Tag template for Google Tag Manager, under Hero Configuration Object, two rows can be added to describe changes to the horizontal and vertical position of the icon:
<script>
  window.HeroWebPluginSettings = {
    applicationId: "HERO-XXXX",
    translateX: "-5px",
    translateY: "40px",
  };
</script>
<script>
  (function(i,a,m,h,e,r,o){i.HeroObject=e;i[e]=i[e]||function(){(i[e].q=i[e].q||[]).push();
</script>
translateX and translateY are CSS properties that will control the Launcher Icon position using a value in pixels. For example, setting translateX to have a value of -50px will adjust the On-site Chat Launcher so that it sits 5 pixels below the default position.
Moving the On-site Chat plugin will change the behavior of the close/minimize function of the chat. Normally the close/minimize button is in the plugin when the chat is open, moving the plugin will move the close/minimize button to the top right corner of the chat window.
Customize On-site Chat
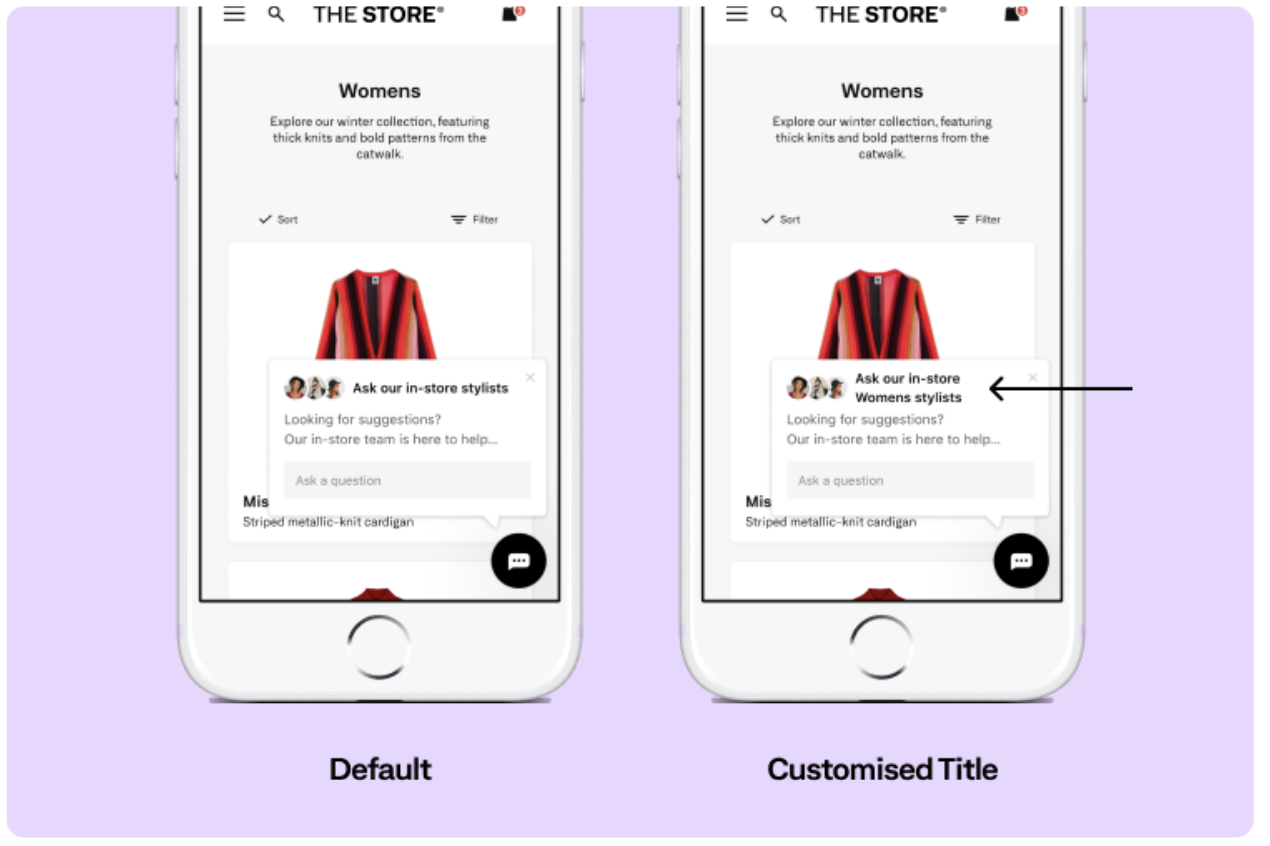
While the wording in your On-site Chat is configurable at a site wide level with this API you can customize the title of the icon to match a specific product, category or department.
Through the Bambuser Chat API, the On-site Chat title can be updated with a specific category, subject or department name, based on the web page or section.
This is useful when used alongside Bambuser Chat Department Filtering if particular sections or pages within a website are restricted to a single department.
The example below shows the default On-site Chat Launcher title on the left, and the updated On-site Chat Launcher title on the right, where the term Department has been passed through.
How to implement a different On-site Chat title
To change the On-site Chat title after the chat has initialized, you can fire an event that makes the following call:
<script>
  hero("update", { category: { title: "Department" } });
</script>
In this example, the term Department is passed through and inserted into the On-site Chat title. When using this method, the category parameter above will replace the $category part of the following title: 'Ask our in-store $category team'.
When used, this interaction event method will update across all of the Hero Launcher types which can be used: Static Launcher, Interactive Launcher and Needs Selector Launcher.
Creating a custom chat menu
Using advanced events, it is possible to customize the chat menu within the Bambuser Chat Messenger so it can sit alongside Customer Service tools. This is useful way to ensure a good shopper experience by diverting support queries away from Bambuser Chat to a Customer Service tool.
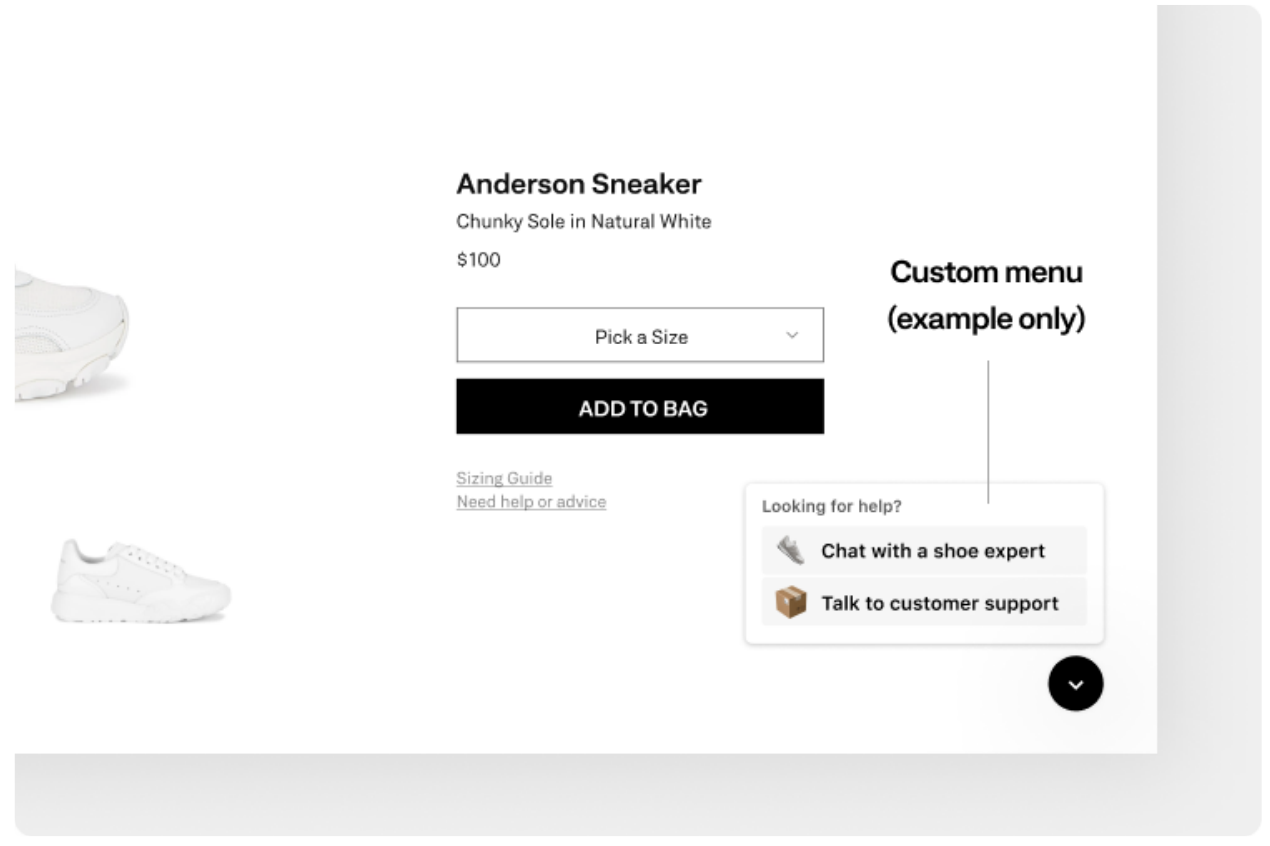
With Interaction Event Listeners and Methods, you can create more complex interactions with Bambuser Chat. This guide shows how a chat menu can be introduced using Bambuser Chat interaction events.
Please note that this an example as to how you could use a custom extension.
Hiding and unhiding the Launcher Icon
When your chat menu is in operation, the On-site Chat Launcher Icon can be hidden using CSS with the element
<style>
  .hero-launcher-container {
    display: none;
  }
</style>
Bambuser Chat is not available
The onShutdown interaction event can be used to see if Bambuser Chat is not present on the page. This could be if associates are unavailable or the Follow Rules indicate that it should not show.
<script>
  hero("onShutdown", function () {});
</script>
Bambuser Chat is in use
The onReady interaction event can also be used to understand whether the shopper is currently in a conversation using the messengerInUse Boolean.
<script>
  hero("onReady", function (event) {
    if (event.messengerInUse) {
    }
  });
</script>
Action: Hide the chat menu altogether and show the On-site Chat icon, to benefit from the incoming notifications and alerts if the shopper is in a chat, giving them the choice to open and close when required.
Department Filtering
Controlling the department options available to your Shopper
By default all departments or teams configured for Bambuser Chat are shown to shoppers on all pages, allowing the shopper to select the right department for them.
However, with the Department Filtering API you are able to restrict which departments are shown to the shopper. Here are some examples of how you can use Department Filtering.
- More strictly control the journey available to your shoppers, e.g. when viewing the Women's category only allow them to start a chat with the Women's department, or when viewing a specific product only allow them to start a chat with your team who are experts in that product.
- Use availability filtering to only load a department when Associates are available in that department. Bambuser Chat's standard availability features will show the plugin if just one department is available, you can use this to hide departments on an individual level.
When there are multiple departments that the shopper can chat with, they need to select the right one for them. However, if only one department is allowed to use Department Filtering then the shopper does not need to select a department and will go straight into starting a chat, no matter how many departments exist.
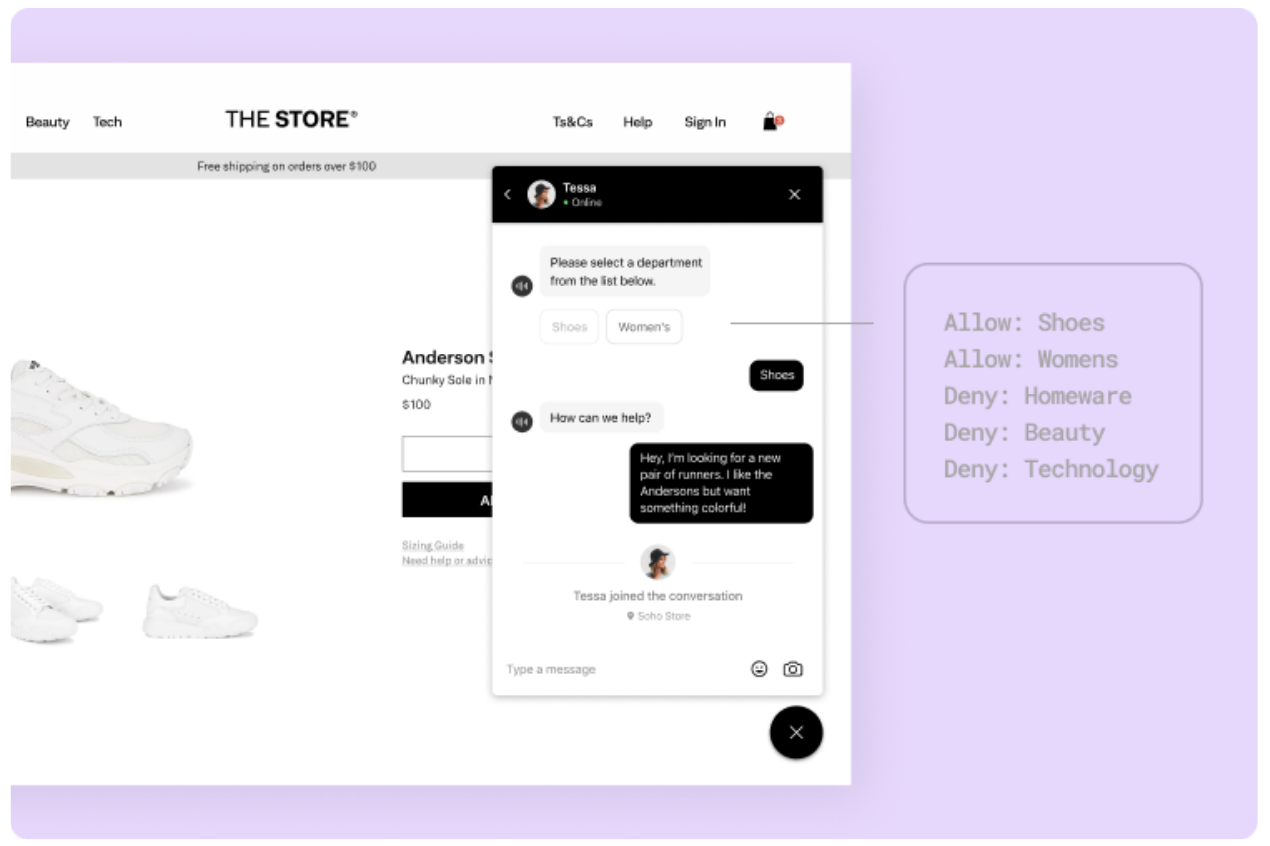
Department Filtering using Allow and Deny lists
Through the Bambuser Chat Client API, departments can be filtered using Allow and Deny lists. These are fully customizable per page so you can tailor them to the unique URL structures of your website or trigger them from events implemented by you to understand the category or product the shopper is viewing.
To implement Department Filtering you will need to get the department IDs from Dashboard. You can find these under Settings > Account Settings > Departments. Note, department IDs are case sensitive. If you don't see the option for Settings in the Dashboard navigation, or the option for Departments, then contact support-chat@bambuser.com
Department Filtering Rules
When allowing and denying departments, it's important to understand these rules:
- When one department is added to the Allow list, any departments not listed will be hidden.
- When one department is added to the Deny list, any departments not listed will still be visible.
- Only an Allow or Deny need to be used on any one page, however when using Allow and Deny together, Allow will always take precedence.
Allowing Departments
For each type of Allow list below you will see two examples, one where only a single department is allowed and one where multiple departments are allowed.
Allow a Department
Used when you only want to show certain departments on a page. Any departments not in the allow list will not be shown.
Allowing a single department:
<script>
  window.HeroWebPluginSettings = {
    departmentAllowList: [
      {
        id: "43a0B7JDdY", // Department ID
      },
    ],
  };
</script>
Allowing multiple departments:
<script>
  window.HeroWebPluginSettings = {
    departmentAllowList: [
      {
        id: "43a0B7JDdY", // Department ID
      },
      {
        id: "27He0Lj38a", // Department ID
      },
      {
        id: "HIW739Olp1", // Department ID
      },
    ],
  };
</script>
Allow a Department if it is Available
You only want to show a department on a page when an Associate is available in that department.Allowing a single department:
<script>
  window.HeroWebPluginSettings = {
    departmentAllowList: [
      {
        id: "43a0B7JDdY", // Department ID
        constraint: {
          departmentAvailable: true,
        },
      },
    ],
  };
</script>
Allowing multiple departments:
<script>
  window.HeroWebPluginSettings = {
    departmentAllowList: [
      {
        id: "43a0B7JDdY", // Department ID
        constraint: {
          departmentAvailable: true,
        },
      },
      {
        id: "27He0Lj38a", // Department ID
        constraint: {
          departmentAvailable: true,
        },
      },
      {
        id: "HIW739Olp1", // Department ID
        constraint: {
          departmentAvailable: true,
        },
      },
    ],
  };
</script>
Allow a Department if an Active Conversation Exists
You only want to show a department on a page when the shopper has a chat in progress with a department.
Allowing a single department:
<script>
  window.HeroWebPluginSettings = {
    departmentAllowList: [
      {
        id: "43a0B7JDdY", // Department ID
        constraint: {
          conversationInProgress: true,
        },
      },
    ],
  };
</script>
Allowing multiple departments:
<script>
  window.HeroWebPluginSettings = {
    departmentAllowList: [
      {
        id: "43a0B7JDdY", // Department ID
        constraint: {
          conversationInProgress: true,
        },
      },
      {
        id: "27He0Lj38a", // Department ID
        constraint: {
          conversationInProgress: true,
        },
      },
      {
        id: "HIW739Olp1", // Department ID
        constraint: {
          conversationInProgress: true,
        },
      },
    ],
  };
</script>
Allow a Department if a Previous Conversation Exists
You only want to show a department on a page when a user has had a previous conversation with that department.
Allowing a single department:
<script>
  window.HeroWebPluginSettings = {
    departmentAllowList: [
      {
        id: "43a0B7JDdY", // Department ID
        constraint: {
          conversationExists: true,
        },
      },
    ],
  };
</script>
Allowing multiple departments:
<script>
  window.HeroWebPluginSettings = {
    departmentAllowList: [
      {
        id: "43a0B7JDdY", // Department ID
        constraint: {
          conversationExists: true,
        },
      },
      {
        id: "27He0Lj38a", // Department ID
        constraint: {
          conversationExists: true,
        },
      },
      {
        id: "HIW739Olp1", // Department ID
        constraint: {
          conversationExists: true,
        },
      },
    ],
  };
</script>
Denying Departments
For each type of Deny list below you will see two examples, one where only a single department is denied and one where multiple departments are denied.
Deny a Department
You only want to prevent one (or more) departments from showing. All other departments will show.
Denying a single department:
<script>
  window.HeroWebPluginSettings = {
    departmentDenyList: [
      {
        id: "43a0B7JDdY", // Department ID
      },
    ],
  };
</script>
Denying multiple departments:
<script>
  window.HeroWebPluginSettings = {
    departmentDenyList: [
      {
        id: "43a0B7JDdY",
      },
      {
        id: "27He0Lj38a",
      },
      {
        id: "HIW739Olp1",
      },
    ],
  };
</script>
Deny a Department if it is Unavailable
Do not show a department if a department is unavailable, or a shopper hasn't had a conversation in that department.
Denying a single department:
<script>
  window.HeroWebPluginSettings = {
    departmentDenyList: [
      {
        id: "43a0B7JDdY", // Department ID
        constraint: {
          departmentAvailable: false,
        },
      },
    ],
  };
</script>
Denying multiple departments:
<script>
  window.HeroWebPluginSettings = {
    departmentDenyList: [
      {
        id: "43a0B7JDdY", // Department ID
        constraint: {
          departmentAvailable: false,
        },
      },
      {
        id: "27He0Lj38a", // Department ID
        constraint: {
          departmentAvailable: false,
        },
      },
      {
        id: "HIW739Olp1", // Department ID
        constraint: {
          departmentAvailable: false,
        },
      },
    ],
  };
</script>
Deny a Department if Previous Conversation Does Not Exist
Deny a department from showing if a conversation does not exist. This will only show a department if a conversation has already happened with this department.
Denying a single department:
<script>
  window.HeroWebPluginSettings = {
    departmentDenyList: [
      {
        id: "43a0B7JDdY", // Department ID
        constraint: {
          conversationExists: false,
        },
      },
    ],
  };
</script>
Denying multiple departments:
<script>
  window.HeroWebPluginSettings = {
    departmentDenyList: [
      {
        id: "43a0B7JDdY", // Department ID
        constraint: {
          conversationExists: false,
        },
      },
      {
        id: "27He0Lj38a", // Department ID
        constraint: {
          conversationExists: false,
        },
      },
      {
        id: "HIW739Olp1", // Department ID
        constraint: {
          conversationExists: false,
        },
      },
    ],
  };
</script>
Configurations
| Attribute | Required | Type | Note |
|---|---|---|---|
| id | Mandatory | string | Department IDs can be requested from Bambuser Chat for Staging and Production retailer applications. |
| constraint | Optional | object | |
| constraint.departmentAvailable | Optional | boolean | The department's current availability state determines if it considered to be in Allow / Deny list. |
| constraint.conversationInProgress | Optional | boolean | Whether the Shoppe has a conversation inprogress determines it is considered to be the Allow / Deny list. |
| constraint.conversationExists | Optional | boolean | Whether the Shopper has an existing conversation with the department determine if it is considered to in the Allow / Deny list. |
Suggested Checklist for Creating New Departments and Implementing Department Filtering While Bambuser Chat is Already Live on Your Site
When a department is created through your Dashboard it will immediately show across all pages where the On-site Chat plugin appears. If this is a problem then you may want to follow the order of steps below for rolling out Department Filtering.
- Implement Department Filtering for your existing departments, this will mean that the plugin continues to behave as normal while you create the new departments
- Create new departments Settings > Account Settings > Departments > Add Department
- Assign relevant Associates to new departments, remember Associates can be in multiple departments
- Update Department Filtering to use the new department IDs where you want them to appear
Using Department Filtering to deactivate a department
Bambuser Chat does not currently support deleting or removing departments. If you no longer want a department to be available to your Shoppers then simply implement Department Filtering and add the relevant department to a deny list on all pages.