Inspector Tool
Overview
Quickly spot common issues while setting up Bambuser Chat
With the Inspector Tool, you can quickly spot common issues when setting up Bambuser Chat. If you are working on Bambuser Chat implementation, we recommend using this tool to support with a smooth and efficient launch process. All the information you need on how to fix issues identified with the Inspector tool can be found in the Dev Docs.
The Bambuser Chat Inspector Tool loads on any website with the implemented, and displays via a panel on your browser session. To learn how to use the tool and its range of capabilities, jump straight in:
How to load the tool
How to open the Inspector Tool
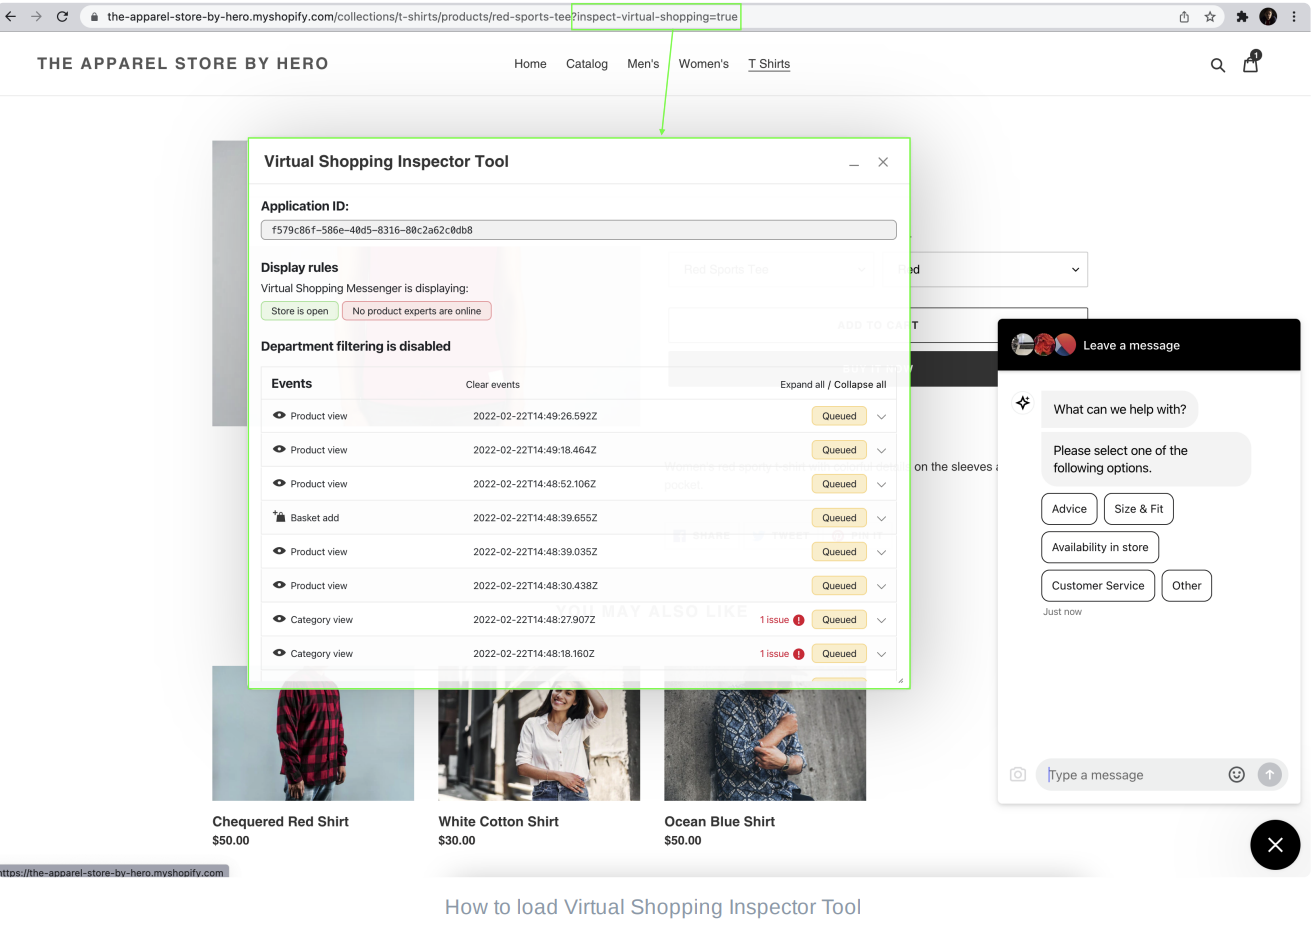
Firstly, open the website where you have added the Bambuser Chat Tag and Shopper Events.
Then add ?inspect-virtual-shopping=true to the end of your URL as a query parameter, and reload the page.
You will only need to do this once per website (domain). If you have multiple subdomains/environments open, you will need to load this separately on each browser. You will also need to do this if you clear the website cookies or each time you use Incognito Mode. After the first load of the Inspector Tool, the browser will remember that it was loaded and it will then load it automatically across all the pages of the website where the Bambuser Chat Tag is added.
What you can inspect
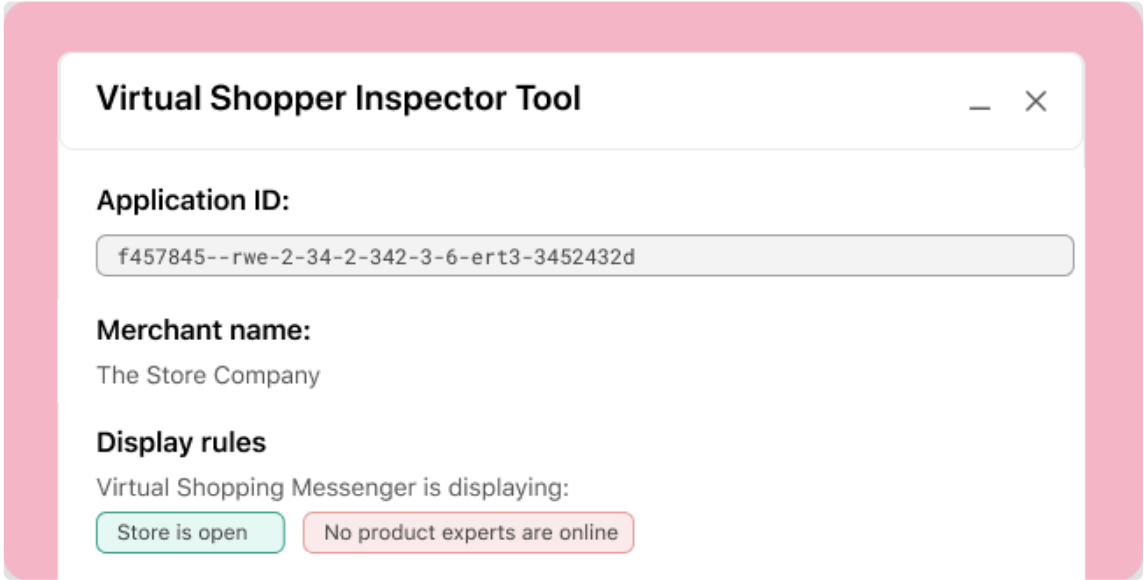
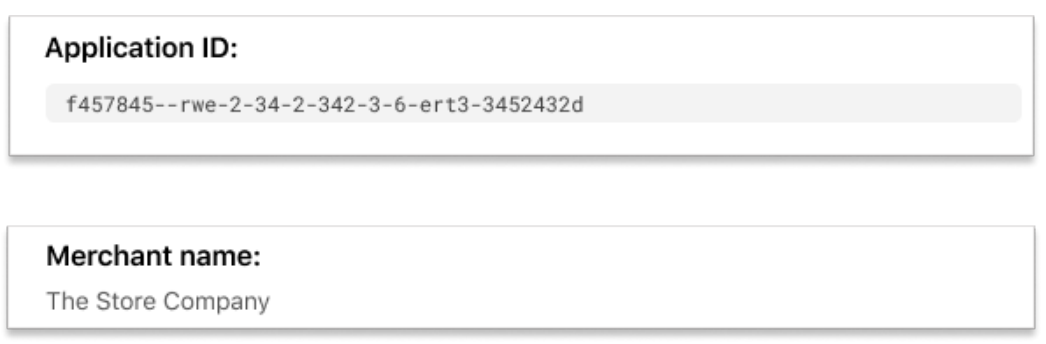
Application ID & Merchant Name
You can use the Inspector Tool to check the Application ID (App ID) used to load the Bambuser Chat on your website. This can be used to ensure the correct Staging or Production App ID has been used to launch Bambuser Chat.
The Merchant Name, which corresponds to the Application ID, will be displayed. This provides additional confirmation that the correct application ID has been implemented.
If no App ID has been added, the message No Application ID found will display. If this happens it's a good idea to check that your team has deployed the correct App ID.
Your App IDs would have been sent to you when you began the setup process. If you are unsure what your App ID is, please get in touch with your Customer Success Manager.
Display Rules
The Display Rules section helps you understand whether or not the Bambuser Chat chat is displaying onyour online store. Getting a clear view of what rules are in place you can help you quickly understand if there is an issues as a result of unwanted rules being in place, or if Bambuser Chat is behaving as expected.

Display Rules indicate:
- if the store is open / closed
- if there are product experts online
- if all product experts are busy
- if the leads queue is full
- display rules (pages allowed or denied to display the Bambuser Chat)
- Geo-restrictions (if enabled)
Any rules that allow Bambuser Chat chat to display are shown in green. Rules that do not allow the chat to display are shown in red.
Shopper Events
The Events section lists all of the recorded since a shopper started their browsing session.
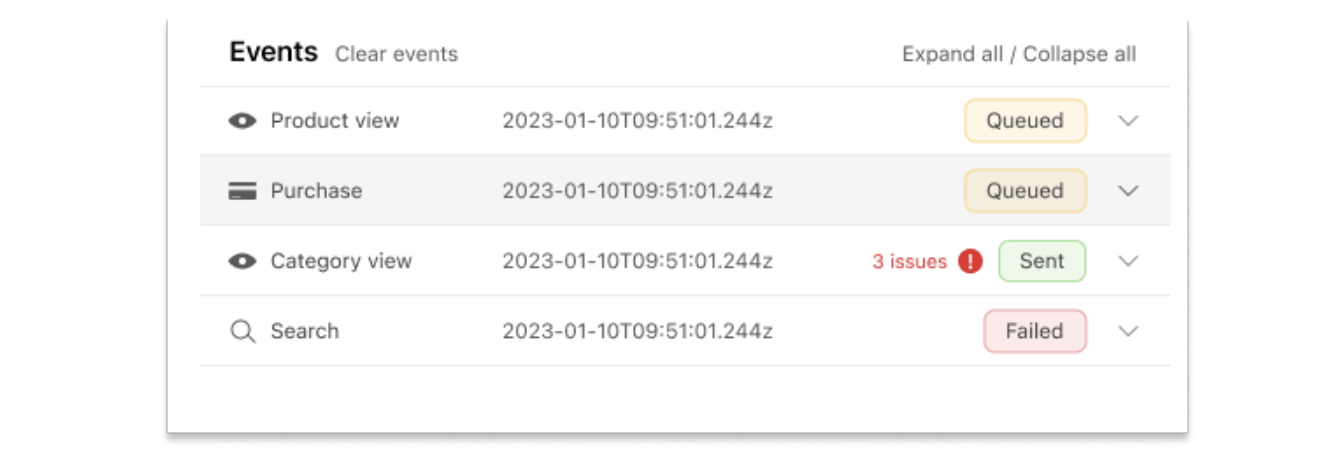
Results Panel
There are 3 columns in the results panel:
| Events | Timestamp | Status |
|---|---|---|
The event name. If the event name is not supported, Invalid will display instead. | The timestamp when the event was created. | The status of the Track Shopper Event. |
Statuses
If issues are detected with an event, the Inspector Tool will indicate this before the status value.
There are 4 possible statuses:
| Status | About |
|---|---|
| Queued | The events that have been recorded in the browsers local storage but not yet sent to Hero A This happens when the visitor is browsing the website but has not yet started a chat. If the shopper never starts a chat, these events will no be sent to Bambuser Chat. Once a chat has started the Product Expert will be able to see an other items the customer had been looking at to better understand browsing habits. |
| In Progress | The event is being sent to the Hero API. This is only a temporary status whilst the events are be sent to Bambuser Chat. |
| Sent | Events that were successfully sent to the Hero API |
| Failed | Events for which the Hero API responded with a error. |
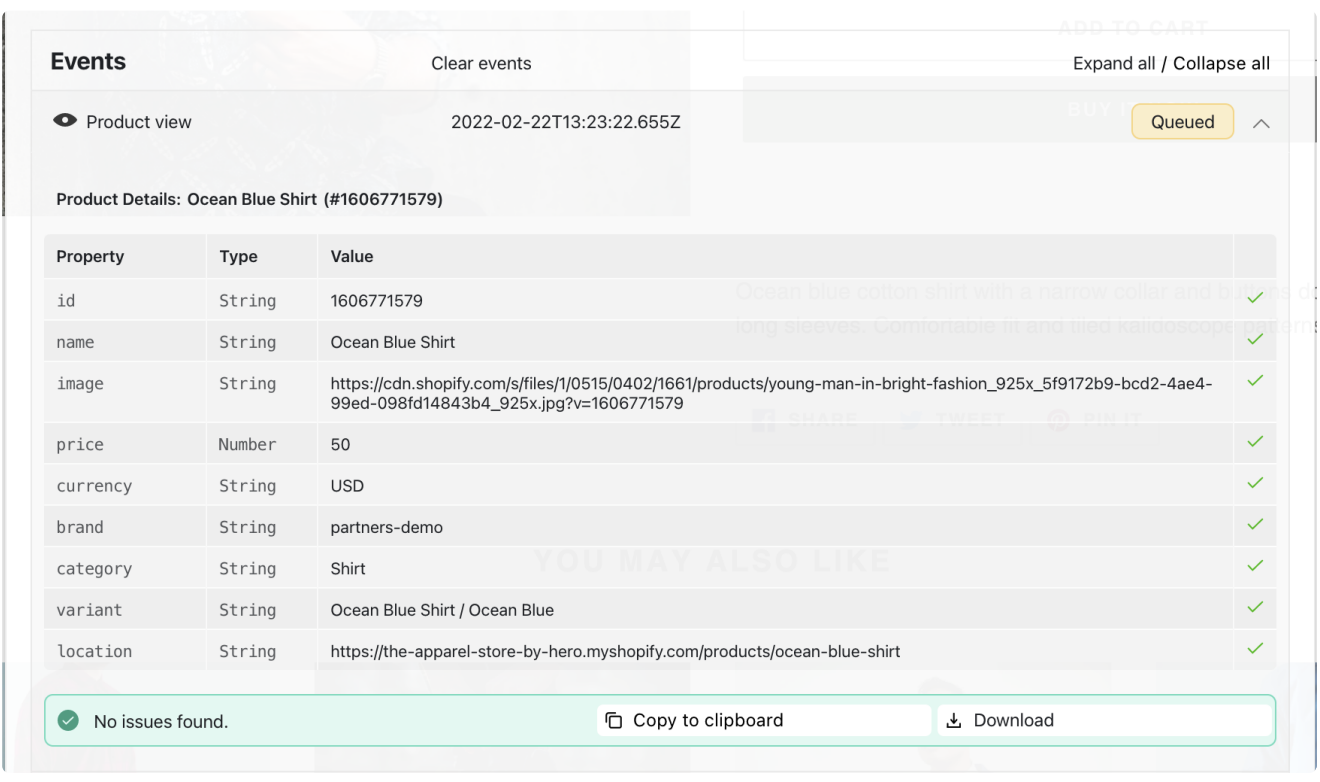
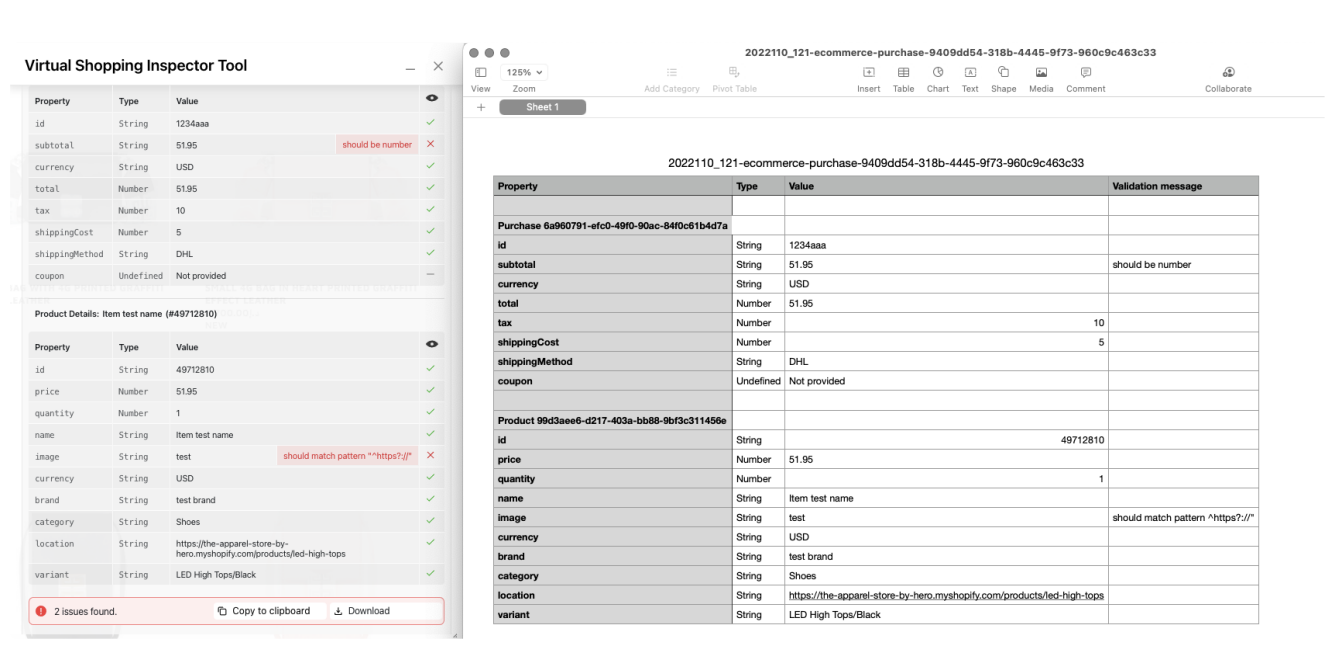
Payload Details Depending on the event type, the details of an event can have multiple subsections. For example, a Product View event will have a Product array subsection, and a Purchase event will have both a Purchase Array and Product array subsection.
Each subsection has 4 columns:
| Field | About |
|---|---|
| Property | The name of the field from the payload. |
| Type | The type of the value of the property. |
| Value | The value of the property. If there is no value for property a message “BLANK” will be displayed. |
| The validation result for the property | This can be one of the following icons: Green tick The property is valid, Red X The property is invalid, Dash This is an optional property for which a value was not provided |
Here is an example of a valid payload without issues:
Copy or Download Event Payload
Clicking the Copy to clipboard button will copy the event payload as a JSON to the clipboard such that it can be pasted into an email/ticket/document.
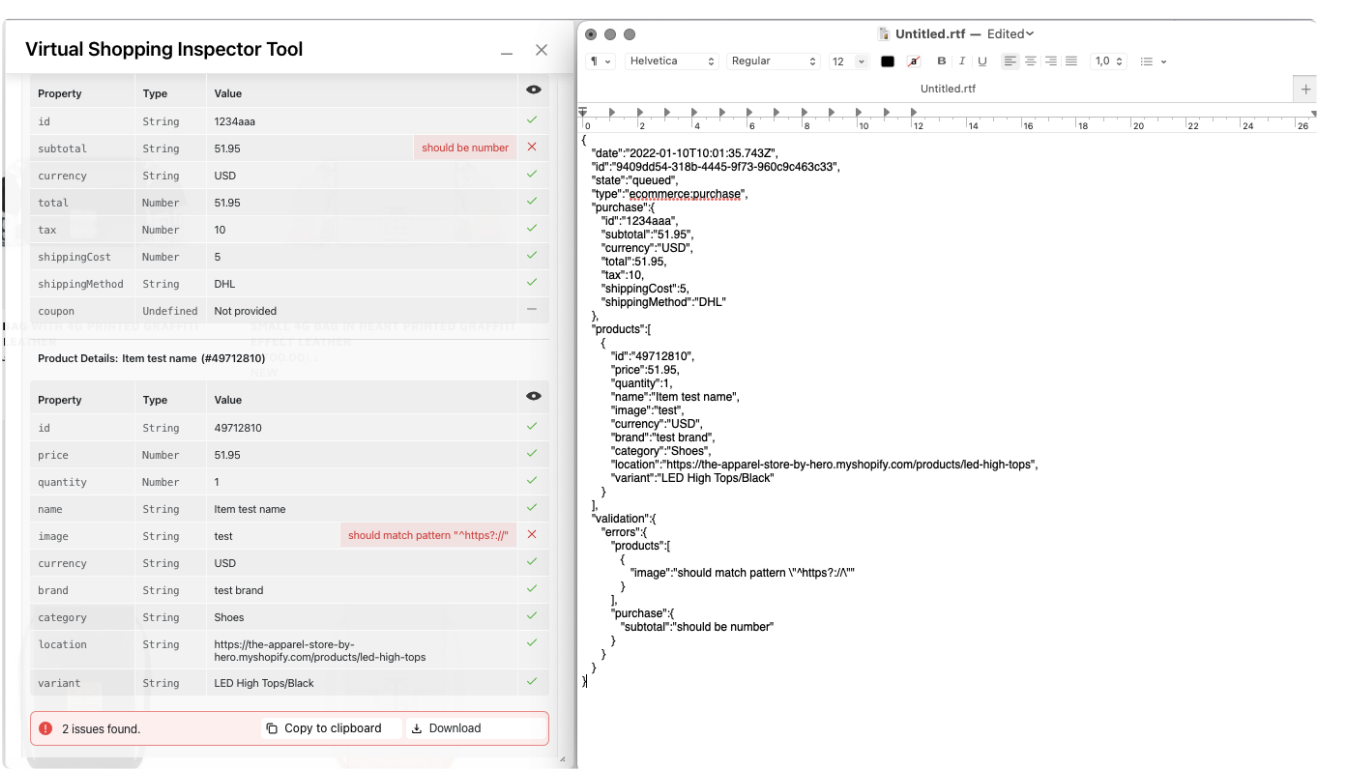
Download Report
Clicking the Download button will save a CSV file with the event details and validation messages so that the report can be easily shared via email/ticket/document.
Department Filtering configuration
Department Filtering can allow you to restrict which departments are shown to the shopper on the chat. The filtering can be applied to single or more pages throughout your site.
If no Department Filtering is applied on the page, the Inspector Tool will indicate this.

Should you have Departments filtered on a particular page the Inspector Tool will display the configuration and constraints. Click on the department to see the constraint details.
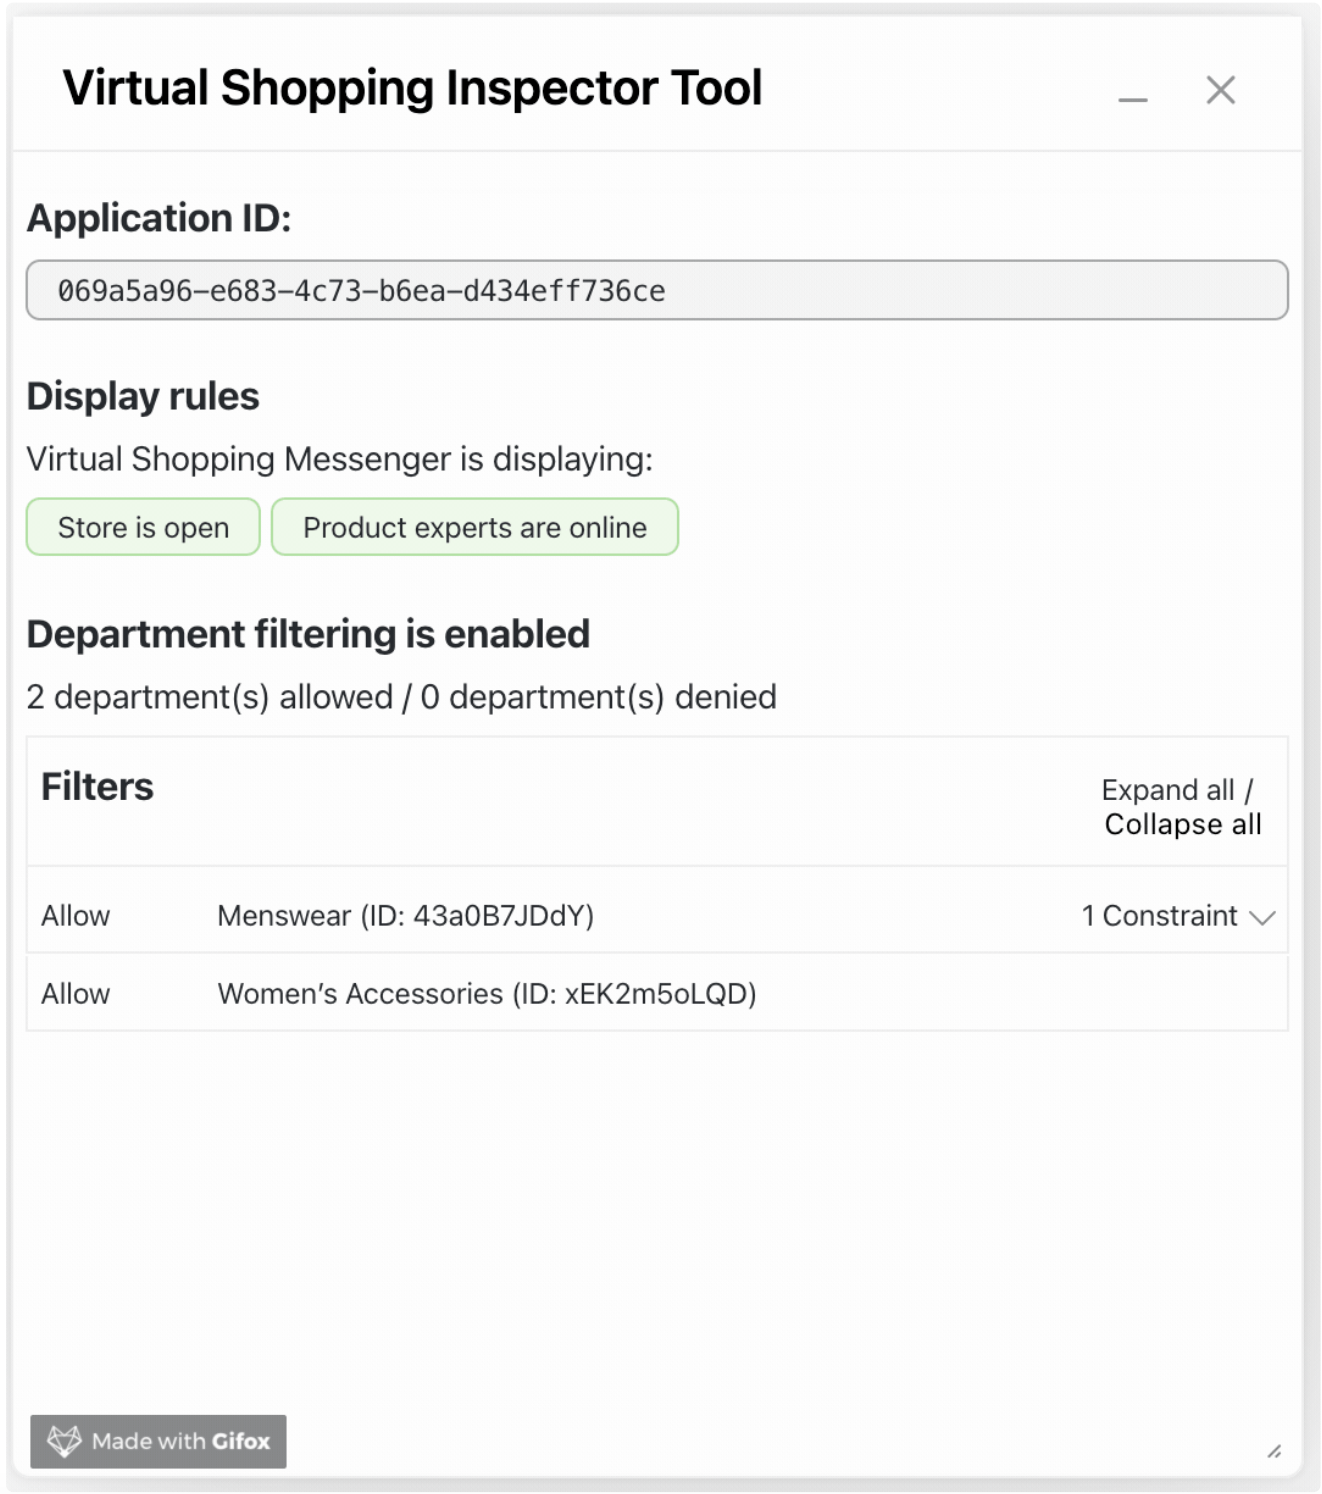
Any errors that are detected will be described. Should you require further support with any errors please reach out to your Customer Success Manager.

Other Information
There is additional information that Inspector Tool can show you if these are set up. This may be useful when completing the testing of Virtual Shopping, or indeed to check the setup at any time.
Need Selectors are prompted to the shopper in the on-site chat to guide them through the correct chat journey. Inspector Tool will display the Need Selectors configured for your account in the order shown to the shopper.
Currently, the Need Selectors cannot be managed in the Dashboard. To request any changes, please contact your Customer Success Manager.

Customer Service
Should the Customer Service link be enabled, the full URL can be seen. The link is also clickable to test if the correct URL has been set in the dashboard.
If the link does require updating this can easily be done in the dashboard, or alternatively please contact your Customer Success Manager.
