Integrate Chat on Shopify
This guide assumes that your site is based on Shopify. The difficulty of integration of the Chat on your Shopify website may vary depending on the used theme.
The code examples provided are sample implementations and may need to be adjusted based on your specific Shopify theme and setup.
Installation
1. Add the loader.js in the header with the right applicationID
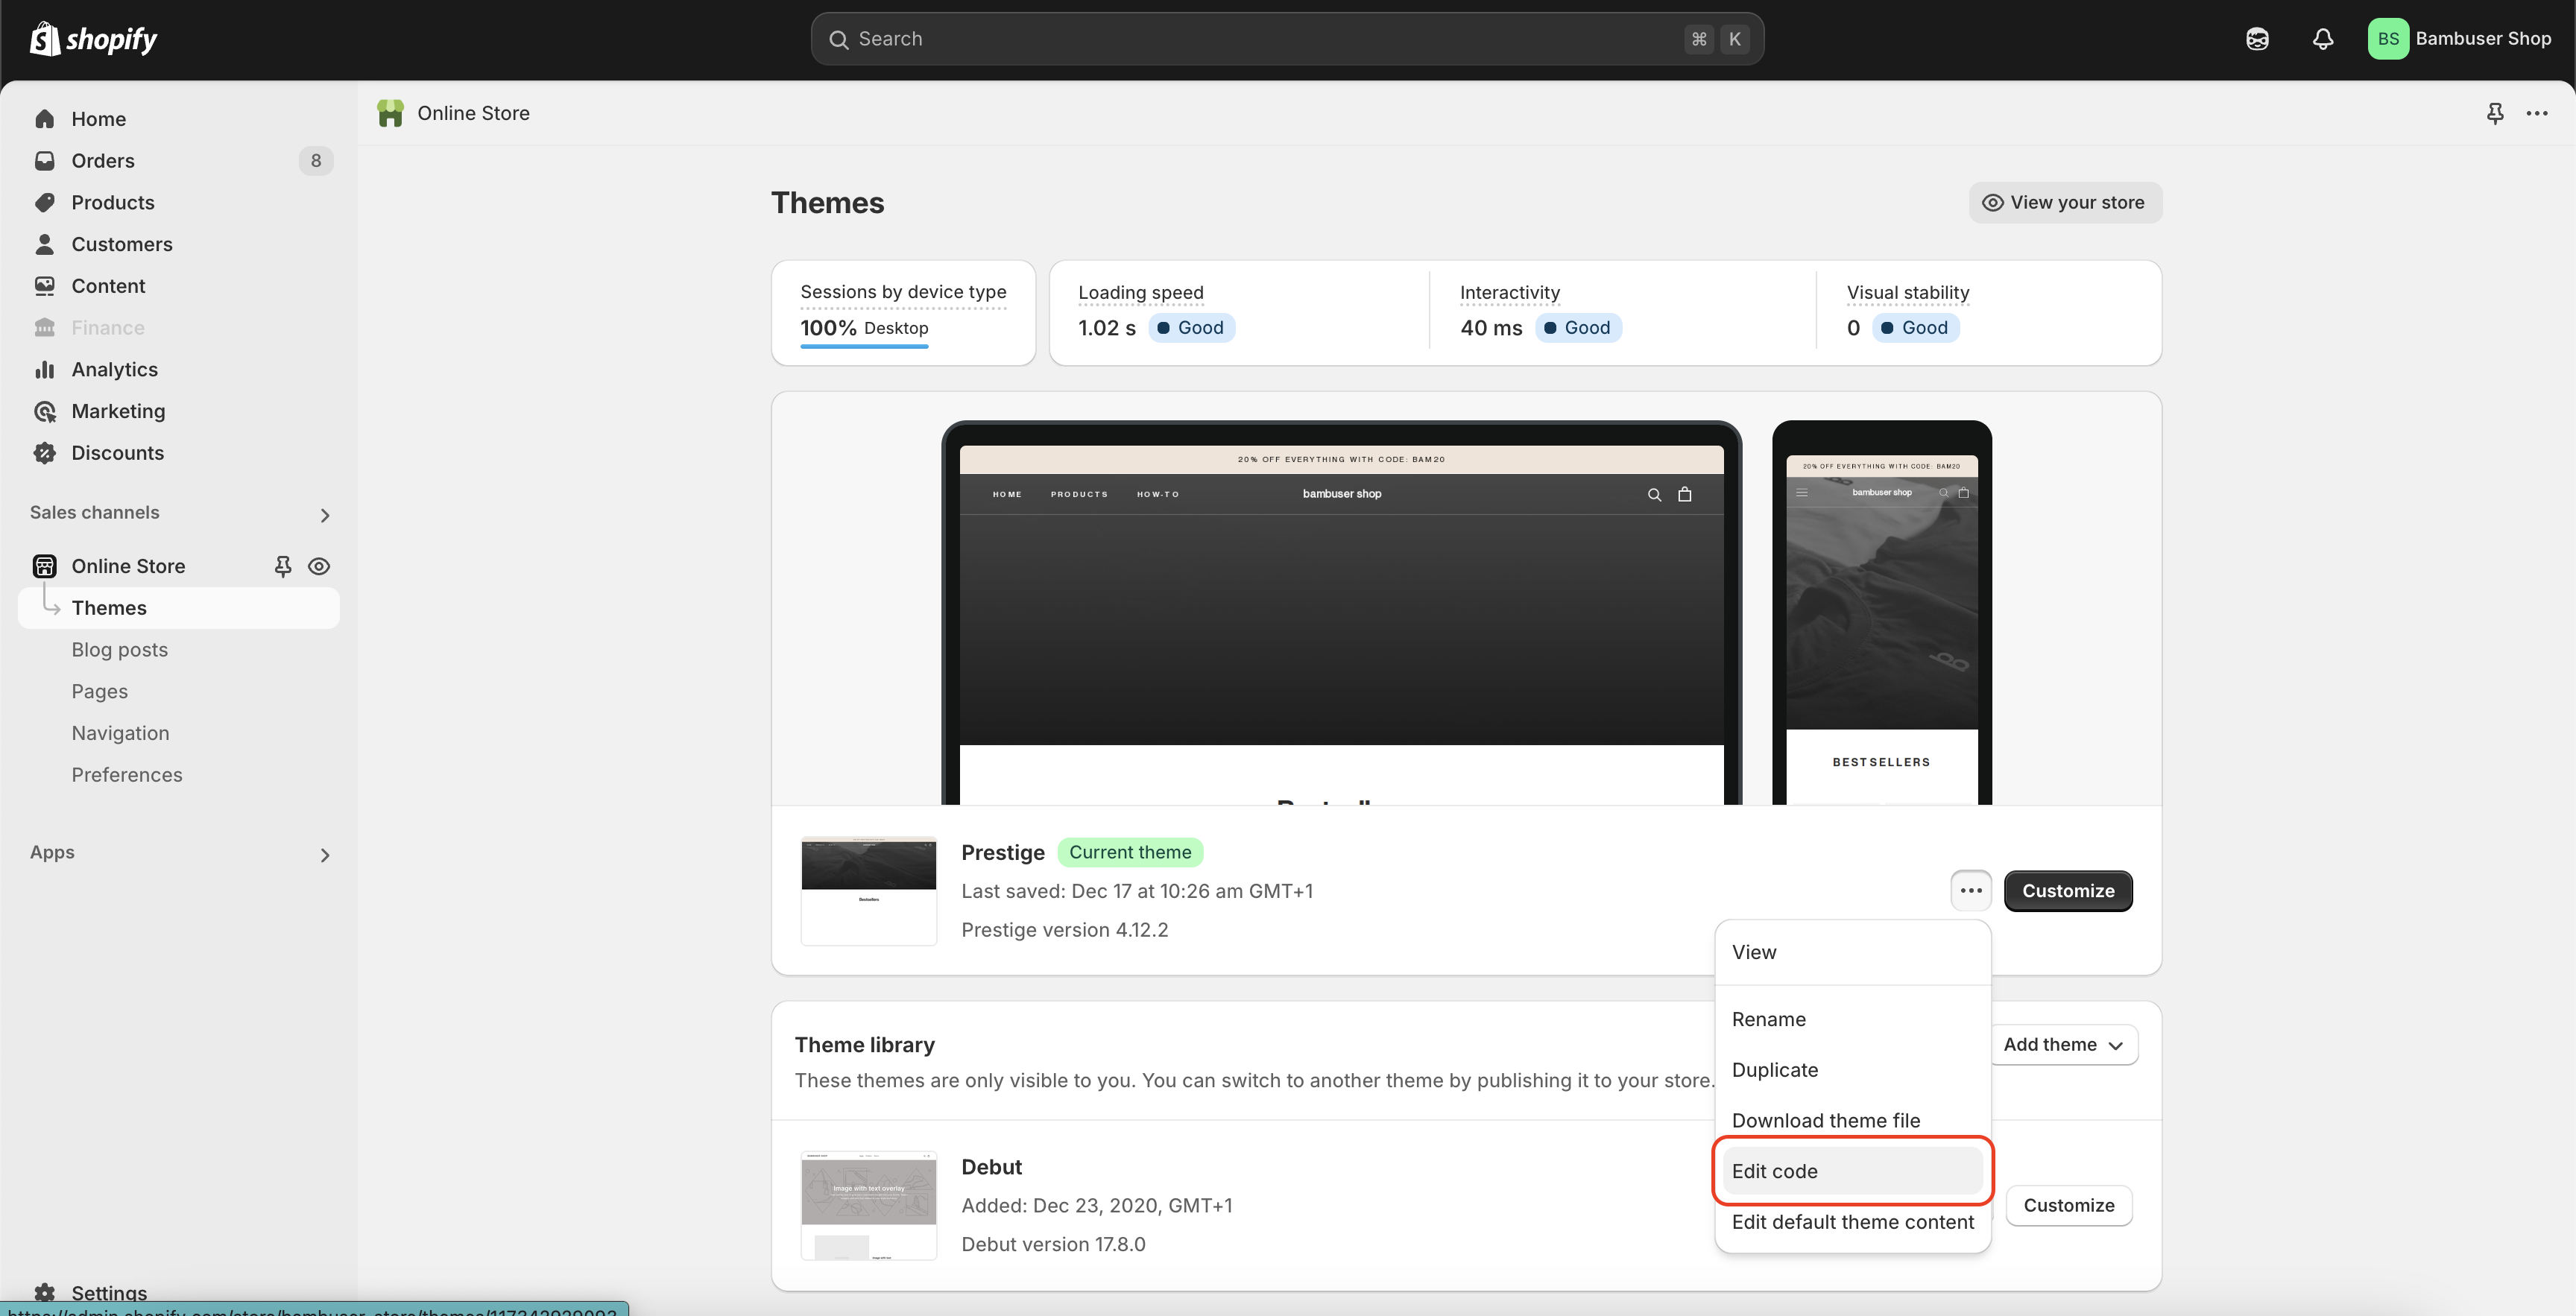
1.1 Navigate to Edit Code from your current theme
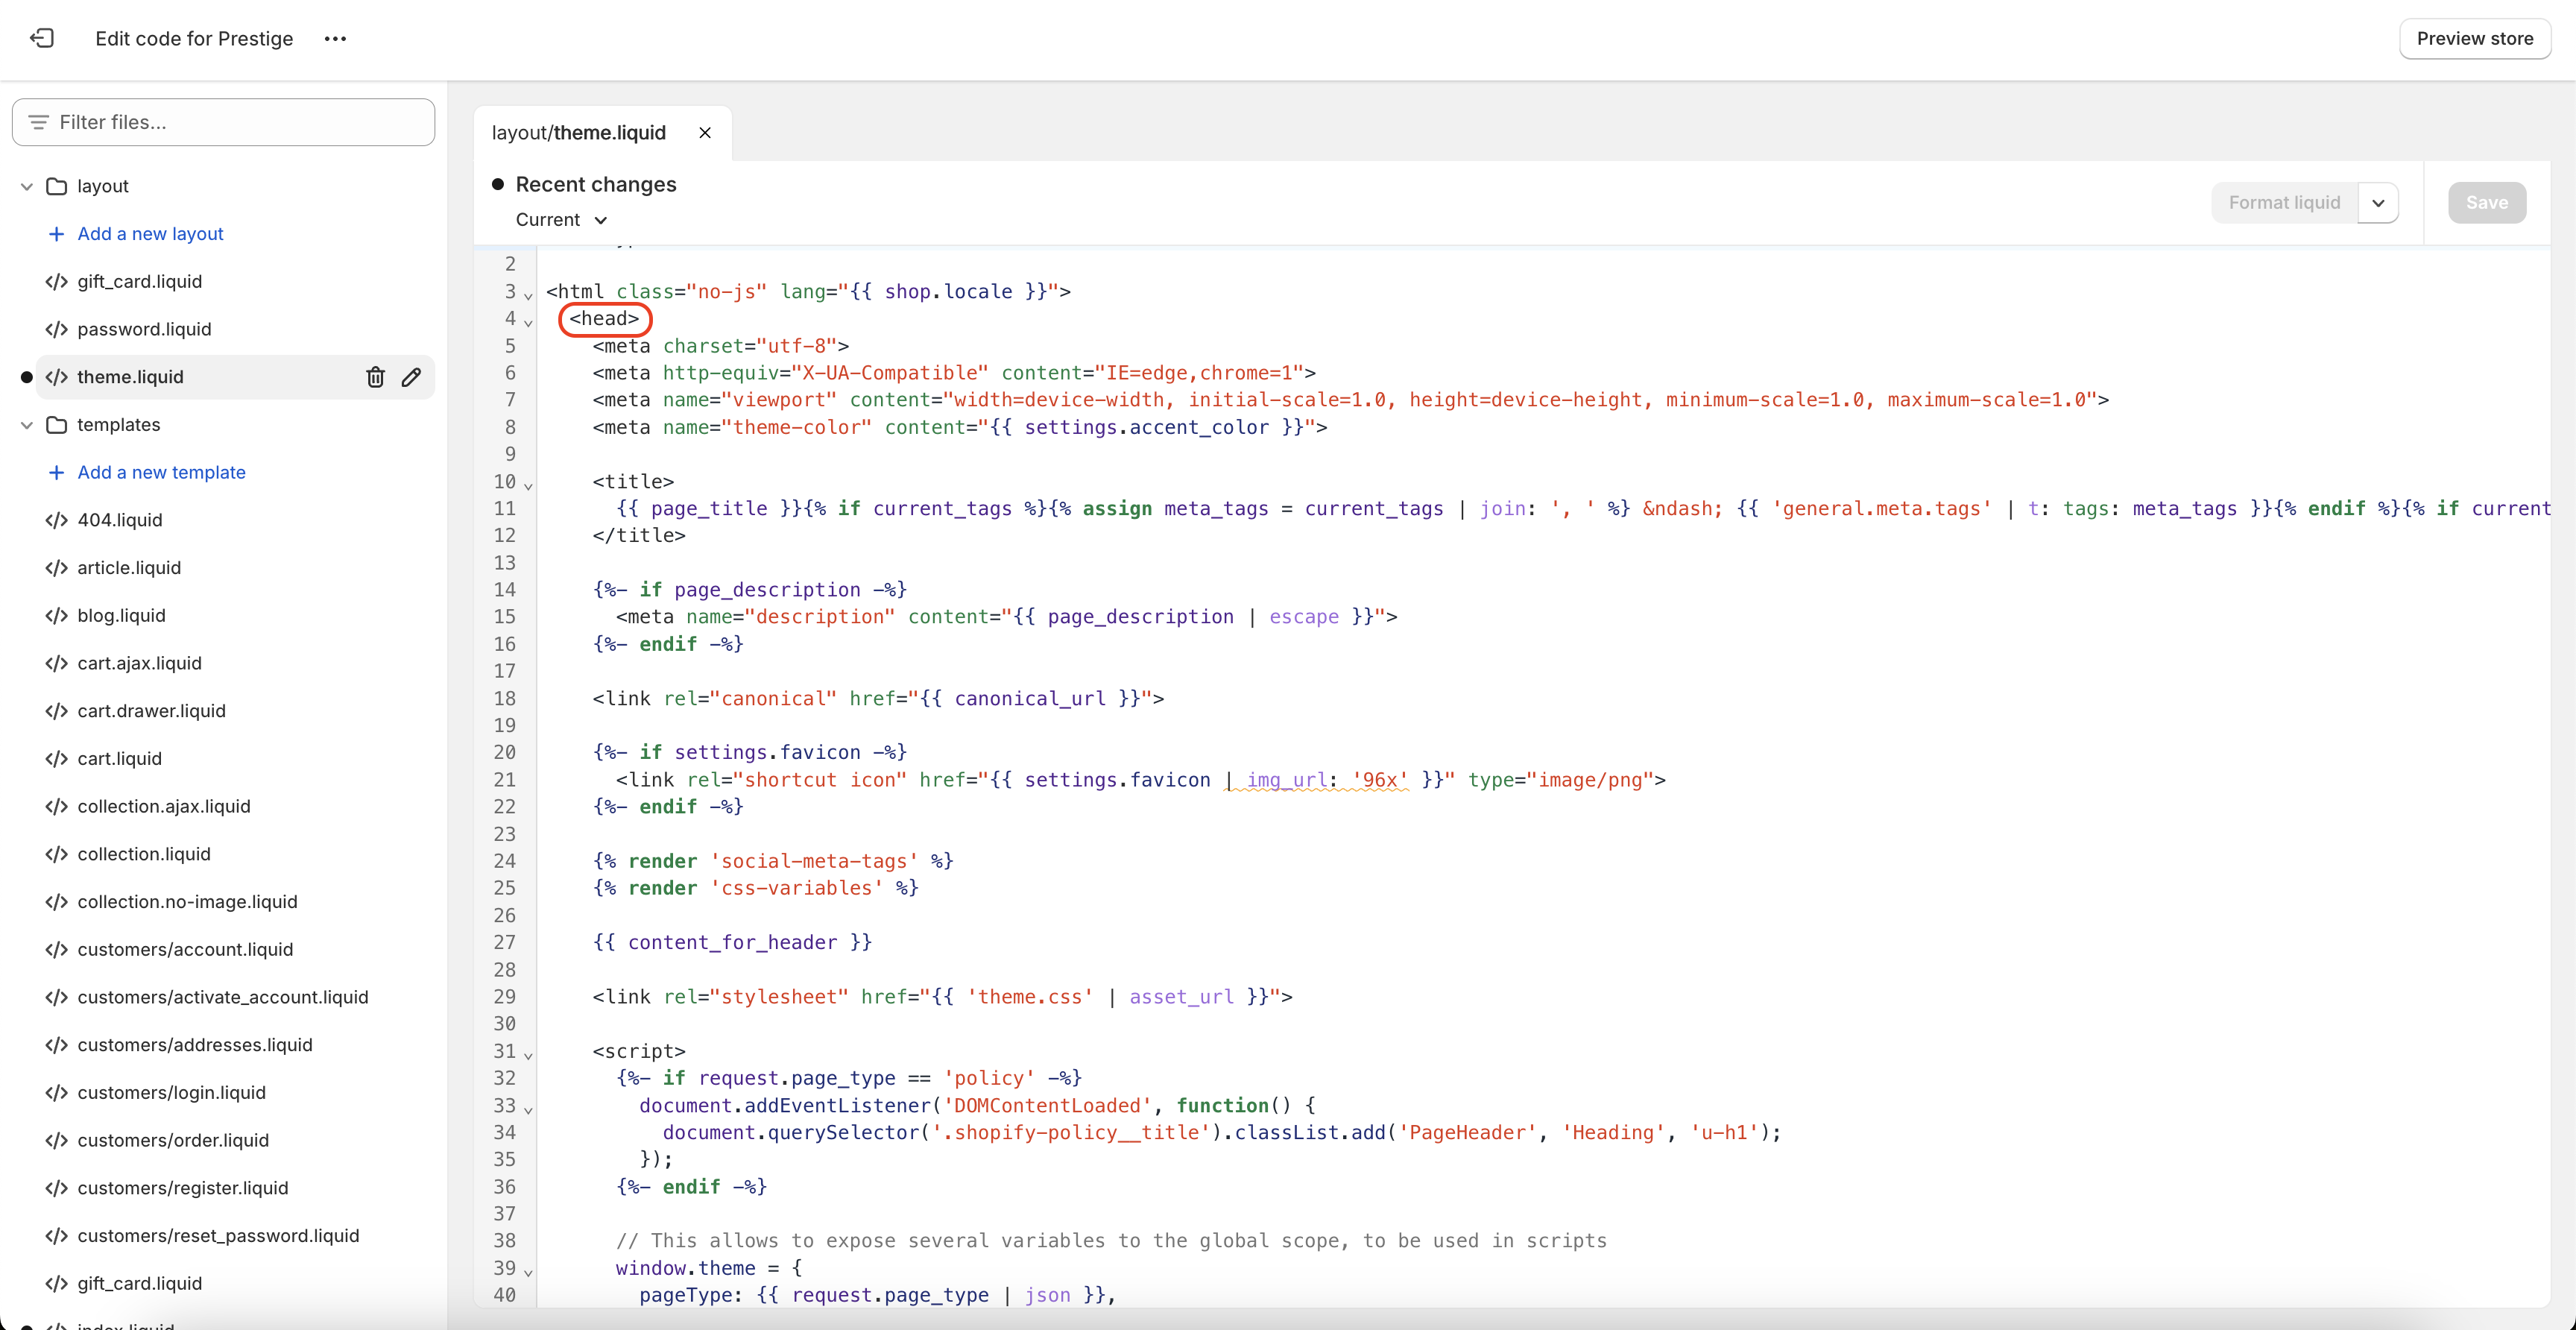
1.2 Locate the <head> section of your Shopify theme liquid file
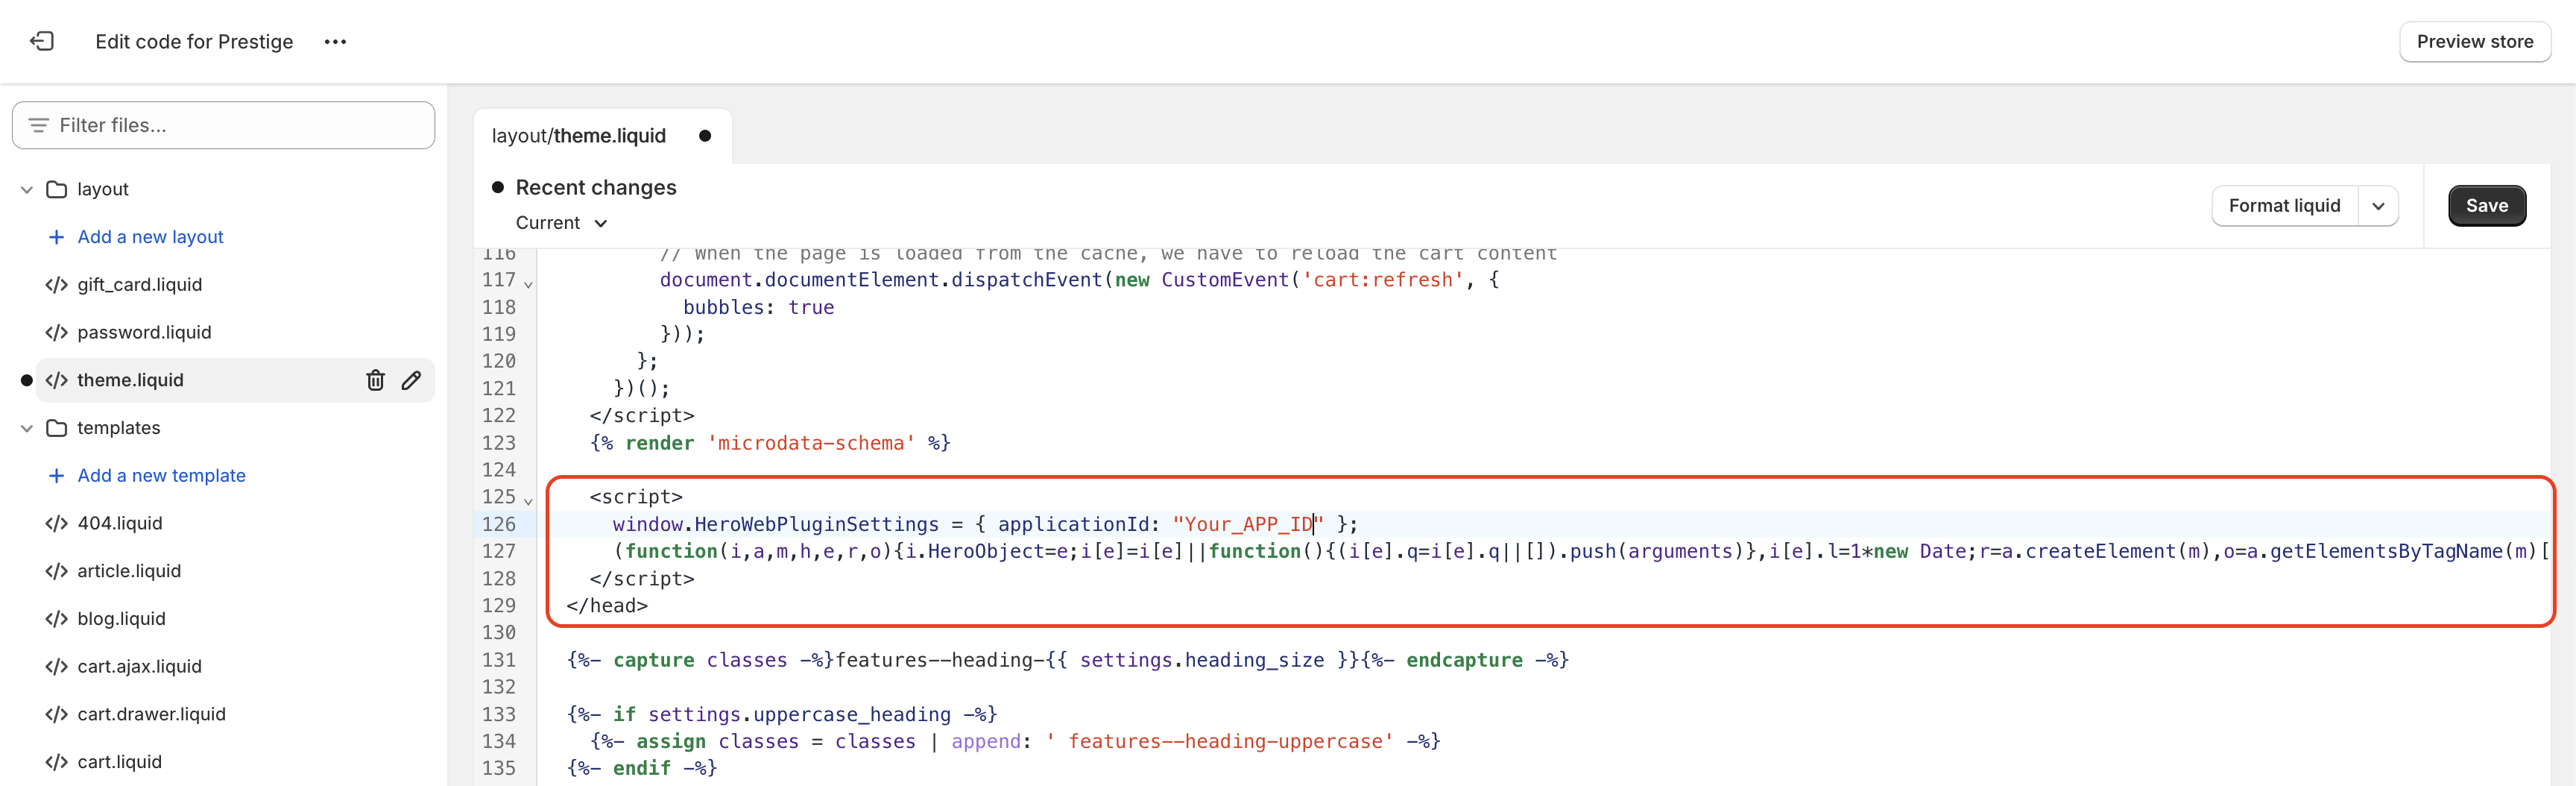
1.3 Add the loader.js script tag inside the <head> section
<script>
  window.HeroWebPluginSettings = { applicationId: "Your_Application_ID" };
  (function (i, a, m, h, e, r, o) {
    i.HeroObject = e;
    (i[e] =
      i[e] ||
      function () {
        (i[e].q = i[e].q || []).push(arguments);
      }),
      (i[e].l = 1 * new Date());
    (r = a.createElement(m)), (o = a.getElementsByTagName(m)[0]);
    r.async = 1;
    r.src = h;
    o.parentNode.insertBefore(r, o);
  })(window, document, "script", "https://cdn.chat.bambuser.com/loader.js", "hero");
</script>
1.4 Replace "Your_Application_ID" with given Application ID
The Application ID can be find in the Bam Hub -> Settings -> On-Site Chat -> Application ID
Here’s a full example of how this might look in your theme.liquid file:
2. Implement tracking events using Shopify Pixels
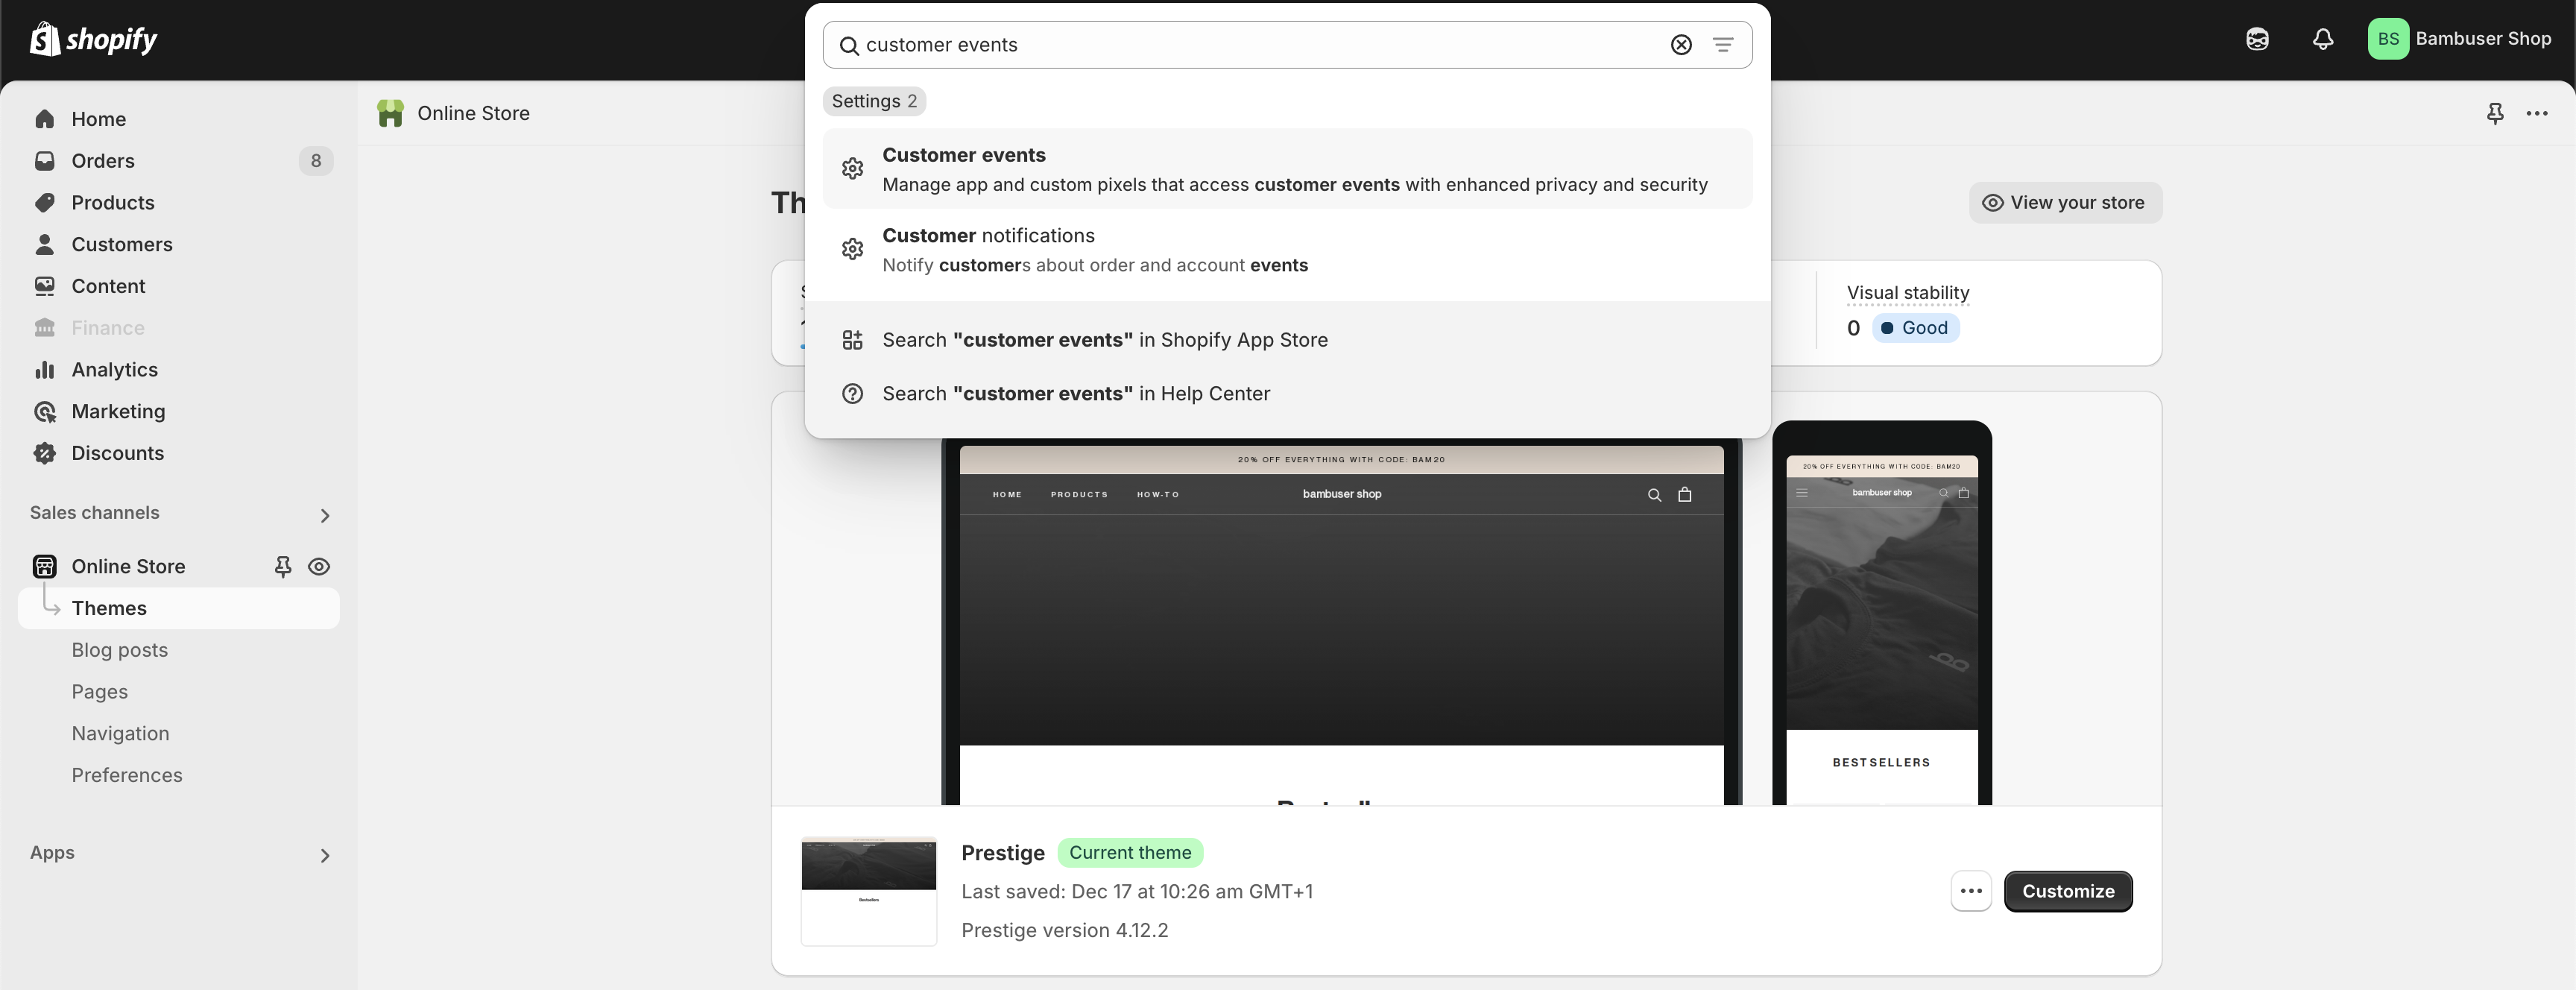
1. Navigate to the Customer events section from your Shopify admin
2. Create a new custom pixel
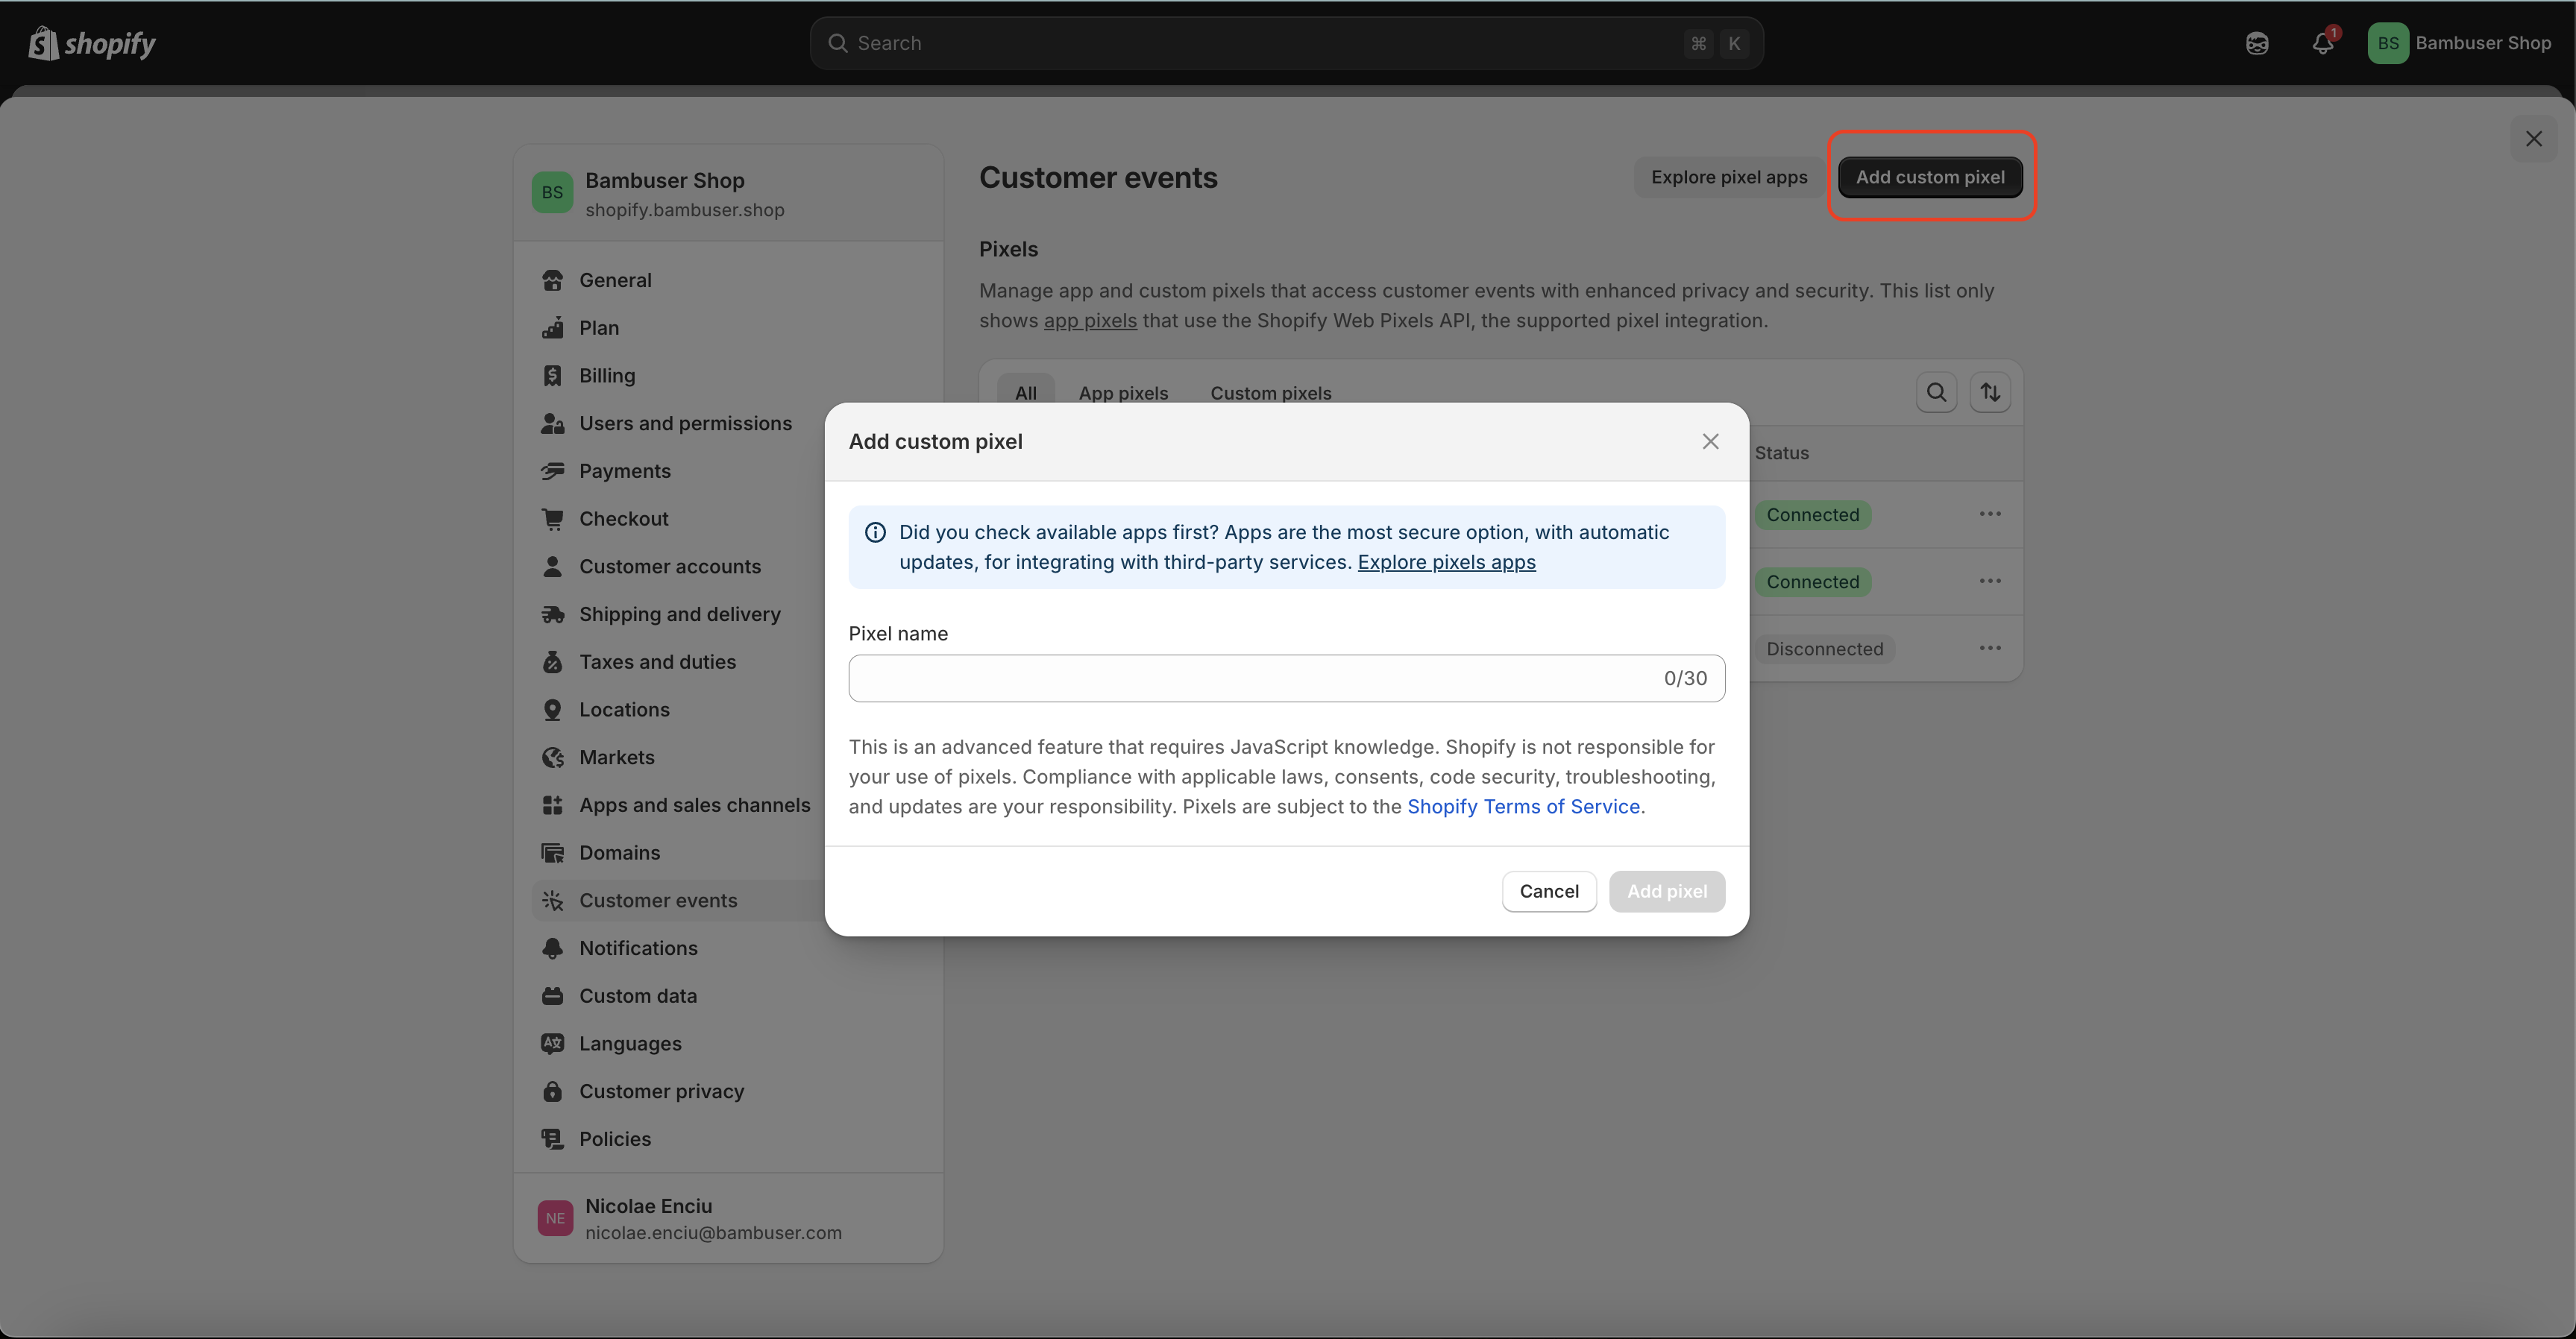
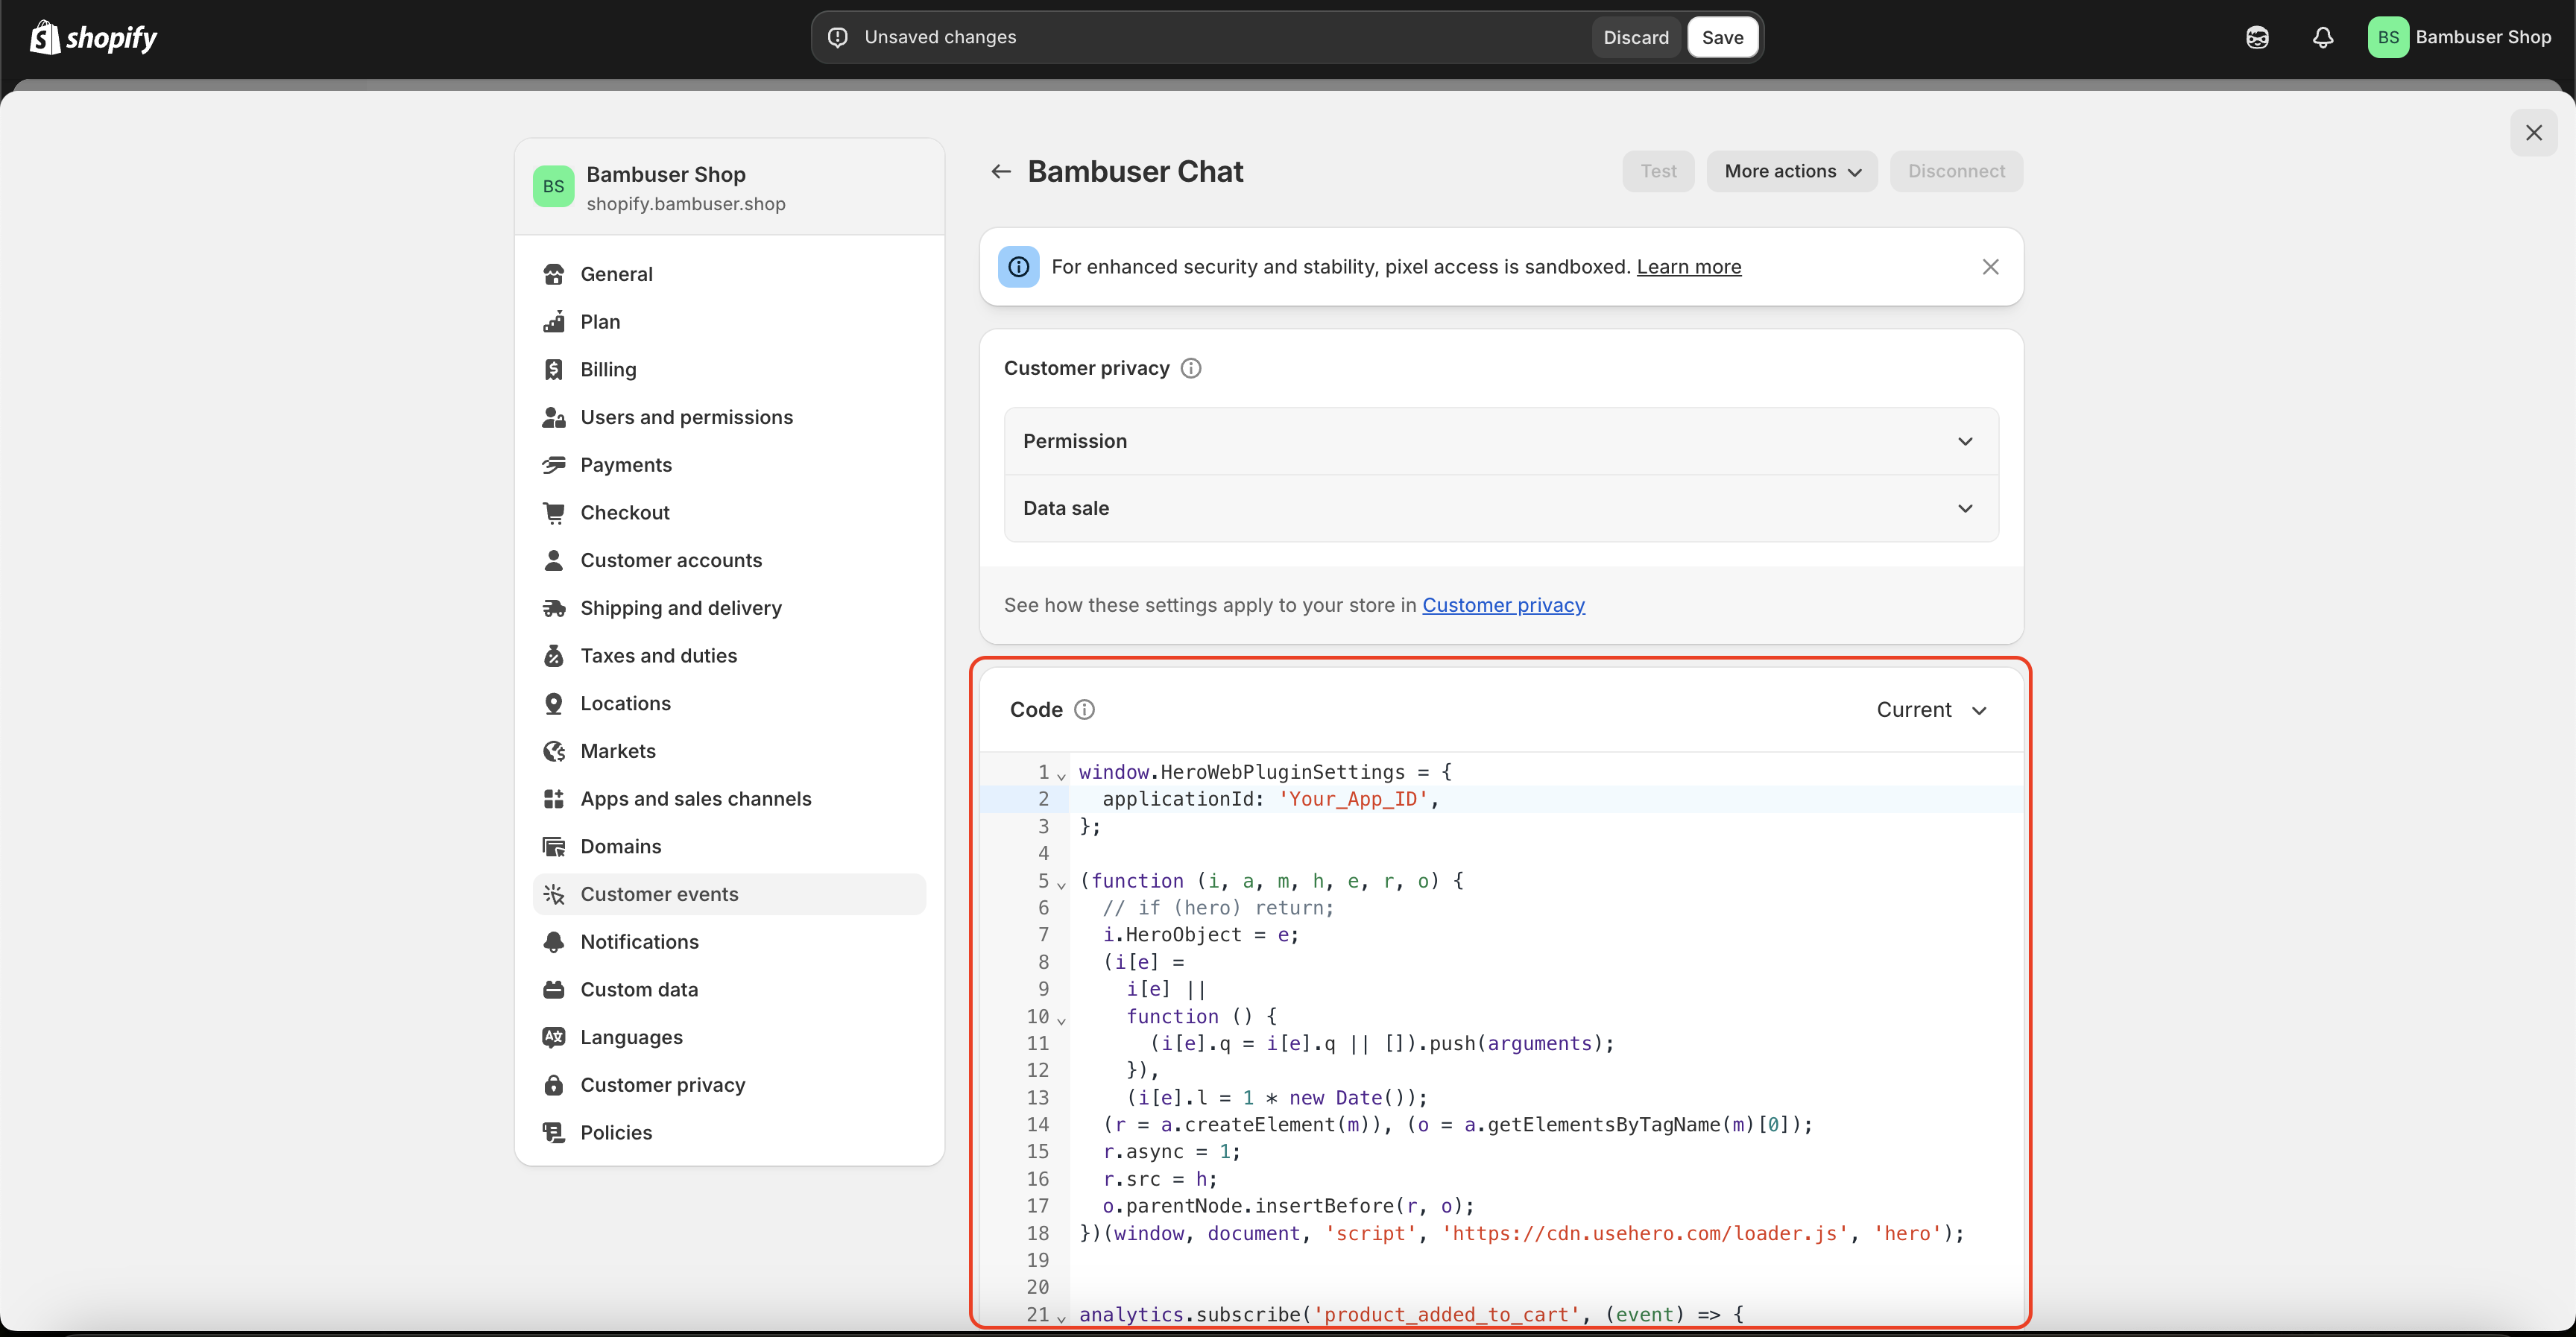
3. Add the pixel code
3.1. Copy/paste the sample code below and place it into your pixel code (remove any existing code). It includes
- Initializing the Chat Instance ('loader.js')
- Subscription to all events (product view, category view, search, and cart events)
3.2. Replace the applicationId with your Application ID
3.3. Save and Connect the pixel
Make sure that the 'Product view' and 'Purchase' Shopper Event tracking are set up at launch. Bambuser Chat will not work properly without these events in place.
The Application ID can be found in the Bam Hub -> Settings -> On-Site Chat -> Application ID
The code example provided below is a sample implementation and may need to be adjusted based on your specific Shopify setup, event data structure, and available variables.
window.HeroWebPluginSettings = {
  applicationId: "Your_Application_ID",
  trackingOnlyMode: true // puts the loader.js script into a restricted state.
  // In this mode, it will only listen for hero('track', ...) calls.
  // It will not show any UI or react to any other hero() calls.
  // This is intended for use in tracking-only contexts, such as Shopify Web Pixels iframe.
};

(function (i, a, m, h, e, r, o) {
  i.HeroObject = e;
  (i[e] =
    i[e] ||
    function () {
      (i[e].q = i[e].q || []).push(arguments);
    }),
    (i[e].l = 1 * new Date());
  (r = a.createElement(m)), (o = a.getElementsByTagName(m)[0]);
  r.async = 1;
  r.src = h;
  o.parentNode.insertBefore(r, o);
})(
  window,
  document,
  'script',
  'https://cdn.chat.bambuser.com/loader.js',
  'hero'
);

analytics.subscribe('product_viewed', (event) => {
  const productVariant = event.data.productVariant;
  const product = productVariant?.product;

  if (!product || !productVariant) {
    console.info(
      'Bam Chat: Skip ecommerce:detail event tracking. Product data is missing in the event payload'
    );
    return;
  }

  // Construct the product data in Bambuser format
  const productData = {
    id: product?.id || productVariant?.id || productVariant?.sku || '',
    name: product?.title || productVariant?.title || '',
    image: productVariant?.image?.src || '',
    price: parseFloat(productVariant?.price?.amount) || 0,
    currency: productVariant?.price?.currencyCode || '',
    brand: product?.vendor || '',
    category: product?.type || '',
    location: product?.url || '',
  };
  hero('track', {
    type: 'ecommerce:detail',
    products: [productData],
  });
});

analytics.subscribe('collection_viewed', (event) => {
  const collection = event.data.collection;
  const collectionTitle = collection.title;

  hero('track', {
    type: 'event',
    action: 'category-view',
    value: collectionTitle,
    location: event.context.window.location.href,
  });
});

analytics.subscribe('search_submitted', (event) => {
  const searchResult = event.data.searchResult;
  const searchQuery = searchResult.query;

  hero('track', {
    type: 'event',
    action: 'search',
    value: searchQuery,
    location: event.context.window.location.href,
  });
});

analytics.subscribe('product_added_to_cart', (event) => {
  const cartLine = event.data.cartLine;

  // Example for sending event to third party server
  hero('track', {
    type: 'ecommerce:add',
    products: [
      {
        id: cartLine.merchandise.product.id,
        name: cartLine.merchandise.product.title,
        image: cartLine.merchandise.image.src,
        quantity: cartLine.quantity,
        currency: cartLine.merchandise.price.currencyCode,
        brand: cartLine.merchandise.product.vendor,
        price: cartLine.merchandise.price.amount,
        category: cartLine.merchandise.product.type,
        variant: cartLine.merchandise.title,
        location: event.context.document.location.href,
      },
    ],
  });
});

analytics.subscribe('product_removed_from_cart', (event) => {
  const cartLine = event.data.cartLine;

  // Example for sending event to third party server
  hero('track', {
    type: 'ecommerce:remove',
    products: [
      {
        id: cartLine.merchandise.product.id,
        name: cartLine.merchandise.product.title,
        image: cartLine.merchandise.image.src,
        quantity: cartLine.quantity,
        currency: cartLine.merchandise.price.currencyCode,
        brand: cartLine.merchandise.product.vendor,
        price: cartLine.merchandise.price.amount,
        category: cartLine.merchandise.product.type,
        variant: cartLine.merchandise.title,
        location: event.context.document.location.href,
      },
    ],
  });
});

analytics.subscribe('checkout_completed', (event) => {
  const checkout = event.data.checkout;
  let products = [];
  for (const lineItem of checkout.lineItems) {
    console.log(lineItem);
    products.push({
      id: lineItem.variant.id,
      quantity: lineItem.quantity,
      name: lineItem.title,
      image: lineItem.variant.image.src,
      price: lineItem.variant.price.amount,
      currency: checkout.currencyCode,
      location: lineItem.variant.product.url,
    });
  }

  hero('track', {
    type: 'ecommerce:purchase',
    purchase: {
      currency: checkout.currencyCode,
      id: checkout.order.id,
      total: checkout.totalPrice.amount,
      shippingCost: checkout.shippingLine.price.amount,
      shippingMethod: '',
      subtotal: checkout.subtotalPrice.amount,
      tax: checkout.totalTax.amount,
      coupon: '',
    },
    products: products,
  });
});
Here's a full example of how this might look custom pixel file:
3. Test the integration
The Inspector Tool does not work on Shopify websites. Please use alternative testing methods such as checking the browser console for errors, verifying that events are being sent, and testing the chat functionality directly.
You need to have an actual chat session active to see tracking events in the network tab. Make sure the chat widget is visible and a chat conversation has been initiated before checking for tracking events.
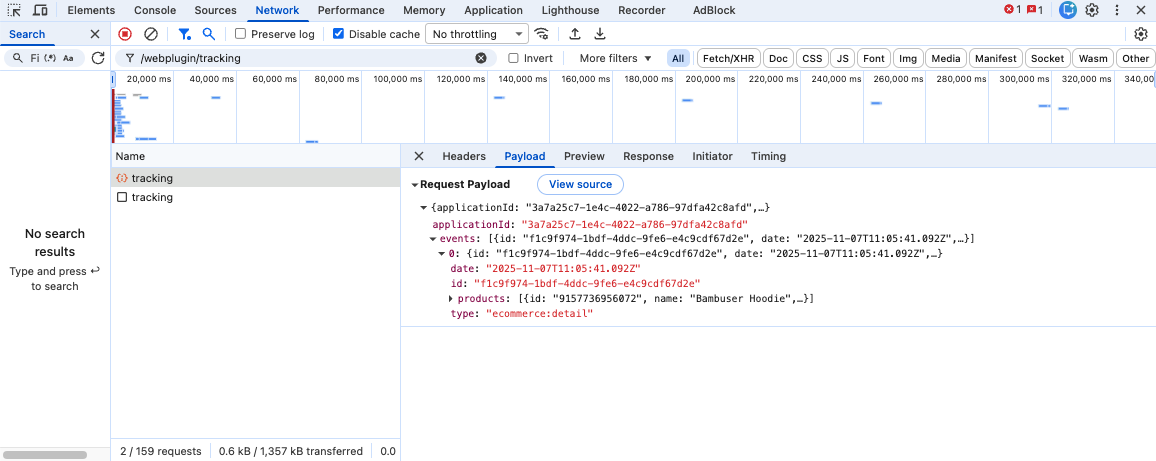
How to verify events are being sent:
- Open your browser's Developer Tools (Right-click on page → Inspect)
- Navigate to the Network tab
- Filter for "/webplugin/tracking" in the network filter/search box
- Perform actions on your website (view products, add to cart, etc.)
- You should see network requests containing "/webplugin/tracking" that indicate events are being sent
4. Integrate the Product Feed
After all the settings from above are done, it remains to ingest your Product Feed into Bambuser system.
Follow this documentation