How To Integrate Appointedd Solution As a Booking System
- API Key To create an API key, follow Generating API Keys. Required scope is
APPOINTED_BOOKINGS_WEBHOOK. This will enable you to make http requests to our REST API.
Step 1: Configure your Appointedd account
If you're new to Appointedd, you can find a collection of helpful articles here on how to get start with Appointedd.
In order to utilize the Appointedd x Bambuser integration, we recommend the below configuration as a minimum:
Create resources in appointedd
Resources are what your Bambuser Agent's are going to connect to. Therefore in the context of Bambuser we recommend that you have one resource per agent.
It is also possible for two or more agents to share the same resource, but then they will have to manually communicate with each other who will attend each meeting as they will all see the same meetings in the Bambuser Agent Tool.
Create services in appointedd
A Service is what your customers will book, for example "Virtual Consultation". For each service you need to assign resources that can provide the service. Appointedd will manage the availability and make sure that when customers book a service the booking will be assigned to one of the available resources within that service.
Microsite, popover or embed
Configure your microsite, popover or embedded widget to how you want it to look like. You can adjust these to suit your brand or existing website and then add them to your website and/or promote your new online booking tools.
Step 2: Customize the automated communications your customers receive
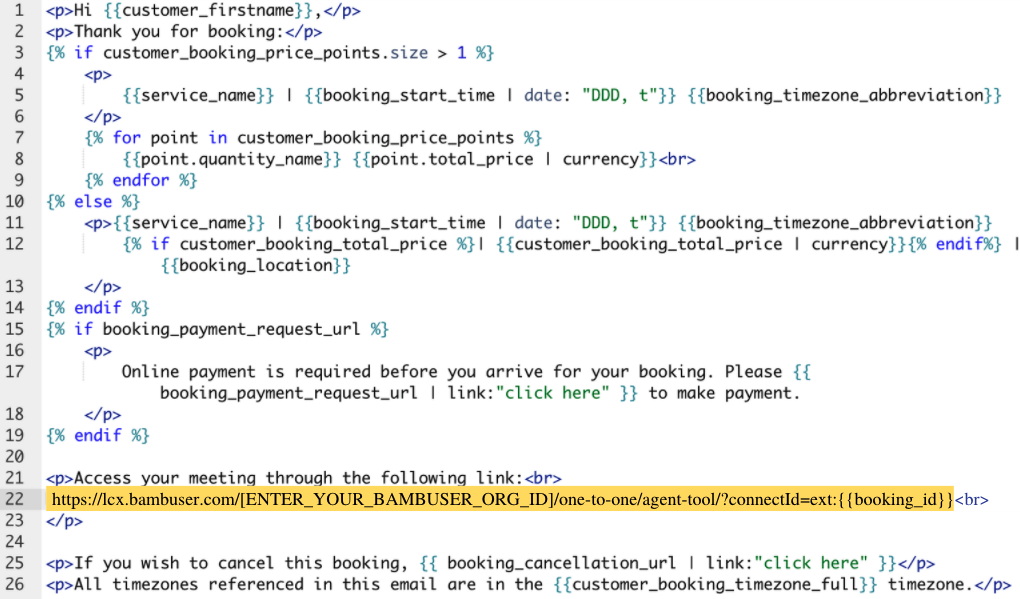
In the booking confirmation email you will need to include the unique Bambuser link with an Appointedd variable for customers to be redirected to your site where they will meet up with the booked resource.
You can set this up easily by utilizing the Advanced communication feature of Appointedd. We recommend including the joining URL in the confirmation modification & reminder emails.
Once you have Advanced communications turned on for each communication template you'd like to include the Bambuser link in, adjust the content as you'd like, and add the appropriate URL. This URL should be in the following format, and look something like this:
https://your-website/your-live-meeting-page/?bambuserConnectId=ext:{{booking_id}}
- Advanced Template
- Content itself
- Email example
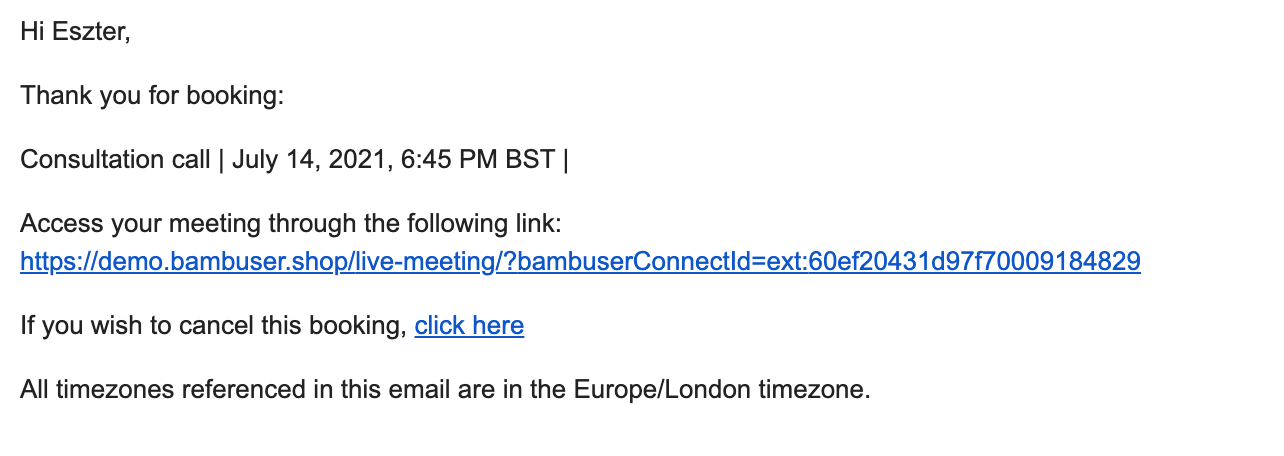
<p>Hi {{customer_firstname}},</p>
<p>Thank you for booking:</p>
<p>{{service_name}} | {{booking_start_time | date: "DDD, t"}} {{booking_timezone_abbreviation}}</p>
<p>Access your meeting through the following link:<br>
https://demo.bambuser.shop/live-meeting/?bambuserConnectId=ext:{{booking_id}}<br></p>
<p>If you wish to cancel this booking, {{ booking_cancellation_url | link:"click here" }}</p>
<p>All timezones referenced in this email are in the {{customer_booking_timezone_full}} timezone.</p>
Step 3: Customize the automated communications your resources receive
Your resources will be able to start the virtual meetings from Bambuser workspace, but if you'd like them to receive the joining URL in the resource confirmation email as well, please get in touch with team Appointedd to action this. They will need your resource/agent joining URL for this, which will follow the below format:
https://lcx.bambuser.com/[BAMBUSER_ORG_ID]/one-to-one/agent-tool/?connectId=ext:{{booking_id}}
Step 4: Sync Appointedd bookings into Bambuser
In order to ensure that all bookings created in your Appointedd account appear in your Bambuser workspace, you'll need to set up webhooks in Appointedd. You can learn more about how to set these up here.
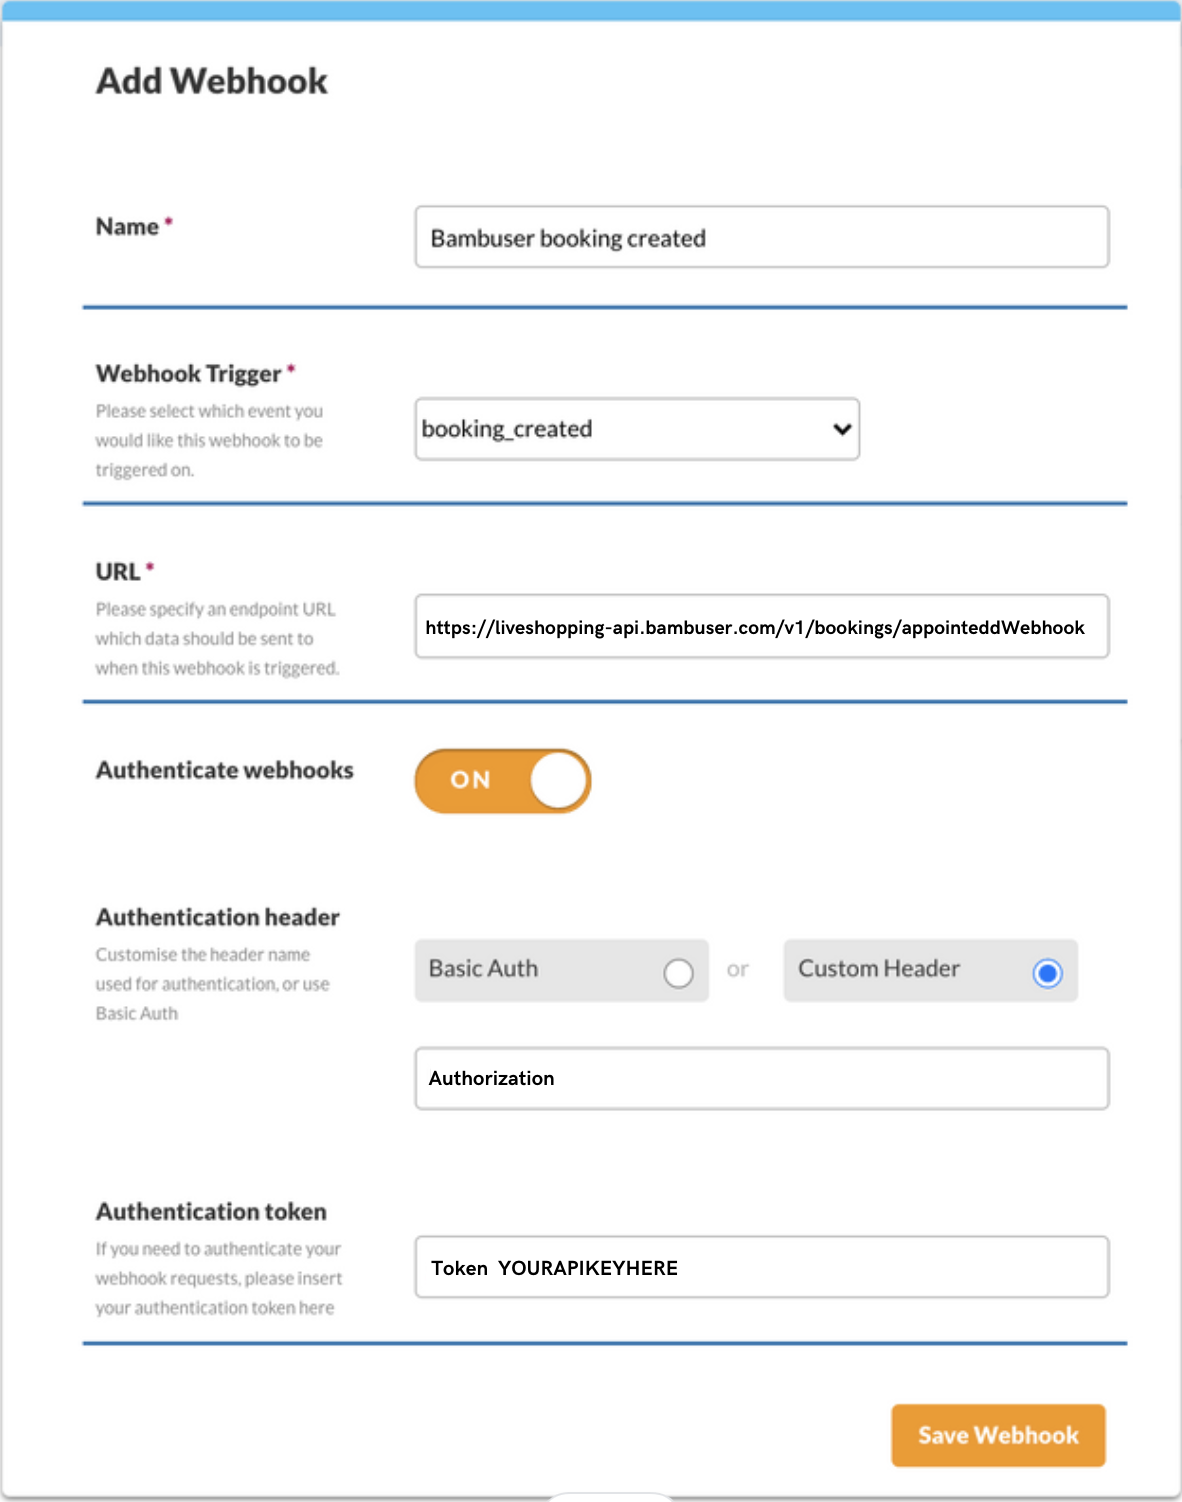
For this connection specifically, you'll need to create a booking_created, booking_updated and booking_cancelled webhook with the same settings:
- In your Appointedd account go to integrations > webhooks and click add webhook
- Name webhook to make it easily identify-able, this could be anything
- Select webhook trigger which will be
booking_created - Under URL, add the Bambuser API endpoint:
https://liveshopping-api.bambuser.com/v1/bookings/appointeddWebhook - Then add the authorization header with the API key you created. If needed, follow Generating API Keys. The required scope is
APPOINTED_BOOKINGS_WEBHOOK. - Repeat this process for
booking_updatedandbooking_cancelled
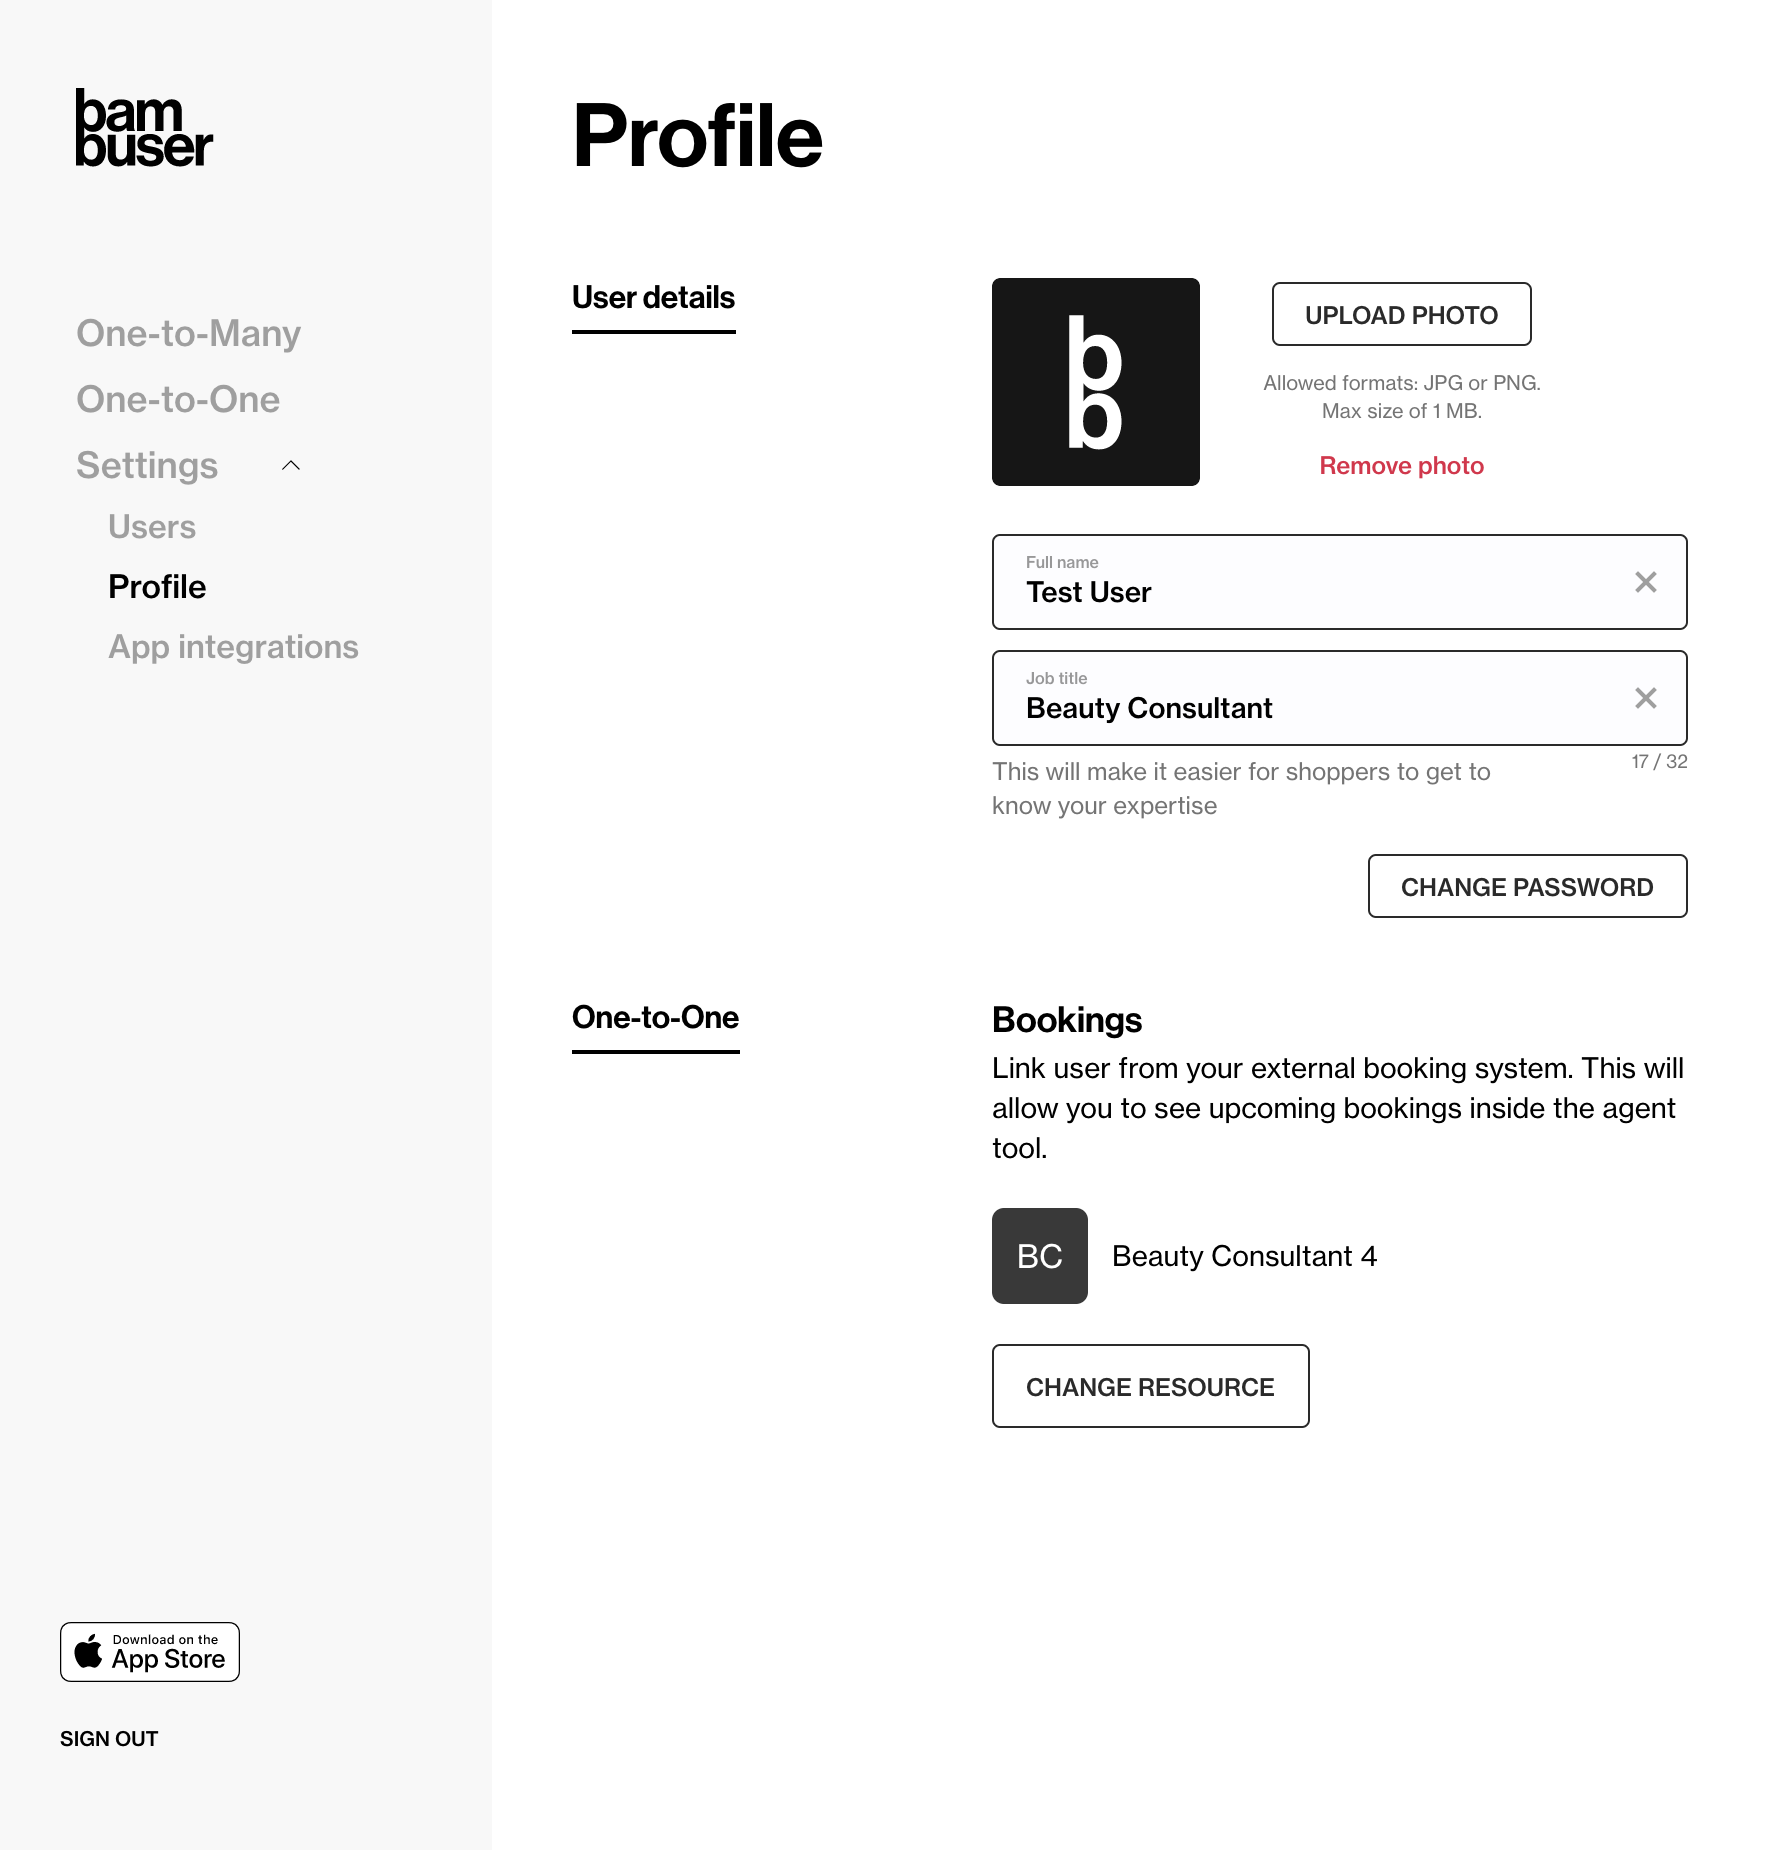
Step 5: Link an Agent to your booking system
Your Bambuser Agents will need to be connected to their corresponding Appointedd resource. We provide two ways of doing this, with a Resource picker or just a plain Text field on the Agent's profile page.
We recommend the Resource picker as it is the smoothest and easiest user experience for the Agents.
- Resource picker
- Text field
- Appointedd API Key You will need to configure your Appointedd API key in your Bam Hub. You can find your Appointedd API key in your Appointedd admin tool under Integrations menu. Navigate to your Bam Hub under Settings > Integrations to configure it.
- Configure your Appointedd API key in your Bam Hub under Settings > Integrations
- After configuration, Agents can now go and pick their Appointedd Resource on their profile page in Bambuser Workspace
The Appointedd resource ID can be found by navigating to the resource record under your business > resources > working hours. The ID will be visible in the page URL:
https://app.appointedd.com/resource/[RESOURCE_ID]/...
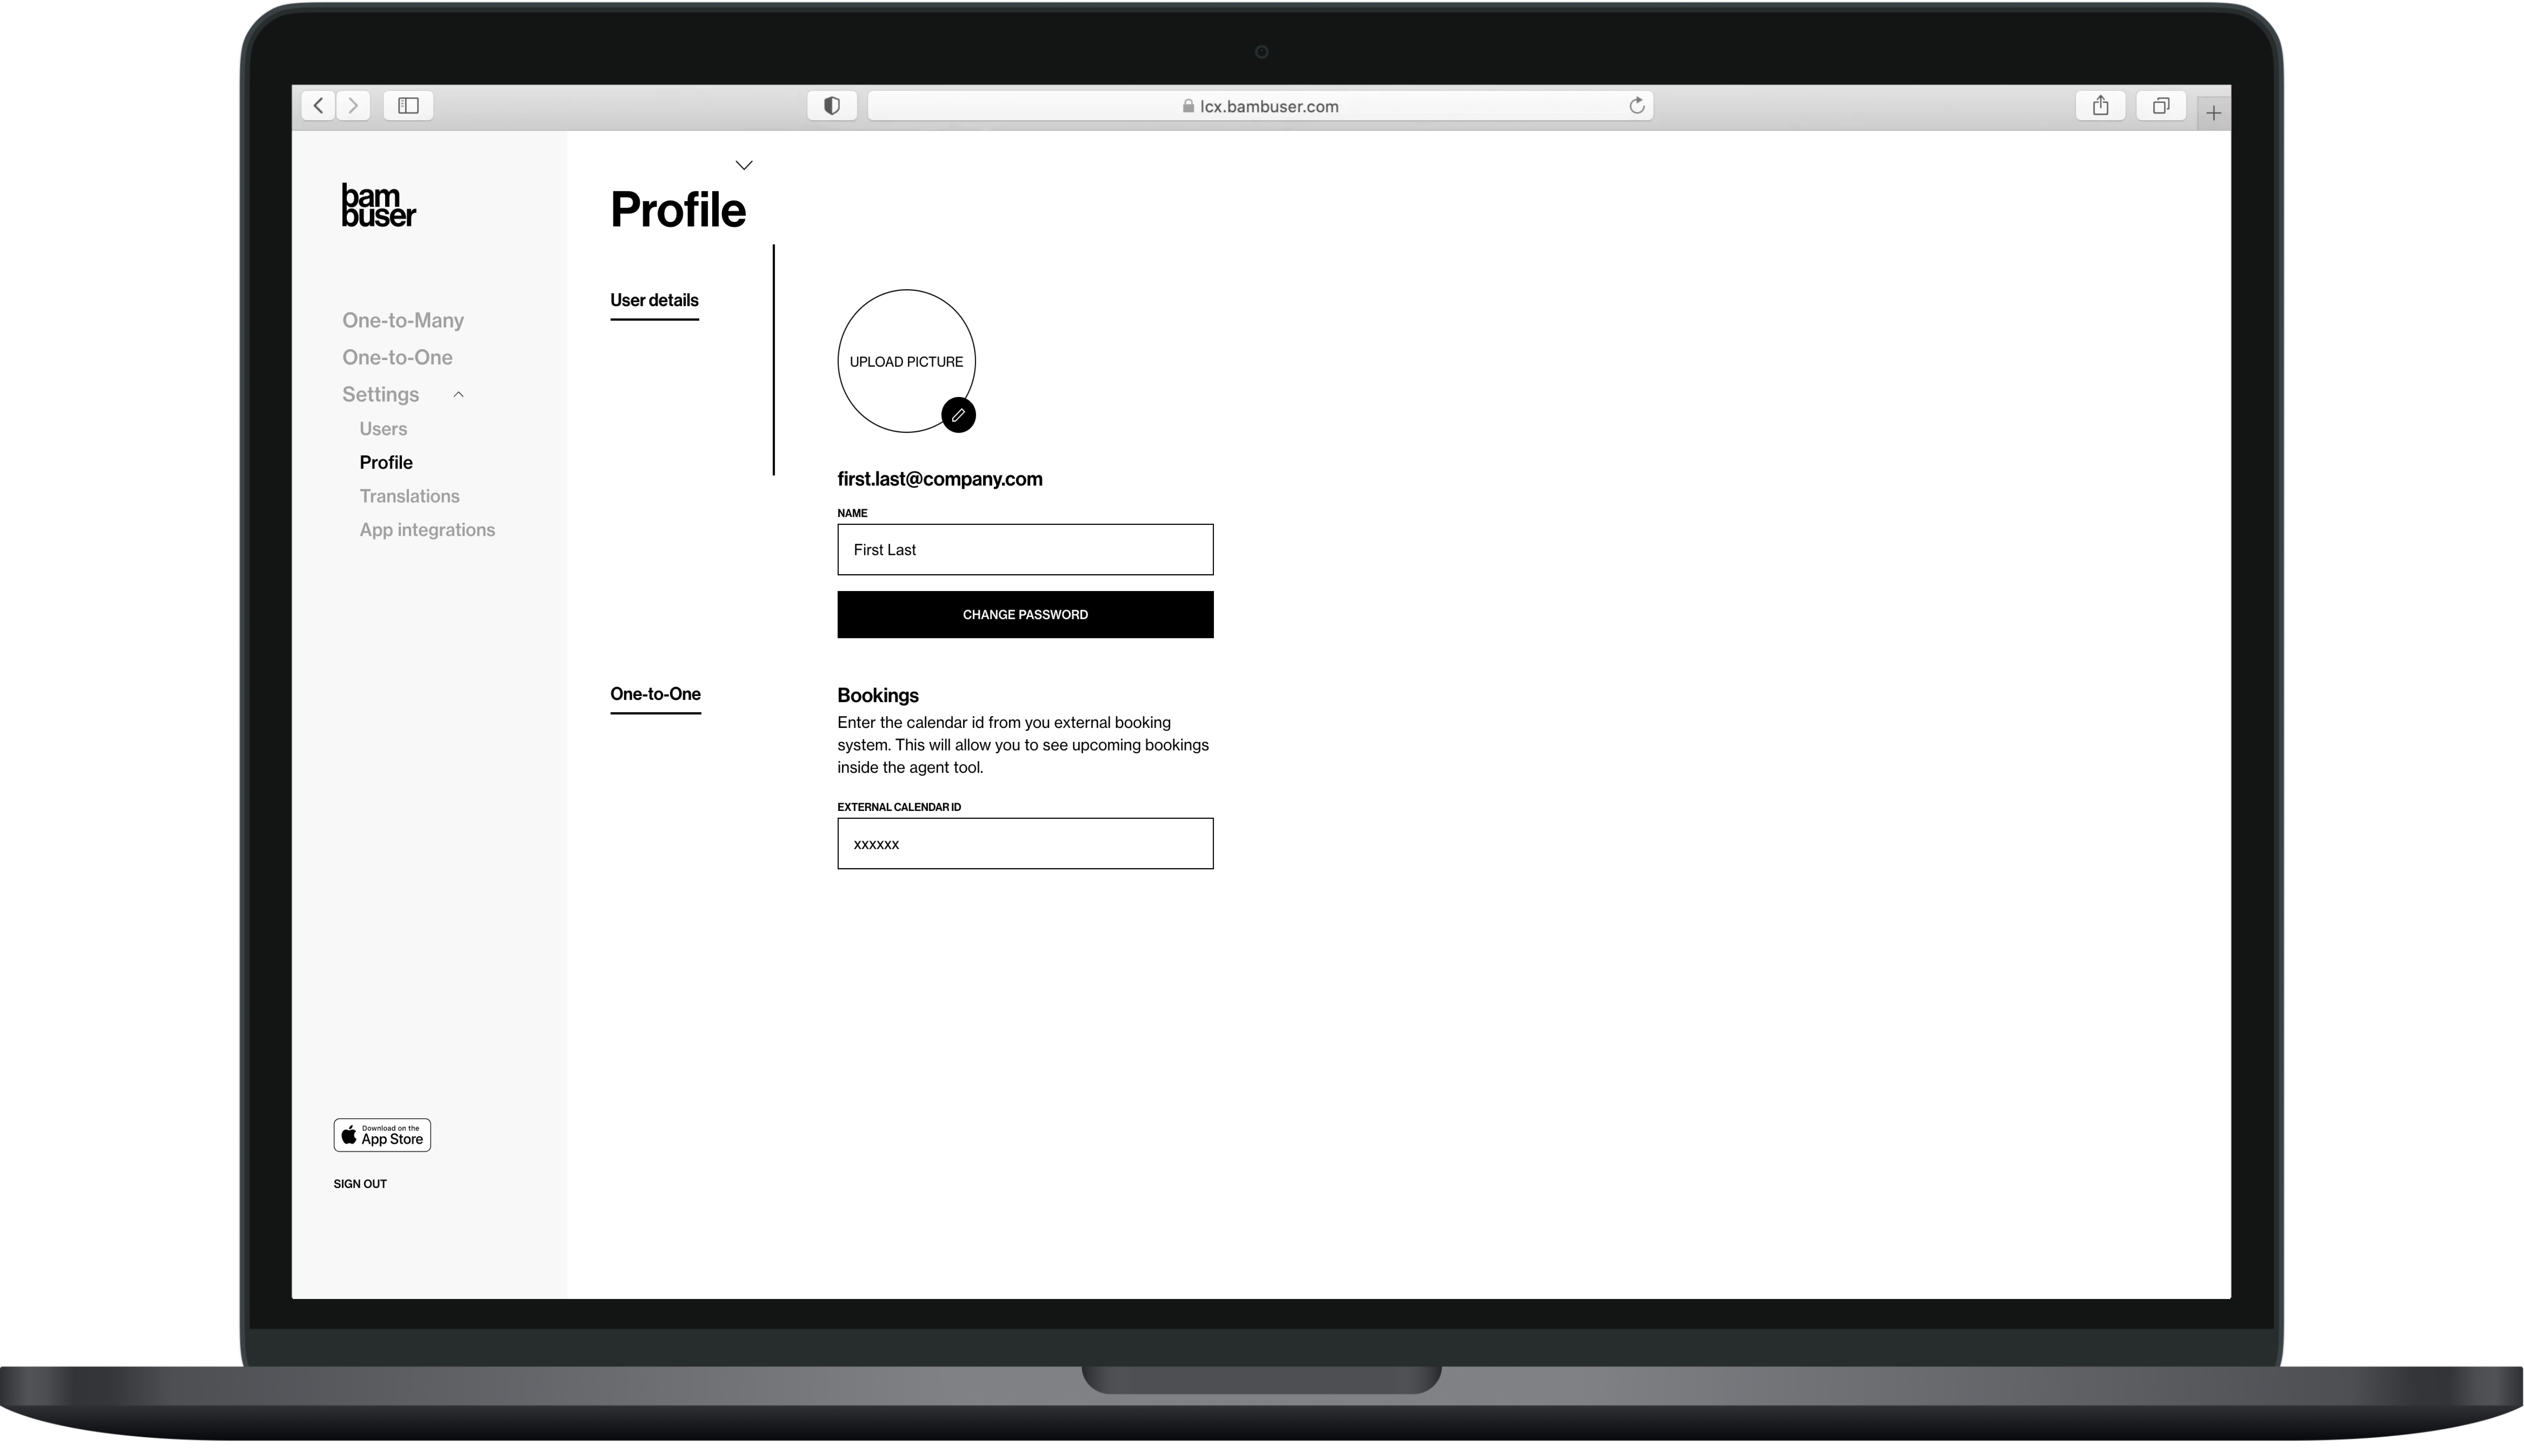
Instruct your users/agents to login to Bambuser Workspace and go to their profile settings and enter their Appointedd Resource Id in the Calendar Id field.
Step 6: Enable bookings directly from the Bambuser Calls Widget (Optional)
Bambuser can enable Book a meeting button in the Calls Widget. You can select in between three different behaviors when clicking on the button.
To configure this, you should navigate to Bambuser workspace -> Configurations -> Integrated Booking Widget. In there you should provide:
- URL to your booking interface page
- Which of the below option you will opt in
| Option | Behavior | Description |
|---|---|---|
| 1 | Iframe | Booking URL page opens in an iframe inside the Calls Widget. If you are using this option, your booking page should be responsive on mobile devices! |
| 2 | New Tab | Booking page URL will open in a new tab and widget will remain open in the old tab |
| 3 | Redirect | Booking page URL will open in the same tab and force widget to close. |