How To Integrate Booxi Solution As a Booking System
Step 1: Setup your Booxi account
Create personnel in booxi
Personnel are what your Bambuser Agent's are going to connect to. Therefore in the context of Bambuser we recommend that you have one personnel per agent.
It is also possible for two or more agents to share the same booxi personnel, but then they will have to manually communicate with each other who will attend each meeting as they will all see the same meetings in the Bambuser Agent Tool
Create services in booxi
A Service is what your customers will book, for example "Virtual Consultation". For each service you need to assign resources that can provide the service. Booxi will manage the availability and make sure that when customers book a service the booking will be assigned to one of the available resources within that service.
Step 2: Configure and customize your customer booking experience
Create your widgets
You can use Booxi's own widgets generator
Email confirmations
Contact Booxi for help with configuration of your email confirmation templates to create a user friendly experience and an easy way for your customers to enter their scheduled calls.
- You should ask them to add the connect URL for the page where the end-customer should be redirected to when entering the scheduled call. This URL should be in the following format:
https://your-website/your-live-meeting-page/?bambuserConnectId=ext:BooxiBookingId - You can also ask them to add another connect URL for the confirmation that is being sent to the booked personnel/agent. This URL should be in the following format:
https://lcx.bambuser.com/{orgId}/calls/agent-tool?connectId=ext:BooxiBookingId
Step 3: Sync Booxi meetings into Bambuser One-to-one
- Create an API key by following Generating API Keys. Give it scope
BOOXI_BOOKINGS_WEBHOOK. - Ask your Booxi contact to setup a webhook integration for the following Booxi events:
appointment.createdappointment.updatedappointment.updated_statuswith the following configuration details- EU environment:
POST https://liveshopping-api-eu.bambuser.com/v1/bookings/booxiWebhook - US/Global environment:
POST https://liveshopping-api.bambuser.com/v1/bookings/booxiWebhook - Header:
Authorization: Token yourApiKey(for exampleAuthorization: Token ABC123DEF456)
- EU environment:
If your Bambuser workspace is on EU (for example lcx-eu.bambuser.com), you must use the EU webhook URL (liveshopping-api-eu.bambuser.com).
Using the US/Global URL will cause Booxi webhooks to be sent to the wrong environment, and bookings will not appear in the Agent Tool.
Step 4: Link an Agent to your booking system
In order to link bookings made for a certain personnel with their user account in Bambuser, you need to add the user's staff id as calendar id in the Bambuser workspace.
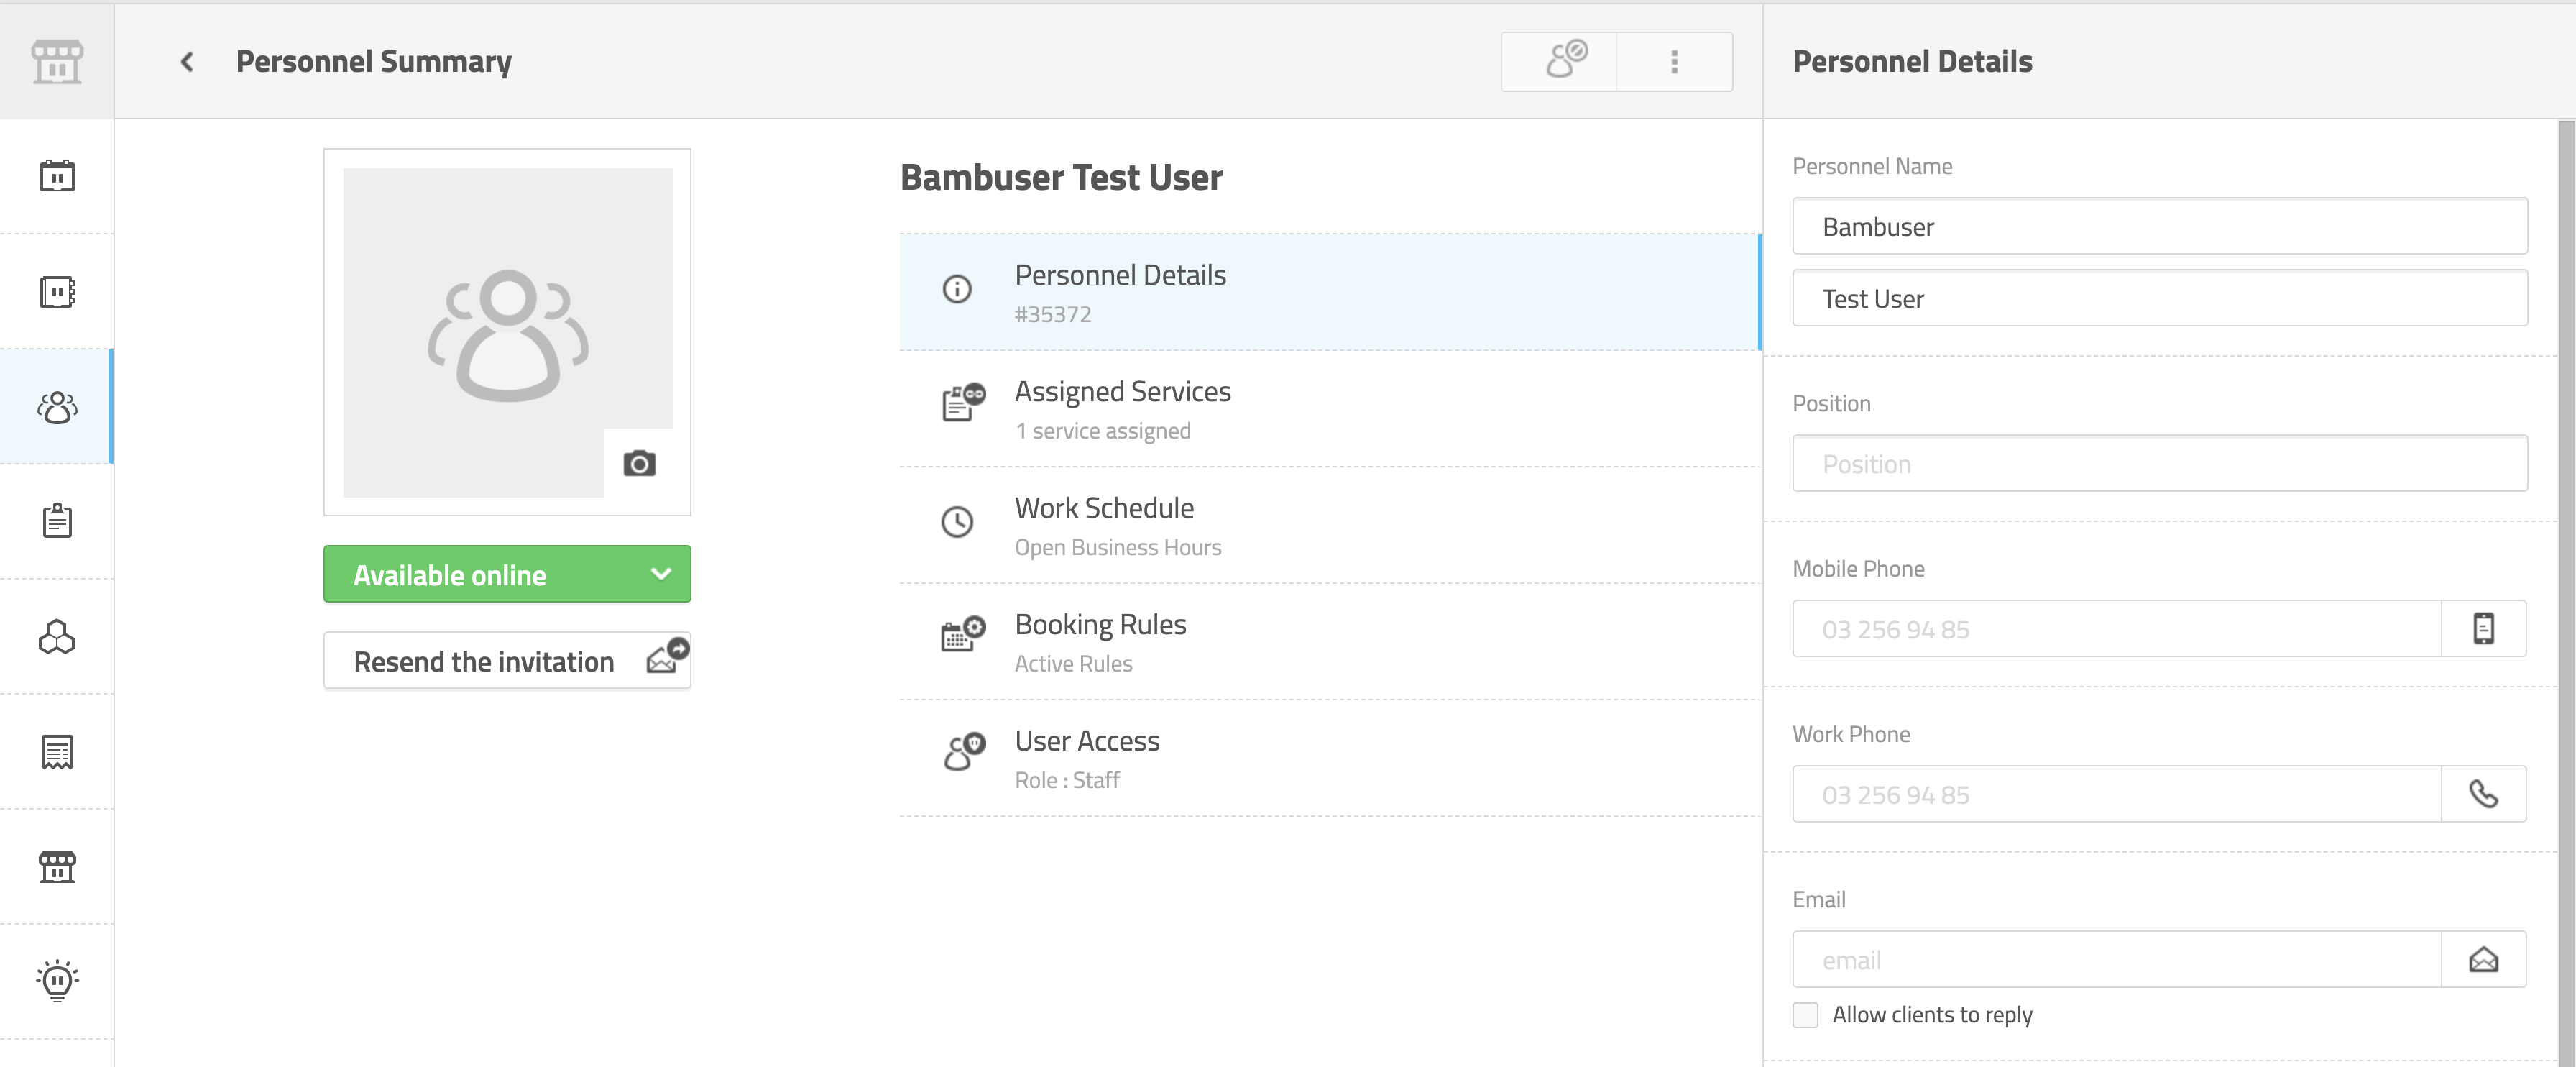
How to find your booxi staff id
You will find each staff id for the Booxi users under the Personnel menu in Booxi and under the Personnel Details you will see a something like the picture below #35372. The staff id is then 35372 (without the #).
How to add the staff id to your Bambuser agent profile
Instruct your users/agents to login to Bambuser Workspace and go to their profile settings and enter their Booxi Staff Id in the Calendar Id field.

Troubleshooting: booking not visible in Agent Tool
If a booking is created in Booxi but not visible in Bambuser:
- Verify the webhook base URL matches the workspace environment (EU vs US/Global).
- Verify the
AuthorizationAPI key belongs to the same org where the booking is expected. - Verify the Booxi
staffIdmatches the agentcalendarId(or a value incalendarIds) in Bambuser. - Check logs in the correct environment for
/v1/bookings/booxiWebhookrequests:401/403usually means wrong API key for that environment/org.- No logs usually means Booxi is not sending to that environment/URL.