Initial Setup
The widget contains both mandatory and optional features and can be adapted to different use cases.
To be able to meet and support your customers when they need sales guidance, you can allow calls to be initiated from various sources.
Initiate The Calls Widget
Before embedding the Calls Widget on your site, you should first decide how you want to approach your customers. There are different integration options for the call initiation.
Embed source URL is different depending on location of servers that your workspace is set up on.
- Global Servers
- EU Servers
Use Global servers URL https://one-to-one.bambuser.com/embed.js if the login to your Bambuser workspace is on following link: https://lcx.bambuser.com/.
Use European servers URL https://one-to-one.bambuser.com/eu/embed.js if the login to your Bambuser workspace is on following link: https://lcx-eu.bambuser.com/.
- Overlay Widget
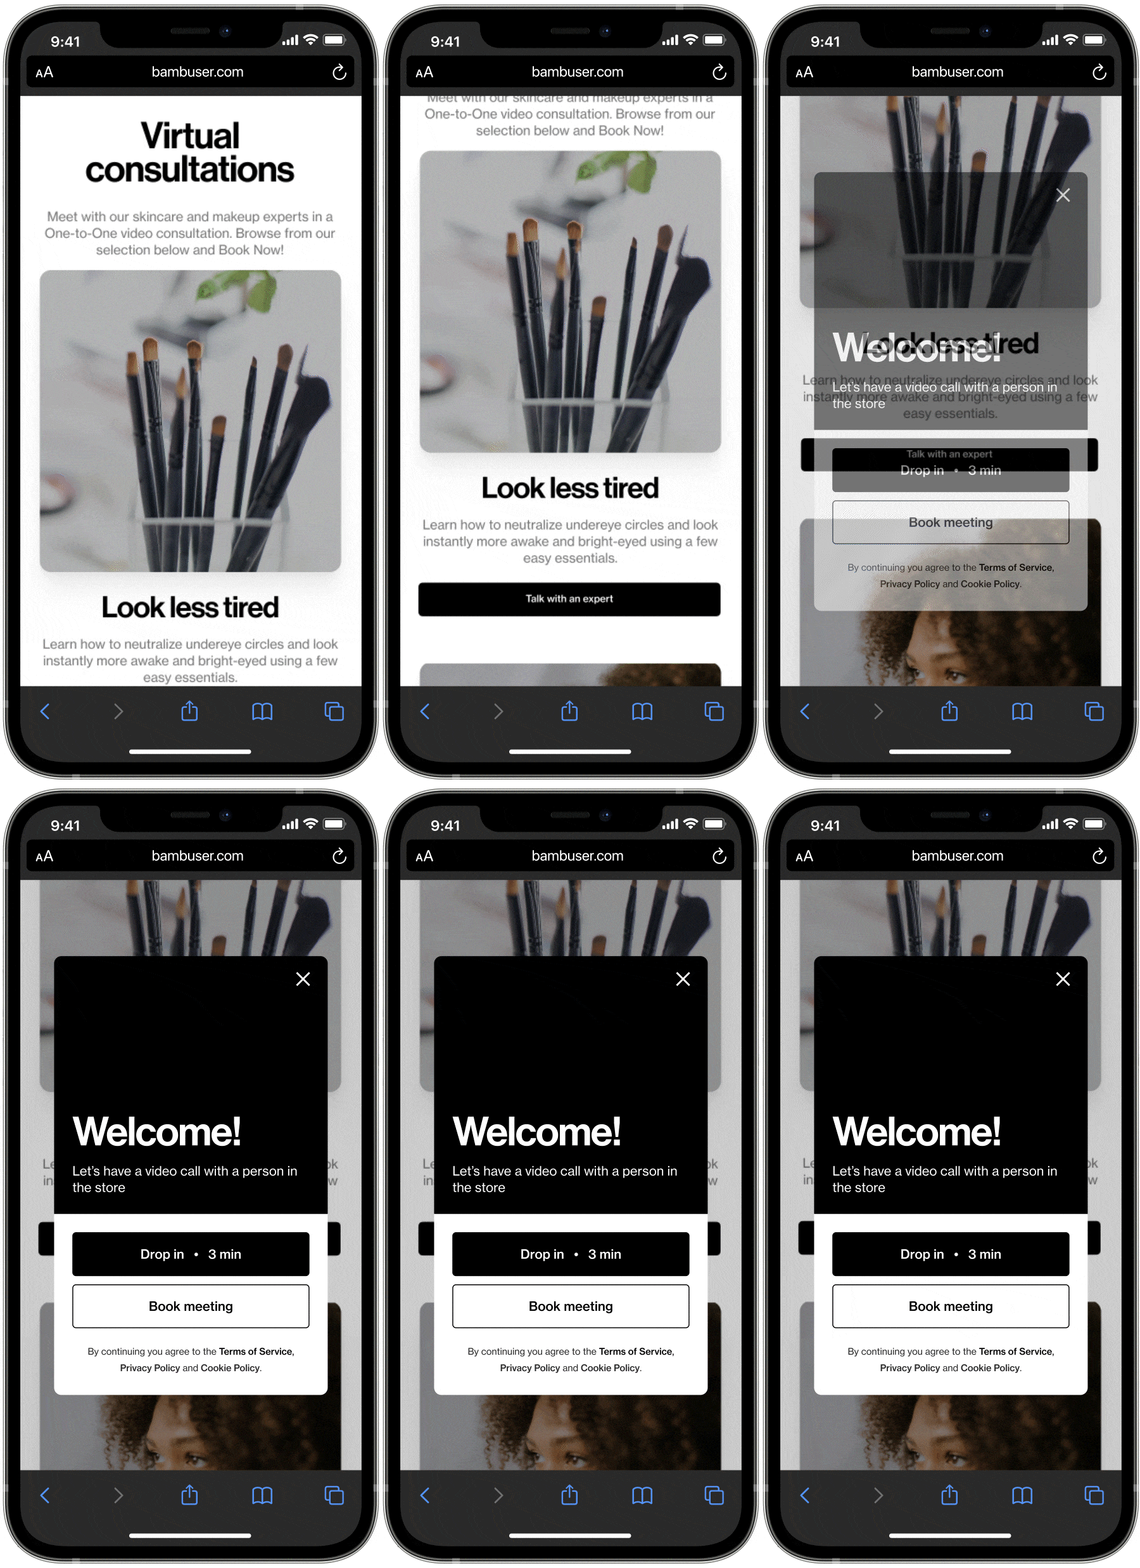
- CTA on one page
- CTA on multiple pages
- GTM
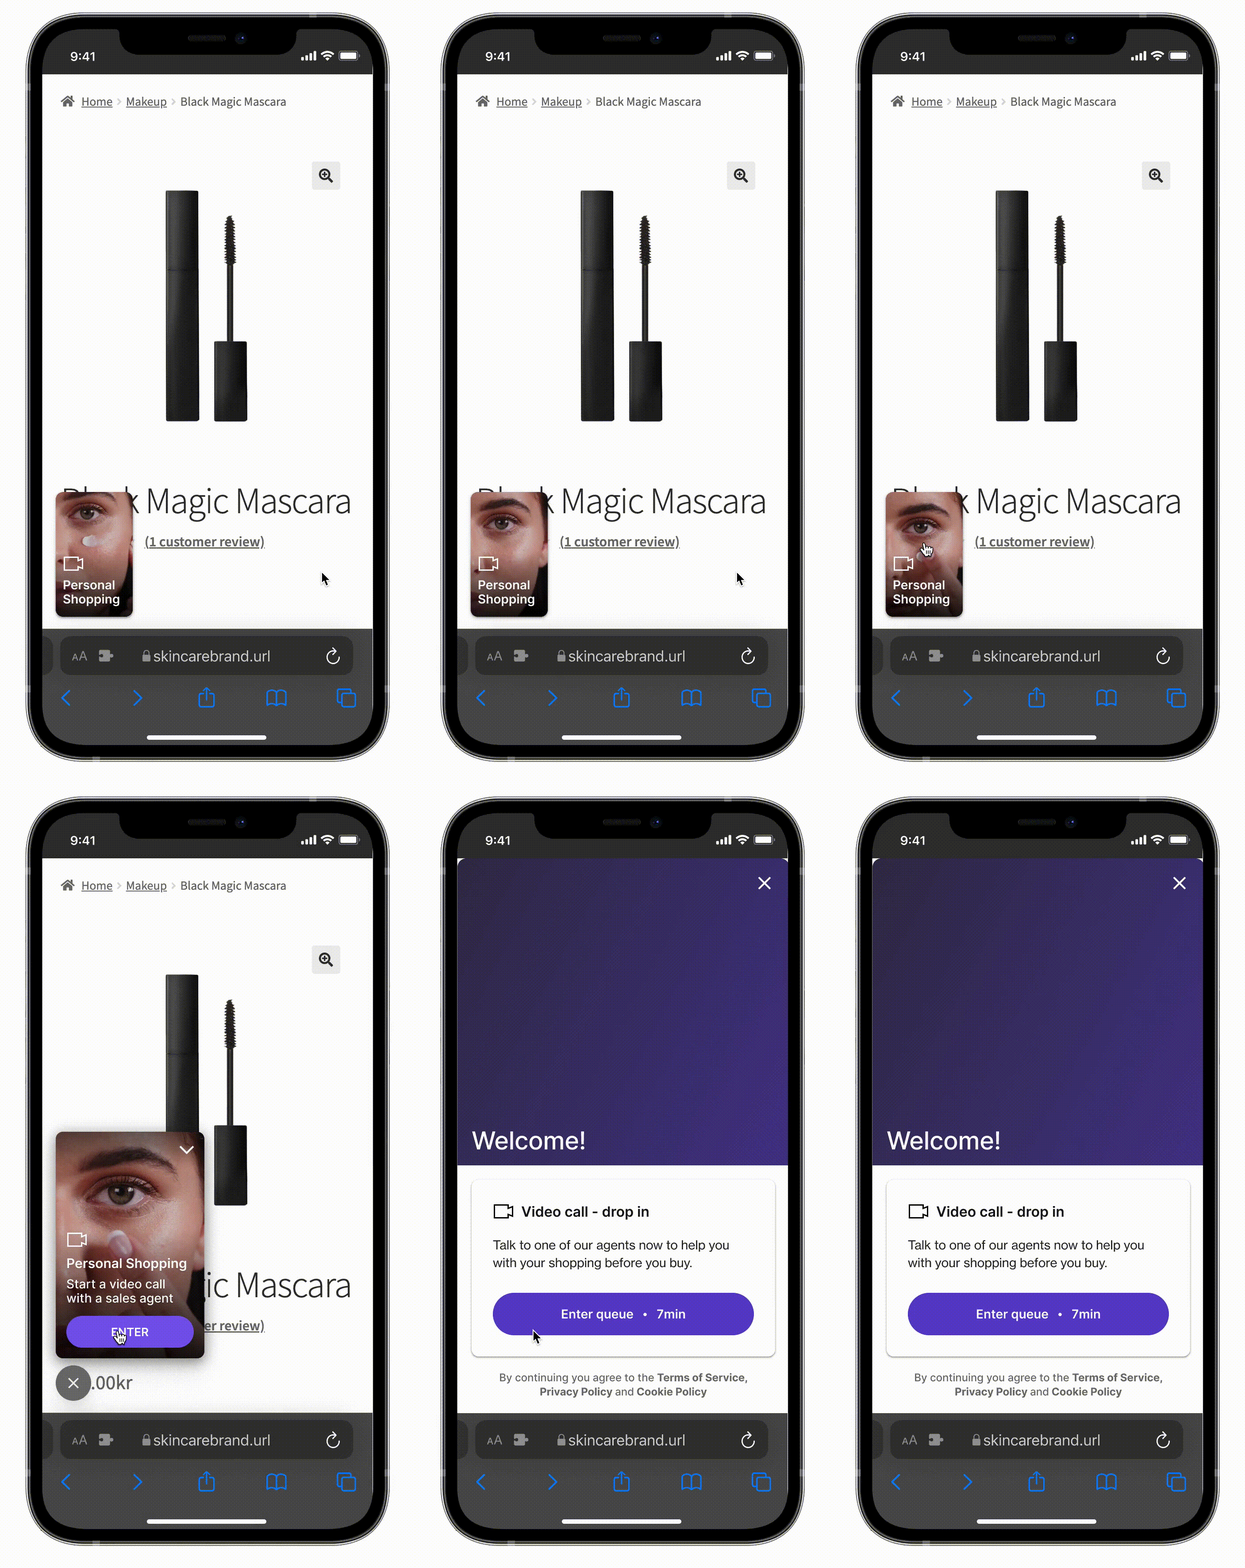
The Overlay Widget (OLW) is an easy way to guide more visitors into the Calls Widget. By appearing automatically after configurable amount of seconds it guides visitors towards sales help at the right time.
Make sure to add the Calls Widget script on all pages where the OLW should appear.
If you want to further configure Overlay Widget, you can read more about it here.

<script>
window.onBambuserOneToOneReady = function(BambuserOneToOneEmbed) {
  // This method will be invoked when embed.js has loaded and Bambuser
  // Calls API is available.
  // Creating an instance directly will allow to detect connect links
  // that will automatically open the Live Meeting overlay on page load.
  let oneToOneEmbed = new BambuserOneToOneEmbed({
      orgId: 'YOUR_ORG_ID_HERE',
      triggers: [
            'smart', // activate the overlay widget
            'connect-link' // activate the connect link - Unrelated to OLW, yet mandatory
        ],
        smartVariantOverride: 'Video', // force variant 'Video'. Other options are 'Avatar' and 'Side dock'
        popupTimeoutSeconds: '5' // after how many seconds OLW appears on the first time page load (default = 60)
      });
}
</script>
<script id="bambuser-one-to-one" async src="https://one-to-one.bambuser.com/embed.js"></script>
<button id="start-one-to-one">Get in touch with us</button>
<script>
window.onBambuserOneToOneReady = function(BambuserOneToOneEmbed) {
  // This method will be invoked when embed.js has loaded and Bambuser
  // Calls API is available.
  // Creating an instance directly will allow to detect connect links
  // that will automatically open the Live Meeting overlay on page load.
  let oneToOneEmbed = new BambuserOneToOneEmbed({
      orgId: 'YOUR_ORG_ID_HERE',
    });

  // Connect CTA button to open Calls Widget overlay.
  let button = document.querySelector('#start-one-to-one');
  button.addEventListener('click', () => {
    oneToOneEmbed.show();
  });
}
</script>
<script id="bambuser-one-to-one" async src="https://one-to-one.bambuser.com/embed.js"></script>
// PAGE 1
<button id="start-one-to-one">Ask an expert</button>
<script>
window.onBambuserOneToOneReady = function(BambuserOneToOneEmbed) {
  let oneToOneEmbed = new BambuserOneToOneEmbed({
      orgId: 'YOUR_ORG_ID_HERE',
 });

  // Connect CTA button to open Calls Widget overlay.
  let button = document.querySelector('#start-one-to-one');
  button.addEventListener('click', () => {
    oneToOneEmbed.show();
  });
}
</script>
<script id="bambuser-one-to-one" async src="https://one-to-one.bambuser.com/embed.js"></script>


// PAGE 2
<button id="start-one-to-one">Ask an expert</button>
<script>
window.onBambuserOneToOneReady = function(BambuserOneToOneEmbed) {
  let oneToOneEmbed = new BambuserOneToOneEmbed({
      orgId: 'YOUR_ORG_ID_HERE',
 });

  // Connect CTA button to open Calls Widget overlay.
  let button = document.querySelector('#start-one-to-one');
  button.addEventListener('click', () => {
    oneToOneEmbed.show();
  });
}
</script>
<script id="bambuser-one-to-one" async src="https://one-to-one.bambuser.com/embed.js"></script>
This is the Plug-and-Play solution that gets you started with receiving calls within just a few minutes.
How to install
- Search for "Bambuser" in Template Gallery
- Install our Bambuser Live Shopping template
- Go to tags
- Create a new tag from our template
- Select one-to-one integration and provide your organization ID in the configuration
- Select a trigger of when the widget should be shown
- Done!
You can now preview and test on your site before publishing for your customers
You can read the full guide of GTM setup here.

Your organization ID can be found in Bambuser workspace URL
https://lcx.bambuser.com/[YOUR_ORG_ID]/...
You should use the official Bambuser embed script (e.g., "https://one-to-one.bambuser.com/embed.js) instead of hosting a local or modified version.
Self-hosted or outdated copies can cause problems like incorrect price rendering, missing features, or broken functionality because they do not receive our ongoing updates. The official script is required for:
- Access to the Latest Features: It keeps your integration current with new enhancements and improvements we roll out regularly.
- Reliability and Stability: It’s fully tested and maintained by us, preventing errors that arise from outdated or untested code.
Calls Widget positioning
The Calls Widget is rendered on top of your site to allow customers to interact with the page behind the widget and browse around on your site while waiting in queue.
Default positioning of the Calls Widget is in the bottom left corner. If you want to change the positioning, reach out to your contact person at Bambuser.
For better browsing experience on different devices the customer can further minimize The Calls Widget while waiting in queue. If you want to change the positioning for the minimized version and set another Z-index, you can define placement dynamically through integration code. Find more information here.
Navigating around your website when Calls Widget is present might not be fully compatible with all websites. Read more about the compatibility & requirements here.
Embedding options
When adding the embed you can pass options to BambuserOneToOneEmbed(). Embedding options are used to configure the the Calls Widget for your specific use case.
There are some options needed for initiation of the the Calls Widget (presented in code examples above) as well as other options, which you can read about below.
You need to specify your options inside BambuserOneToOneEmbed():
let oneToOneEmbed = new BambuserOneToOneEmbed({
  /* your options here */
});
Queue system for drop-in
Bambuser Video Consultation product comes with a built-in queing system. Workspace admins can configure different queues in Bambuser workspace. Each queue will get its own unique ID when created.
Each queue will have a Queue ID, which Video Consultation Admin can find in Queue Settings within Bambuser Workspace.
In the integration code, you can specify what queue the customer should end up in when initiating the call. You do this by passing the queue property inside BambuserOneToOneEmbed. This will change the behaviour of placing customers into the default queue.
Example usage:
let oneToOneEmbed = new BambuserOneToOneEmbed({
    queue: 'QUEUE_ID_HERE' //if not specified, default queue configured from the workspace will get applied
});
To get information regarding queue status, there are several functions you can use in order to customize the behaviour for Calls Widget initiation. You can read more here.
Provide customer data
Customer information can be provided and presented to the Agent during a call. The information that will be provided is controlled by you.
You do this by passing the data object inside BambuserOneToOneEmbed.
Example usage:
let oneToOneEmbed = new BambuserOneToOneEmbed({

    // Optional
    data: {
        firstName: "Joe",
        lastName: "Doe"
    }
});
The data shared with the agent is sent over secure data channels and will be stored in memory on agent side for the duration of the session. It will only be stored on server database if using Call Summary feature.
You can read more information about providing customer data here.
Additional options
Beside already specified options above, you can also pass some extra optons to BambuserOneToOneEmbed.
options.locale (optional, default='en-US')
Sets the language and region for the Widget, controlling the translation displayed to customers on your website. The value must be a string in the format languageCode-countryCode (e.g., en-US for English in the United States).
The locale must be added in Bam Hub under Settings > Translations to be supported. If the specified locale is not available, the Widget falls back to the default locale defined in your Bam Hub.
Example usage:let oneToOneEmbed = new BambuserOneToOneEmbed({
locale: 'en-US'
});Dynamic Locale Example: Dynamically set the locale based on the customers location or preference:
const userLocale = yourMethodToGetUserLocale(); // e.g., "sv-SE" for Swedish
let oneToOneEmbed = new BambuserOneToOneEmbed({
  locale: userLocale
});
Note: Translation updates may take up to 30 minutes to appear due to caching.
options.allowFirstPartyCookies (optional, default=true)
Configures if embed script is allowed to write first party cookies for tracking purposes.
Example usage:let oneToOneEmbed = new BambuserOneToOneEmbed({
allowFirstPartyCookies: false,
});
options.enableScanning (optional, default=false)
If this option is enabled the agent apps will scan for barcodes and QR codes when the backfacing camera is active. If such a code is found a request will be made to provide-product-data with the type set to "scanned-code".
Example usage:let oneToOneEmbed = new BambuserOneToOneEmbed({
enableScanning: true,
});
options.merchantBaseUrl (optional, default=window.origin)
In Cobrowsing mode, when Agent starts browsing, he/she will be sent to merchantBaseUrl. This is useful to dynamically configure in case you have multiple markets on same domain.
Example usage:let oneToOneEmbed = new BambuserOneToOneEmbed({
merchantBaseUrl: 'https://demo.bambuser.shop/eu'
});
options.dataLayerTracking (optional, default=true)
The Calls Widget pushes the tracking events to the Google Tag Manager data layer by default. However, it is possible to deactivate by setting this option to false
options.ecommerceTracking (optional, default=true)
The Calls Widget pushes GA 4 Ecommerce events to the data layer by default. However, it is possible to deactivate by setting this option to false
It is also possible to exclude single events in your Google Tag Manager, more information here
options.bookingServiceIds (optional, default=all published services)
This is applicable only when using Bambuser Native Booking. With this option, you can control which published services are visible to your customers. Read more about it here.
Example usage:let oneToOneEmbed = new BambuserOneToOneEmbed({
bookingServiceIds: ['<BAMBUSER_SERVICE_ID_1>', '<BAMBUSER_SERVICE_ID_2>']
});
options.themeId (optional, default=default theme set in Bambuser workspace)
If you have multiple theming feature enabled, then you will have the possibility to create more than one theme. With this option, you can control which theme will apply to your Calls Widget.
Your theme ID can be found in Bambuser workspace -> Theming -> Click on a theme -> Extract Theme ID from the URL:
https://lcx.bambuser.com/[ORG_ID]/one-to-one/theming/[THEME_ID]/call
Example usage:let oneToOneEmbed = new BambuserOneToOneEmbed({
themeId: "THEME_ID"
});
Troubleshooting
- Widget Drop-In Button Stuck in Infinite Loading
- Widget Popup Not Appearing on Landing Page (with ?bambuserConnectId Parameter)
Initial setup FAQ
You can inject a JavaScript code including the embed code via any tag management solutions such as Google Tag Manager (GTM), Adobe Launch, Tealium, etc.